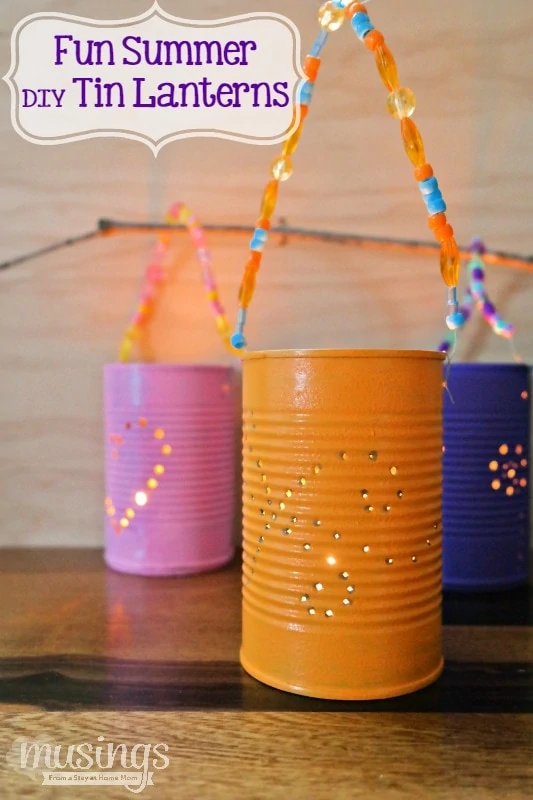
There’s something so magical about warm summer evenings lit up with the soft glow of handmade lanterns — and these DIY tin can lanterns are easier to make than you’d ever guess.
Made from recycled soup cans and a handful of craft supplies, they look like something you’d find at a boutique. But the total cost? Just a few dollars.
With four kids, I’m always on the lookout for projects that keep everyone busy and produce something genuinely beautiful. This one delivers every time — and the whole family can get involved.
Younger kids can handle the painting and decorating. Older kids love trying their hand at the punched hole patterns. And the finished lanterns look absolutely stunning lined up along a porch railing or scattered across a picnic table on a summer night.

Why You’ll Love This Project
- Uses recycled materials — tin cans you already have at home
- Budget-friendly — total cost is just a few dollars if you need to grab supplies
- Great for all ages — younger kids can paint, older kids can punch the pattern
- Totally customizable — change up colors, patterns, and sizes to fit any season or occasion
- Beautiful results — these look like something you’d buy at a boutique
- A fun screen-free summer activity the whole family will remember
Supplies:
Here’s what you need to put these cute lanterns together:
- tin cans – a variety of sizes or all the same
- nail and hammer or a drill with small drill bit
- acrylic paint and paint brush (or spray paint)
- permanent markers
- paper for stencils
- tape
- wire for the handle
- beads to make a beaded handle (optional but pretty!)
- tea light candles or battery-powered LED tea lights
How to Make Tin Can Lanterns
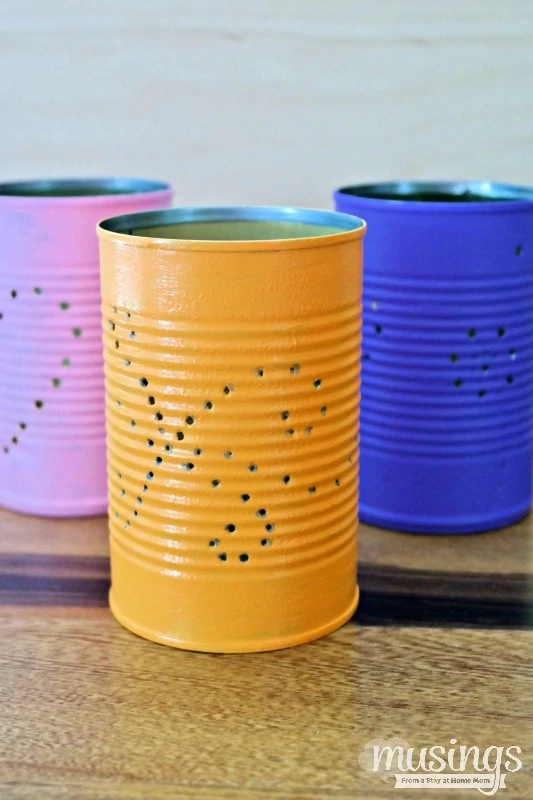
Start by washing your tin cans thoroughly and drying them completely. Run your finger along the rim to check for any sharp edges — if you find any, use a can opener or file to smooth them down before little hands get involved.
Next, create your stencil. Grab a piece of plain paper and sketch out a simple shape — a star, flower, heart, or a simple dot pattern all look gorgeous when the light shines through.
Once you have your shape, add dots along the lines to mark exactly where you’ll punch holes. Don’t skip this step and draw directly on the can — trust me, you’ll want to be able to erase and adjust before committing!

Once your stencil is ready, tape it securely onto the outside of the can.

Now for the most satisfying step — punching the holes! Use a nail and hammer (or a small drill bit) to punch through the dots on your stencil. Work slowly and steadily, rotating the can as you go.
Once all the holes are punched, carefully peel away the paper stencil to reveal your pattern. It’s such a fun reveal moment — kids absolutely love this part.
Before you add the handle, punch two additional holes at the top of the can on opposite sides — these are where your wire handle will attach.
Now it’s time to paint! Apply two coats of acrylic craft paint or spray paint to the outside of each can, letting the paint dry completely between coats. This is a great job for the kids while you tackle the more precise punching on another can.
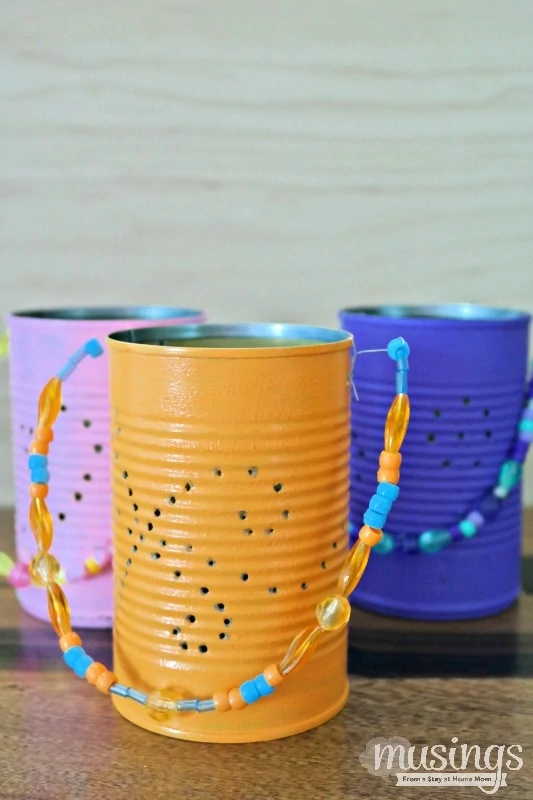
Once the paint is fully dry, cut a length of wire for your handle — aim for about 3 inches longer than you want the finished handle to be so you have enough to twist and secure at each end. If you want to make the lanterns extra special, thread beads onto the wire before attaching — it adds such a pretty, finished touch.

Thread the wire through the holes at the top of the can and twist each end securely several times so it won’t come loose.
Pop a tea light inside, find a spot on your porch or patio, and enjoy!
Storage
These tin can lanterns hold up really well from year to year! To store them, simply remove the candles and stack or line the cans in a box with a layer of newspaper or bubble wrap between them to prevent the paint from scratching.
Store in a dry place — a garage shelf or storage bin works great. Avoid anywhere damp, as moisture can cause the cans to rust over time.
Tips + Tricks for the Best Tin Can Lanterns
Freeze the can before punching. This is the best-kept secret for getting clean, even holes — fill the can with water and freeze it solid overnight before you punch. The ice keeps the can walls from denting inward as you hammer. Just let the ice melt completely before painting.
Use the right paint. Regular acrylic craft paint works well and comes in every color imaginable, but if you want extra durability for outdoor use, look for a paint labeled for metal surfaces, or seal your painted cans with a clear outdoor Mod Podge or spray sealer.
Go with LED tea lights for kids. Battery-powered LED tea lights are a great option if young children will be handling the lanterns. They give the same warm glow without any open flame — and they last for hours.
Vary your can sizes. Using a mix of small (tomato paste), medium (soup), and large (coffee can or large tomato) sizes creates a beautiful grouping effect when displayed together.
Simple patterns are stunning. You don’t need to be artistic — a simple spiral of dots, a scattering of stars, or even just random holes in an organic pattern look amazing when lit. Less is sometimes more!
Keep candle safety in mind. If you’re using real tea light candles, never leave them burning unattended and keep the lanterns away from anything flammable. These are best used outdoors on a stable, non-flammable surface.
Chelley @ A is For Adelaide says
This is such a cute idea! I am pinning to try this next summer with my girls (I hope we can hang them off our new deck!).
Christine says
These are darling! What a fun idea! You could make them for holidays too. Definitely going to try these!
Amy Desrosiers says
What a great idea! I love that they are so rustic and versatile too!
Brandy says
These are adorable! I think they would look great in our new home in the back yard on our back deck! I Must make them with the kiddos!
Sarah @ Must Have Mom says
These are too cute! What a fun project to take on with the kiddos!