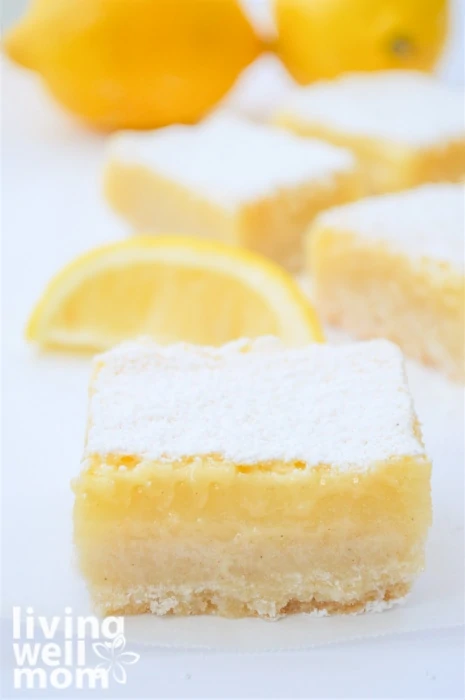
These gluten-free lemon bars are zesty, bright, and oh-so-yummy. A thick layer of sweetly tart lemon filling is balanced out by a shortbread crust. With only 7 ingredients, this allergen-friendly recipe can be whipped up in under an hour from start to finish.
I love lemon bars! There’s just something about their tangy-sweet taste that I adore. Over the years, I’ve had some really good bars along with some rather bland, not so good versions too.

When I set out to create the perfect gluten-free lemon bars recipe, I knew it had to be easy with simple ingredients while also having enough lemon flavor to be lusciously flavorful. This recipe is the result of my testing over a dozen different batches in my quest for the most delicious gluten-free lemon bars and this is it.
My whole family has deemed these lemon bars “yummy!” and “so good!” I even had a request for more which says something since we’ve had a LOT of lemon bars the past few weeks. 😉
Have a sweet tooth but not a big fan of lemon? My yummy raisin date bars can be made gluten-free, too – check them out!
Why You’ve Got to Try this Recipe
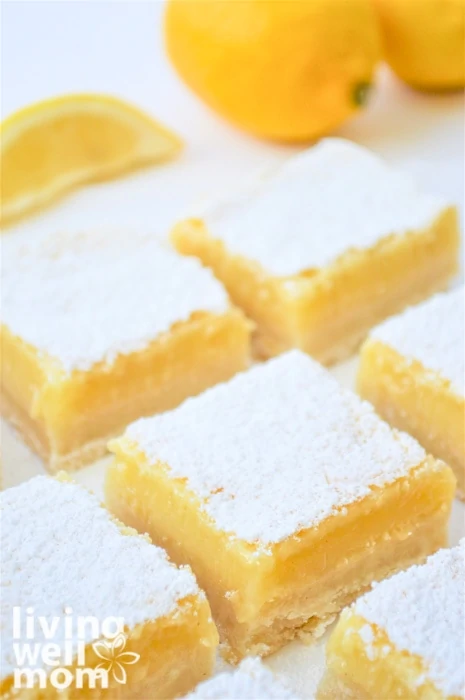
- nice thick lemon layer – if you LOVE lemon, you are going to appreciate the thick, tart layer filled with lemon flavor.
- shortbread crust – that thick lemon is balanced by a buttery shortbread crust.
- just 7 simple ingredients – don’t you love it when a recipe is actually made up of ingredients you likely have in your pantry already? Me too!
- classic favorite – it’s hard to find a dessert that everyone will love, but this may be as close as it gets!
- easy to double the recipe – this recipe will be gobbled up fast; I always recommend doubling the recipe if you are trying to feed a large family.
- simple to make – most importantly, these gluten-free lemon bars are easy to make. If you have never made lemon bars from scratch, you’ll be plesantly surprised at just how simple it is!
Gluten-Free Lemon Bars
This gluten-free lemon bar recipe will soon become a new family favorite. Here’s how to whip up a batch — or two — of your own.
Ingredients Needed:
Lemon bars can be finicky with ingredient substitutions – this recipe is best when both the ingredients and directions are followed exactly.
Shortbread Layer
- butter
- gluten-free flour (I use King Arthur Gluten-free Flour)
- granulated sugar
Lemon Layer:
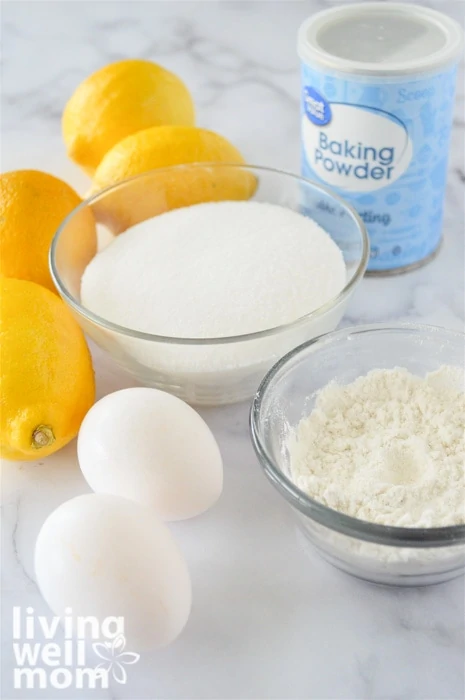
- eggs
- sugar
- baking powder
- gluten-free flour
- lemon juice*
- powdered sugar for dusting the top
*cooking note: freshly squeezed lemon juice will give you the absolute best lemon flavor, but I often use bottled lemon juice to save time and these bars are still delicious.
Supplies You Need:
- 8×8” glass or ceramic baking dish (do not use metal as it can react with the acidity in the lemon juice and can cause an odd, metallic taste)
- stand mixer with both regular paddle attachment and whisk attachment or hand mixer
- measuring cups
- for fresh lemon juice – this citrus squeezer makes it quick and easy to squeeze fresh lemon juice
- spatula
- sifter, optional but recommended for dusting the powdered sugar
How to Make Gluten-Free Lemon Bars
- Preheat your oven and prep your baking pan by lining it with parchment paper or greasing it.
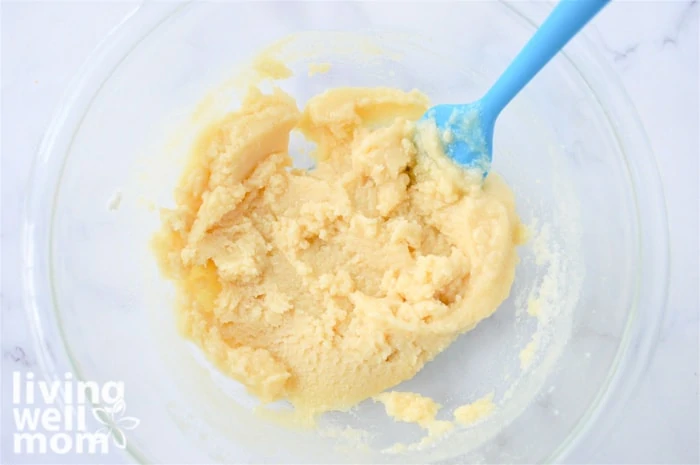
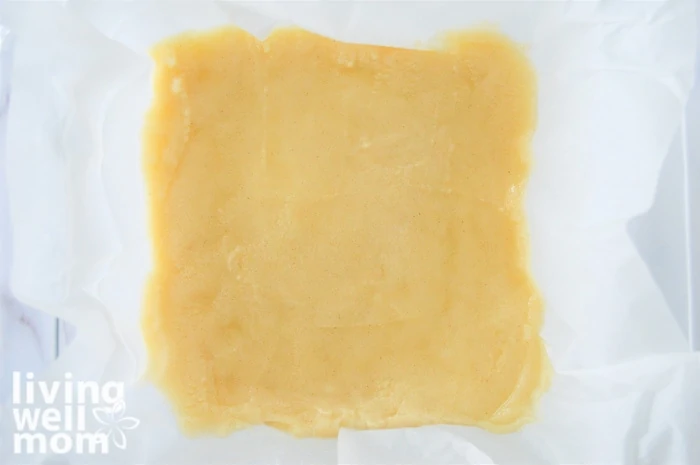
- Make the shortbread layer by mixing butter, sugar, and gluten-free flour. Press it into the baking pan, and bake. Set aside.
- Make the lemon filling as the shortbread is baking. Beat together eggs, sugar, baking powder, and flour, then add lemon juice and beat until it looks frothy.
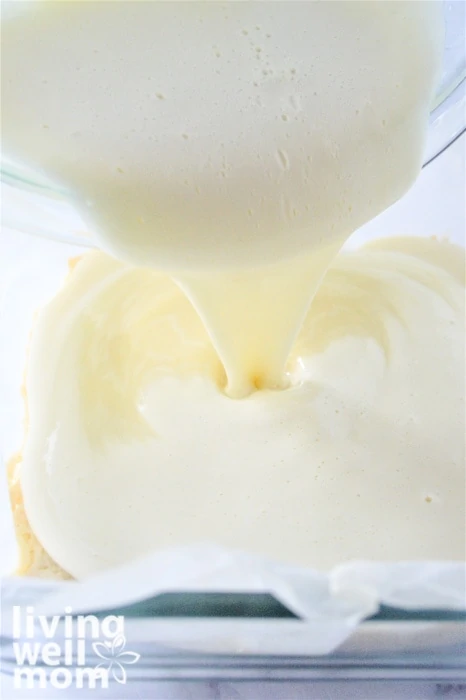
- Pour the lemon filling over the freshly baked shortbread.
- Bake until done.
When Can I Eat the Bars?
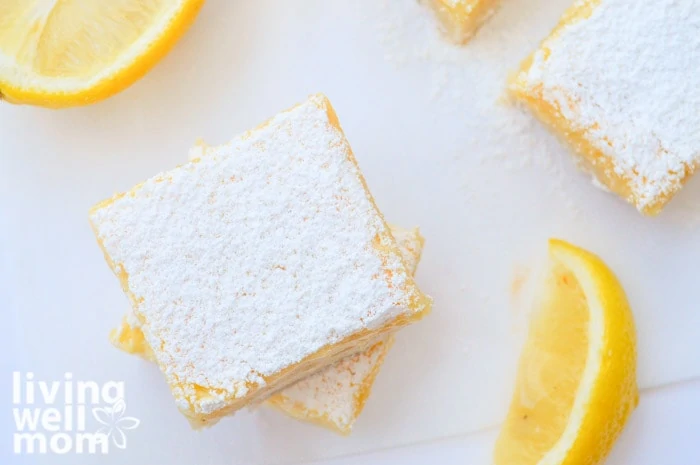
These gluten-free lemon bars are best enjoyed after they have fully cooled, usually the next day. For the best results, wait several hours or overnight before cutting them.
While you can enjoy them while they are still warm, they won’t be as firm and you will probably need to use a fork. (I won’t judge – sometimes I can’t wait and dig in with a fork too!)
How to Store Lemon Bars
I have heard some recommend that lemon bars are best stored in the refrigerator. Personally, I always leave them at room temperature for up to 4-5 days and they are delicious down to the last bar. (Though I have to admit, they rarely last longer than 2 days in my house with 7 people!)
I recommend storing your lemon bars in a room temperature sealed container or simply cover the baking dish they are in.
How to Freeze Lemon Bars
I do believe that most homemade baked goods, including this gluten-free lemon bars recipe, are best enjoyed fresh. However, these bars can be frozen if you prefer.
To freeze the lemon bars, follow the instructions but do not sprinkle powdered sugar on the top. Allow them to cool completely (I recommend 12-24 hours) before cutting into bars.
Place them on a parchment or waxed paper covered cookie sheet and freeze for 1-2 hours. Then, take them out of the freezer and wrap each lemon bar in plastic wrap, and place each into a large Ziploc bag or container to freeze completely.
Place them in the refrigerator to thaw and add a light dusting of powdered sugar once you are ready to enjoy them.
I know your family will love these delicious lemon bars as much as we do! Enjoy!
More Gluten-Free Desserts
- Gluten-Free Sugar Cookies
- Bakery-Style Gluten-Free Blueberry Muffins
- The Best Gluten-Free Chocolate Chip Cookies
- Chewy Gluten-Free Peanut Butter Cookies
Pin the image below to save the Gluten-Free Lemon Bar recipe for later.

Gluten-Free Lemon Bars with Shortbread Crust


These delicious gluten-free lemon bars feature a buttery shortbread crust filled with a thick layer of bright lemon filling.
- Prep Time: 10 minutes
- Cook Time: 45 minutes
- Total Time: 55 minutes
- Category: Dessert
- Method: Baking
- Cuisine: American
- Diet: Gluten Free
Ingredients
Shortbread Layer
¾ cup butter (1.5 sticks), melted
1 ¼ cup gluten-free flour (I use King Arthur Gluten-free Flour)
⅓ cup granulated sugar
Lemon Layer:
2 large eggs
1 cup sugar
½ tsp baking powder
¼ cup gluten-free flour
⅓ cup lemon juice*
powdered sugar for dusting the top
*freshly squeezed lemon juice will give you the absolute best lemon flavor, but I often use bottled lemon juice to save time and these bars are still delicious
Instructions
Preheat your oven to 350 degrees.
Grease an 8×8” glass baking pan or line it with parchment paper. (Parchment paper makes it easy to remove and cut your lemon bars, however greasing the pan works too.)
For the shortbread layer, mix the melted butter and 1/3 cup sugar together, then mix in the 1 1/4 cup gluten-free flour. Press into the baking pan. I use my clean fingers to press it in but you can use a spoon if you prefer. Bake for 18-22 minutes or until the edges are just beginning to turn golden brown. Remove from the oven and set aside.
For the lemon filling: While the shortbread layer is baking, you can make the lemon filling. Using a whisk or whisk attachment on your stand mixer, beat the eggs, then add 1 cup sugar, baking powder, and ¼ cup flour. Scrape the sides and mix well. Turn the mixer to high and slowly add the lemon juice to the egg mixture. Mix on high speed until it begins to look frothy.
Reduce the oven temperature to 325 degrees. Pour the lemon filling over the just-baked shortbread layer. (Note: if you get busy and the shortbread layer begins to cool, don’t worry – just bake the bars a little longer.)
Bake for 22-28 minutes or until the top is just turning golden brown and the center is set. Tap the pan gently with an oven mitt to test. If it jiggles, bake for a couple more minutes. If it doesn’t, your lemon bars are done.*
These lemon bars will turn brown quickly if overbaked or the oven temperature is too hot, so pay close attention to the final minutes. If your lemon bars do turn brown on the top, they will still taste good; they just won’t look quite as pretty.
Remove from the oven and set aside on a wire rack to cool completely. Once cool, use a sifter to dust a little powdered sugar over the top of the bars. (This also helps to cover up imperfections.)
*Poking the bars with a fork or toothpick to test for doneness is not recommended for this recipe as the filling needs time outside of the oven to set (firm) completely. If you wait until the bars test done with a fork, they will be overbaked.
Notes
These gluten-free lemon bars are best enjoyed after they have fully cooled, usually the next day. For the best results, wait several hours or overnight before cutting them.


louisa piper says
This was my first gluten free dessert and it was delicious! Super easy and quick. I made these for a friend and I’m about to make them a 2nd time for Friendsgiving. Exactly the recipe I was looking for. Thanks.
Gail Hewitt says
These are so yummy. Could I substitute xylitol for the sugar?
Erika says
Hi Gail, I haven’t used Xylitol much so I’m not sure. For a sugar-free sweetener, you can sub Monk Fruit, like this Lakanto blend https://amzn.to/3JO4g39 instead. I’d suggest 1/4 cup monk fruit for the crust and 3/4 cup for the lemon part. It has a slightly different flavor but still quite good. I do this often when I want healthier baked goods. Enjoy!
Amanda says
Can these be frozen?
Erika says
Hi Amanda, yes they can. Bake them as directed, let them cool completely, then you can wrap the bars up tightly with plastic wrap and freeze for up to 3 months.