With more than 18 years of experience in Interior Design, it has always been a struggle for me to find toy storage that was a good fit with the decor and style of my home. I want my house to feel welcoming and lived in, which includes being lived in by lots of little people. Most of the toys in our house are kept in the main living area of our home rather than in our children’s bedrooms so I feel like a toy box needs to match our home and look nice.
I’ve seen many ideas and variations including doing a DIY Toy Box Makeover with a plastic storage tote, and decided to make my own version. I love how it came out!
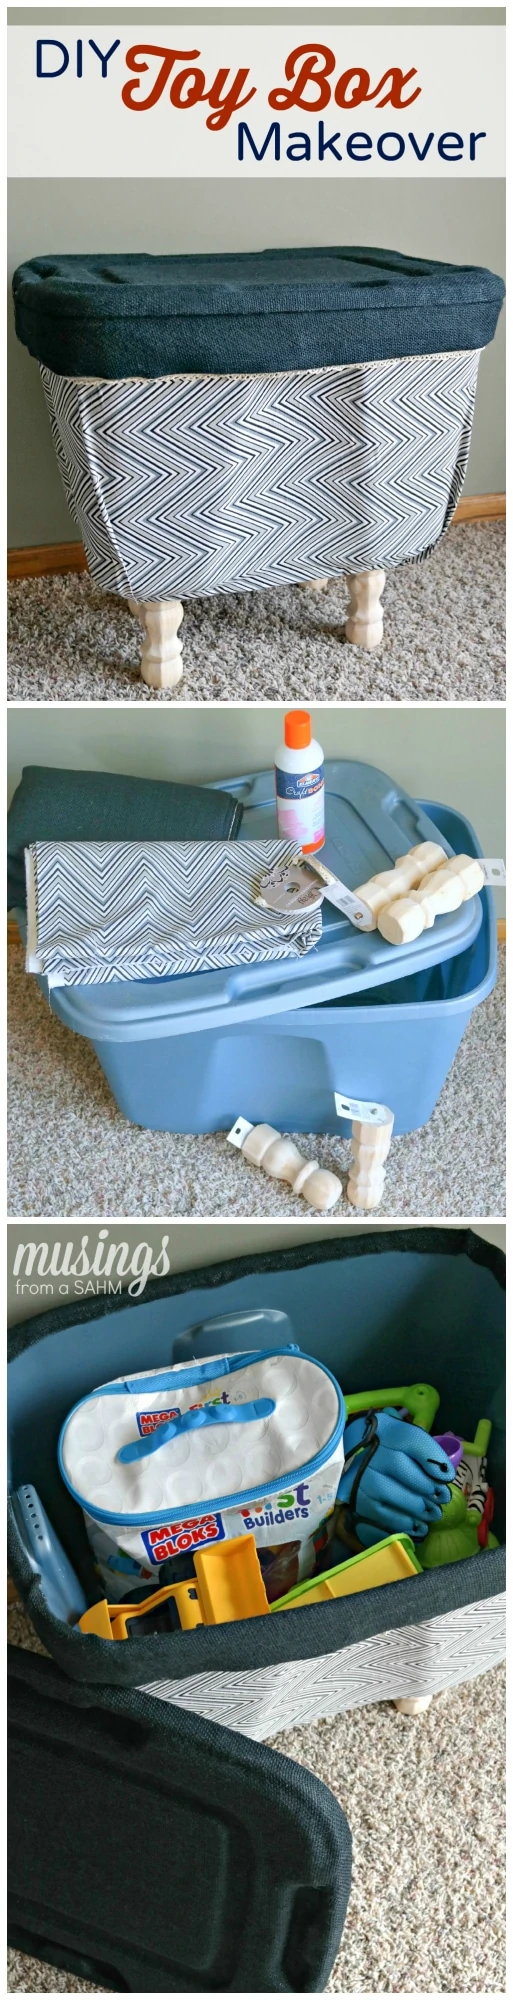
Today, I’ll show you how to make your own DIY Toy Box, by turning an ugly plastic storage bin into a decorated toy box! Not only is this project inexpensive, but you can also decorate it to match the colors of your room or however you like!

DIY TOY BOX MAKEOVER:
(Affiliate links:)
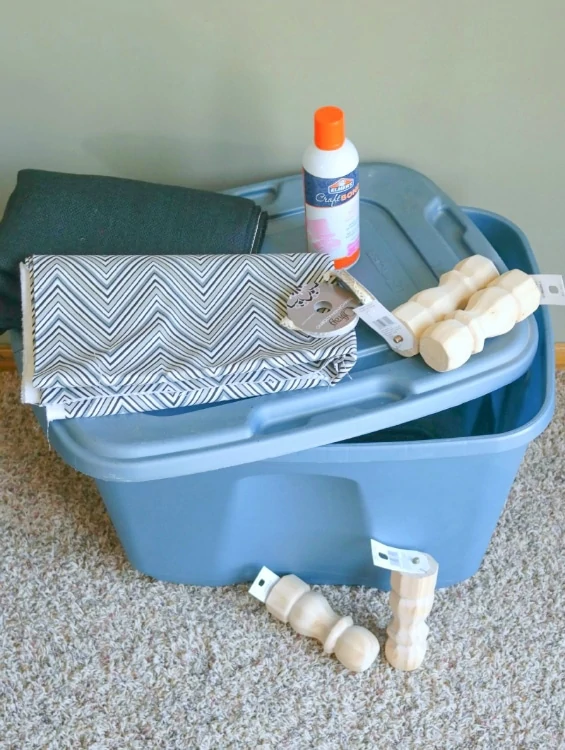
Supplies:
- 1 plastic storage tote and lid
- 1 – 2 yards of fabric (size will vary based on size of your tote)
- 1 yard of burlap to coordinate with your fabric
- 1-2 spools of cording or trim
- spray adhesive
- glue gun and glue
- 4 furniture feet – you can find many different styles and price ranges. Check out deck post caps for another option!
- 4 nuts and washers to fit the screw on the wooden feet
- drill and drill bit (same size or larger than the screw)
Instructions:
Begin by drilling holes in each of the 4 corners of the bottom of your tote. The holes should be the same size or slightly larger than the screws on the wooden feet.
If you want to paint or stain the wooden feet do so now and set aside to allow the paint to dry.
Cut the fabric to the height of your tote and long enough to wrap around. You can also use two pieces and have a seam in each side. This will use less fabric.
Once your fabric has been cut to size spray a small area of the tote with the adhesive. Smooth the fabric onto the area that has been sprayed. Work in small sections carefully smoothing the fabric as you go. Small sections will insure that your adhesive doesn’t dry before you get it covered and helps prevent wrinkles.
There will be a small amount of fabric at each corner that will need to be folded. The contour of the tote makes this fold necessary as the fabric wraps around.
Use the spray adhesive to secure the fabric to the underside of the tote as well.
Next you will cut a piece of burlap large enough to cover the top of the tote. Use the spray adhesive to attach the burlap to the top following the same process as above. Make sure the burlap wraps around the sides of the lid and onto the underside to be secured.
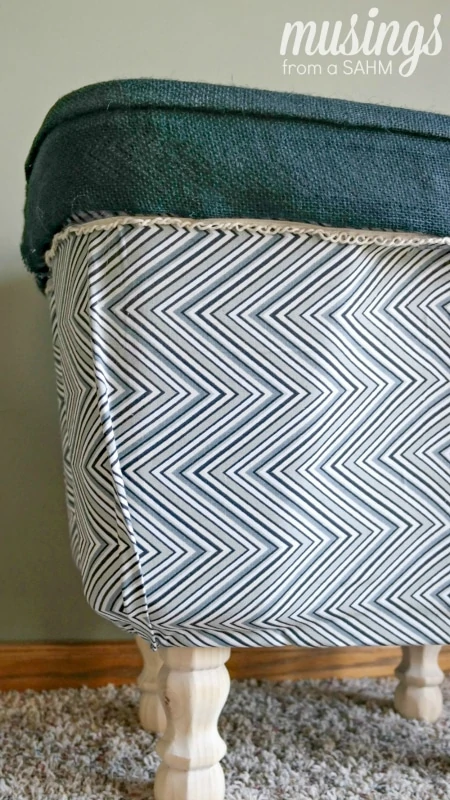
I added a layer of burlap around the top 3″-4″ of my tote as well. The helped to cover the rim of the tote as well as giving it some extra style. I added this burlap border using hot glue to adhere it to the inside edge of the tote and to attach it to my fabric covered sides.
I also used hot glue to attach a trim piece where the burlap and fabric meet.
To finish the Toy Box attach the 4 wooden feet to the tote. Use a washer and nut to securely attach each foot.

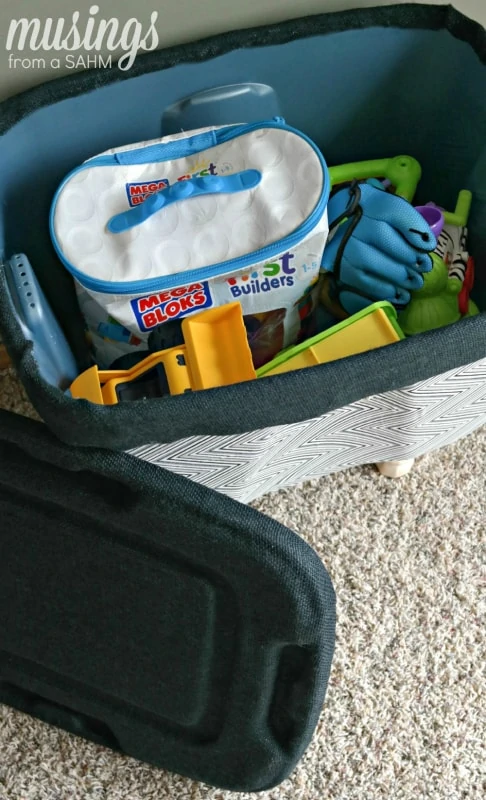
Your DIY Toy Box is now ready to fill with toys!
There are so many possibilities for this kind of DIY project! You could create a blanket chest, extra storage for a bedroom or bath, leave the feet off or use a taller leg instead. And the fabric can be selected to match any room or decor!
allie @ Through Her Looking Glass says
Prettiest toy box I’ve ever seen! Thanks for the inspiration!
Robin Rue (@massholemommy) says
That came out great. You did an awesome job!
Tammi @ My Organized Chaos says
Oh wow, that’s genius!! I have tons of totes and they are UGLY! I so need to try this!
Jennifer says
That is pure genius! I love plastic bins for storage, but they can be pretty ugly. That’s a great idea!
Laura (Lauras Little House Tips) says
I just adore this idea. I need a place to put puppy toys and this is so stylish. I can’t wait to have the time to recreate it. Great DIY project. Kuddo’s!
Kelly Hutchinson says
This is such a stylish way to store your toys. I love the fabric choices and the modern look.
Chelley @ AisForAdelaide says
This is the best IDEA!!!! I am going to make a bunch of these for our new house!
Shauna says
Oh my goodness, this is the cutest thing ever. I totally need to make this so that I am not always steppingo nt hose annoying toys. HA! Thanks for sharing.
Dee Mauser says
Now that certainly looks more stylish than an ordinary old tote box. I love that it can be customized to fit your child’s decor.
Liz Mays says
That ended up looking so cool! I love your choices of fabric. That’s so creative!
Sarah @ Must Have Mom says
I am throughly impressed! This is an awesome idea! Love it!
kristin says
This is such a cute idea. we use these tubs already but this makes them look way better.
Dawn says
This turned out great! I love the denim-like pattern you chose.
Jenny Temcio says
I like how stylish this ended up looking! How crafty of you!
Aubrey says
Cute and fairly cheap. I like it. Amazing how you can turn an ugly plastic tote into something fabulous.
Myrah Duque says
So nice, inexpensive and so useful. I’m not too crafty, so when I see people that are, it just amazes me.
Amy Desrosiers says
This is a very cute idea that I really do need! My kids leave so many toys downstairs and it gets sickening!
Ann Bacciaglia says
This is an amazing project i will definitely have to make. It looks great and is perfect for storing a bunch of different things.
Our Family World says
This is adorable. I am looking for something to help store the kids toys. I have to give this a try.
Ipsita kar says
You did an awesome job…………..