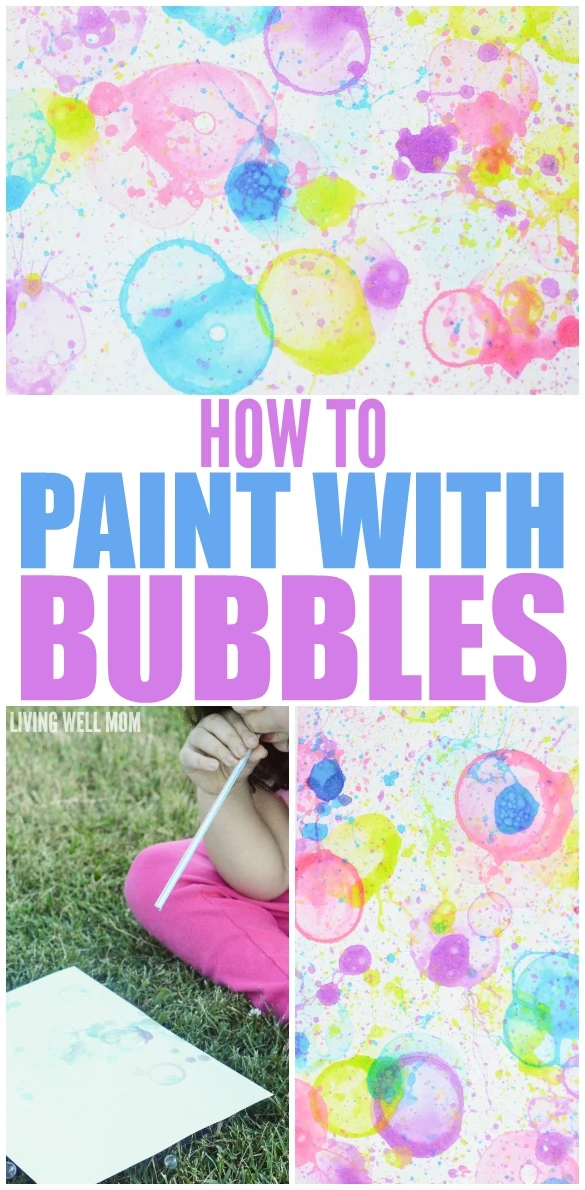
Looking for a fun and easy art activity that will totally wow your kids? Bubble painting is pure magic! With just a few simple supplies, your little ones can create colorful, one-of-a-kind masterpieces—no fancy skills required.
Bubble painting is one of those awesome hands-on activities that combines sensory play, creativity, and just the right amount of messy fun. It’s perfect for toddlers, preschoolers, or even older kids who love to experiment with color and texture.
Whether you do it outside on a sunny day or set up a quick indoor craft session, this is one activity your kids will ask to do again and again!

Thanks to cracking the code on homemade bubble solution, we do a lot of bubbles at our house! And yes, it’s fun, but sometimes it’s nice to add a twist! I decided to try some bubble activities with my kids and our favorite quickly became bubble painting.
It was so much fun and my kids loved making bubble art! I enjoyed it too because it was less messy than regular watercolor paints. Just make sure you don’t use too much food coloring!
Painting with bubbles is super easy too and will keep your kids occupied for a long time. Here’s how to do it at home!
Supplies
Here’s what you’ll need to make your own!
- Bubbles solution (we used this easy recipe, but you can also buy storebought bubbles
 if you prefer)
 - Food coloring
- Plastic cups or containers to make different colors
- Straws
- Paper or card stock (preferred)
- Painters tape, optional
 if you prefer)
How to Make Colorful Bubbles for Painting
First, you’ll want to mix up the different colors – you’ll need a separate container for each color.
Then, simply pour bubble solution into various containers, then add a few drops of liquid food coloring to each container.
The actual ratio of bubble solution to food coloring can vary based on the brands of the soap and dye, but here’s a ratio to start with, and adjust as needed.
- 1/4 cup bubble solution
- 8–10 drops of food coloring
Make sure to mix gently to avoid foaming too early. Try blowing a bubble onto paper to see how vibrant it looks, and adjust from there and add more food coloring for bolder color.
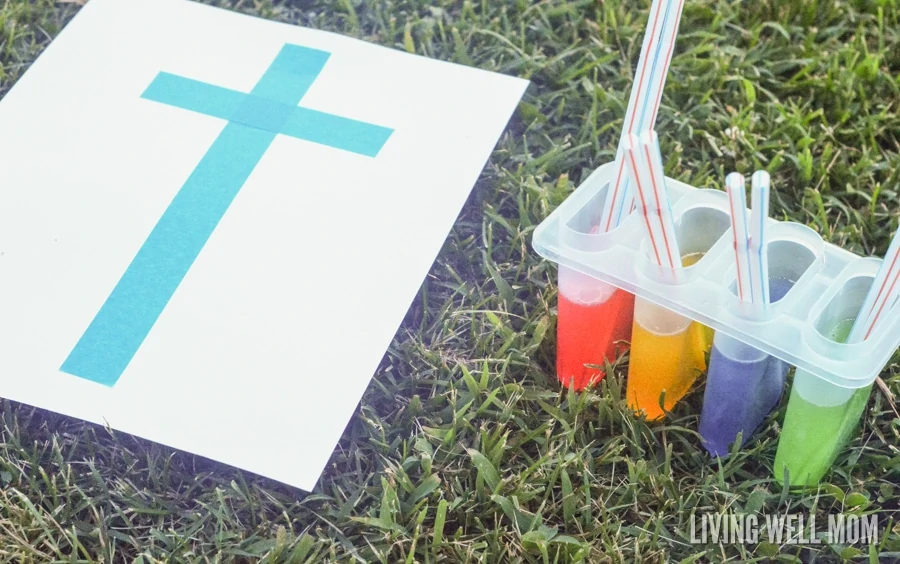
I put out a popsicle mold set to hold our colored bubbles. This kept colors separate, while still providing a tall enough slot for our straws to stay put! I’m really glad we used it, as it worked really well.
If you don’t have one, you can use plastic cups, tupperware containers, dixie cups, mason jars, etc.
Need more help? I have an entire blog post devoted to how to make homemade color bubbles!
How to Paint with Bubbles
Now that you have the bubbles ready to go, it’s time to start bubble painting!
You’ll need paper, or even better, card stock, which holds up better under the liquid than regular paper.
You can let them freestyle, or get a bit more creative by using painters tape to map out designs. We chose a cross as an easy design, but you could also do letters, numbers, etc.
Tip: Make sure you press the tape down firmly, or the bubbles will sneak in under your tape.
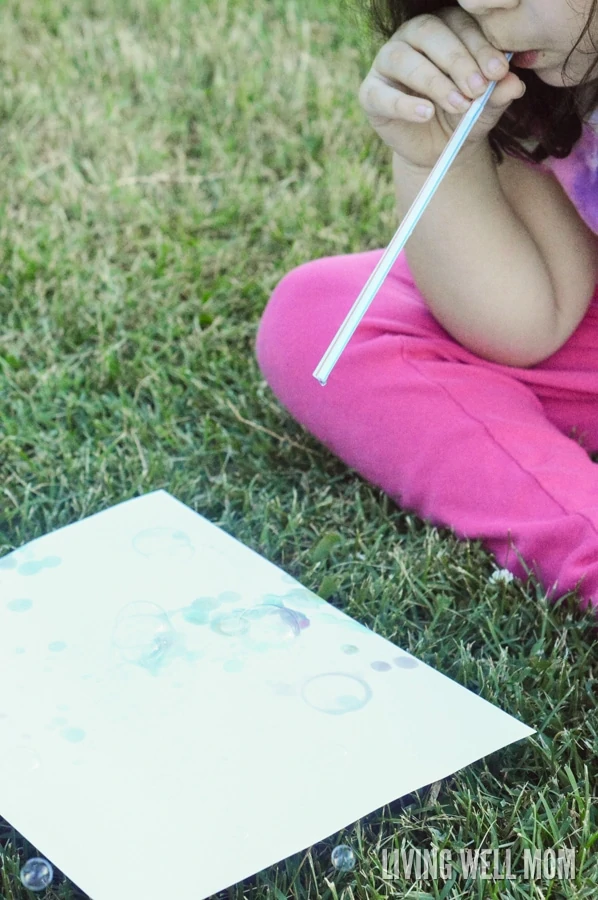
Now it’s time to start painting! Rather than use a bubble wand, we like to do bubble painting with straws because it provides better control than regular bubble wands.
That being said, I would not recommend the straw method for young children, since they may want to drink the bubbles through the straw. Though in my experience, once they try it, they don’t again because homemade bubble solution doesn’t taste very good!
Whatever tool you use, have your children dip the end of the straw or wand into the bubble solution.
Then aim the straw toward the paper and blow!
That’s it! You’re painting with bubbles!
After your kids finish painting with bubbles, allow it to dry. You can leave it outside in the sun or bring it inside. It only took about thirty minutes for ours to dry outside.
Make sure your designs are completely dry before removing your painter’s tape, if you used any, as it can cause your paper to tear if not.
I love, love, love how this easy bubble painting activity turned out!
Bubble Painting Tips and Tricks
How to Get Bright Colored Bubbles
If you want really bright colors, you will need to use a lot of food color in your bubbles. You’ll get a look like this:
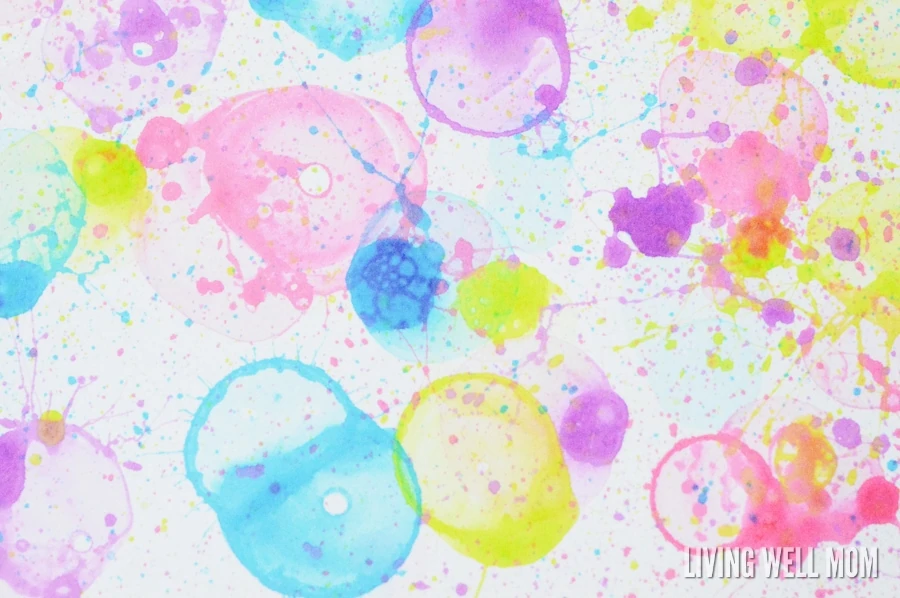
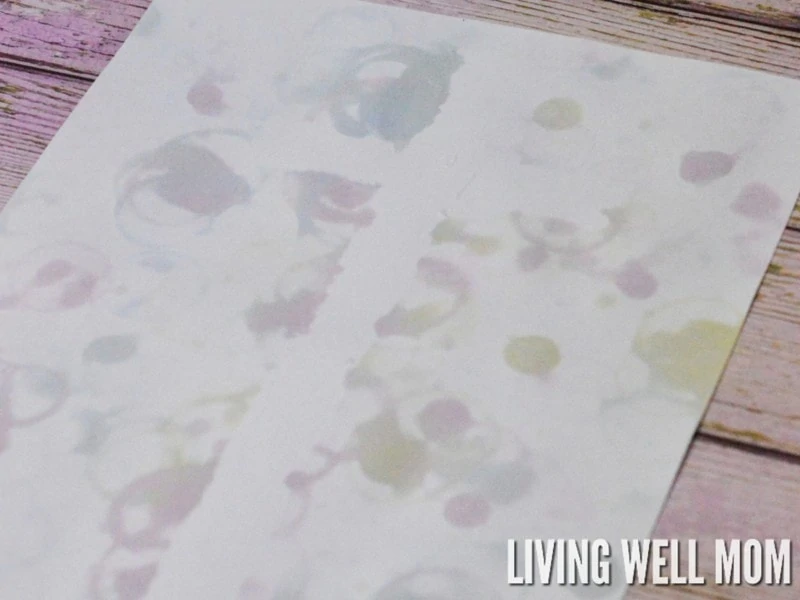
However, if you want a softer, pastel like my daughter did, you don’t need to use very much color.
Unfortionately, there’s a bit of trial and error in this because every brand of bubble and dye is different.
Our colors look bright in their containers, but as you will see from the picture below they actually turn out much lighter than you think they would. My daughter was delighted with how hers turned out, though!
For Less Mess
Bubbles are messy, but fun. That being said, I recommend having your children paint with bubbles outside for the least mess.
You can do it inside, but you will want to supervise more closely in case they decide to have a colorful bubble fight!
Whether you are inside or outside, make sure to cover your table with a plastic cloth or newspaper so it doesn’t get dyed.
I also recommend you dress your kids in play clothes or aprons that can get messy.
More Bubble Art Creative Ideas
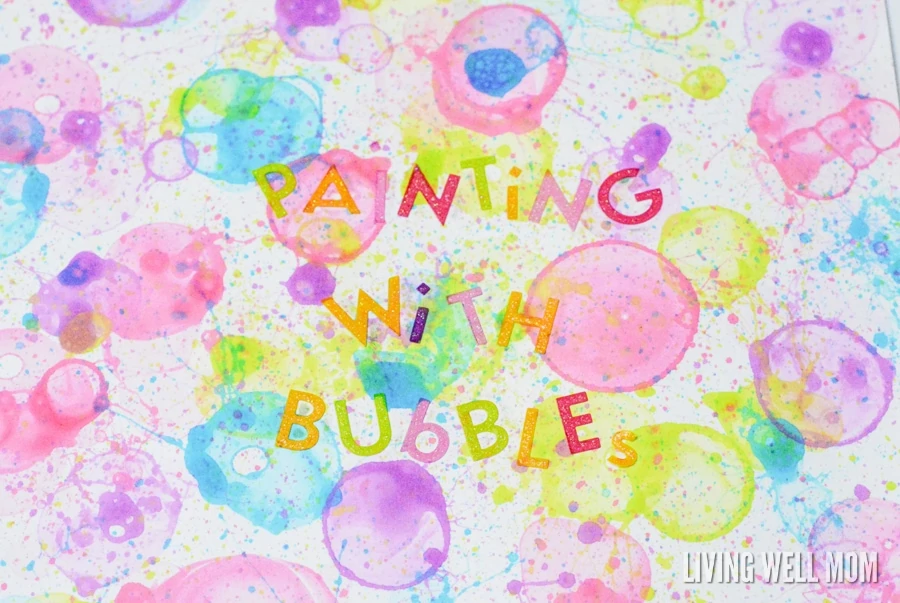
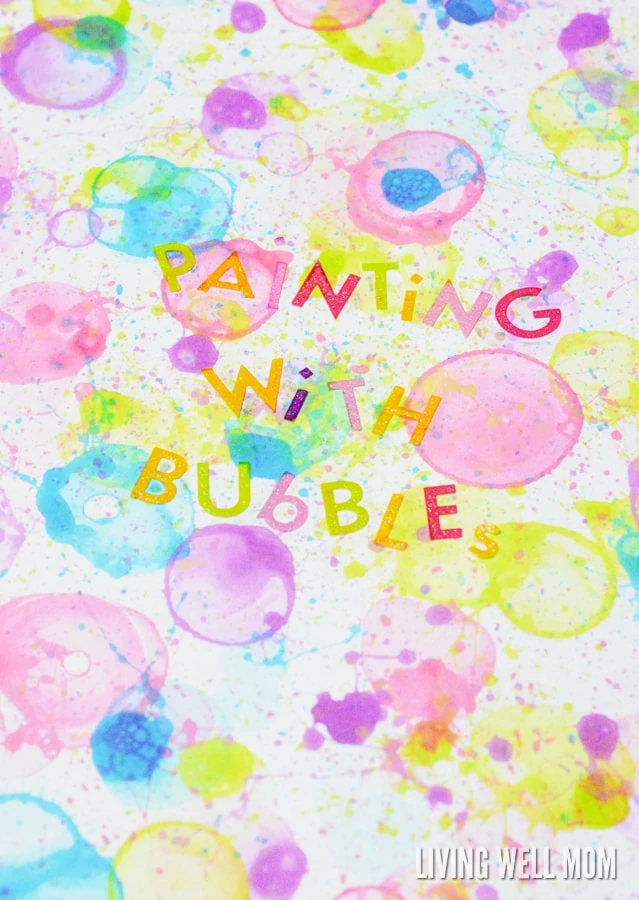
You can also use stickers for more fun and creativity with this bubble activity. I thought it would be fun to add letter stickers to one painting, though they wouldn’t come off for the neat effect I was hoping for. What do you think?
I plan to frame my children’s bubble art and use it around the house. Overall we had so much fun, and my daughter is already asking when we will be making some more! We have plenty of bubbles left, so it will much quicker for next time.
Will your kids prefer pastel or bright colors when they try this bubble painting activity?
More Fun Activities for Kids
- Reusable DIY Sponge Bombs
- Colorful Exploding Bubble Bags
- How to Make DIY Playdough
- DIY Fairy House for Kids
Cathi Crismon says
This is brilliant! I can’t wait to do this with my grandkids this week. They are going to love it! I love it so much I pinned it!!
Ellen says
That is such a cute idea. What a great summer activity for kids!
Shauna says
Now this looks like a perfect Summer afternoon craft. Sometimes I have to remind myself that I need to do fun things to keep the kids busy and they would love this. Thanks for sharing
Crystal says
That looks like so much fun! My kids love anything crafty, and this inexpensive project would be perfect for some easy summer fun.
Lee says
That makes such a pretty look. Obviously, this would be great for any kids’ project, but I’ve got some grown up ideas of my own for this. Thanks!
Erin says
Hello!
Do you think this would work on canvas as well? Such a cute idea!
Alexia Browning says
This is fantastic! Thank you for sharing your ideas. I’ve heard of bubble painting where you blow into pots and put the paper over the top, but this is really effective. I love the brighter colours!
We’re going to try this later this week.
Ruthann Carrier says
Enjoy your craft ideas
Laurie Anne says
Can you do this on white tshirts? Like a tye dye?
Erika says
That’s a good idea. I’ve never tried it but you can try especially if you have an old tee you don’t care if it turns out weird!
B says
I loved this idea- I needed some ideas for crafts this summer at VBS. I practiced with my daughter, and we decided to cut the bubble painting into handmade note cards.
Christine says
That is such a creative idea! They are truly one of kind cards to share. We might have to try it too. Thank you for sharing!