This cauliflower pizza crust is a delicious way to satisfy your pizza craving, minus the guilt and sluggishness! This is the perfect healthy pizza to make if you are on a low-carb and/or grain-free diet.
Plus it’s a great way to sneak more veggies into your family’s diet without them even realizing it because this cauliflower pizza crust does NOT taste like cauliflower.
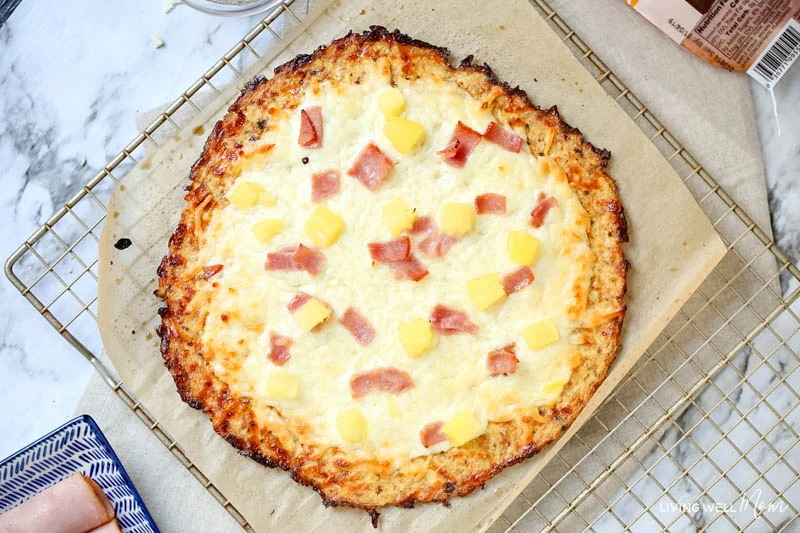
While I opted to use this cauliflower pizza crust recipe for a Hawaiian pizza, you can add whatever toppings you want. I understand that not everyone loves pineapple on pizza (but you are missing out!).

Cauliflower Pizza Crust
I first made a cauliflower pizza crust recipe several years ago when I was on a super strict diet. The diet was not fun at all, but the cauliflower pizza made a lasting impression on me with how delicious it was while still staying within the diet guidelines.
I’ve played around with cauliflower pizza crusts for some time now and the recipe I’m sharing with you today is our confirmed winner.
The trick to making a really good cauliflower pizza is to make sure it doesn’t taste like cauliflower at all! While I want the health benefits, what I really want is yummy pizza.
Tips for Making Cauliflower for Pizza Dough
It’s pretty easy to make cauliflower pizza. It just takes three simple steps:
- You rice the cauliflower in a food processor
- Mix it with a few simple ingredients
- Bake it
Honestly, the longest part is baking the crust. The whole process is really quite easy.
Time-Saving Tips
I like to purchase organic cauliflower on sale and typically get 4-6 at a time. I spend 20-30 minutes cutting them up and ricing them in the food processor.
Then I’ll store the riced cauliflower in 2-4 cup quantities in zippered freezer bags, ready to pull out and defrost whenever we want a cauliflower pizza or cauliflower rice.
Or, for even faster prep, you can use already-riced cauliflower found in the frozen section. This will cost more but save you time.

Pizza Toppings
The cauliflower pizza crust is just part of the pizza. The toppings are the next best part. This is where you can experiment and use whatever your family’s favorite pizza crust toppings are. Here are some classic toppings that work:
- pepperoni – you can sub turkey pepperoni for a healthier option
- veggie pizza – just layer on your favorite veggies!
- sausage – either chicken or pork sausage works well
- sliced chicken – I love this drizzled with ranch and buffalo sauce
- taco pizza – this is so good, especially drizzled with taco sauce
My family loves Hawaiian pizza with ham and pineapple tidbits and it’s one of my favorites too. That’s why I decided to share my cauliflower pizza crust recipe as a Hawaiian pizza. And it works so well together, we love it!
Now that you know one of my favorite topping ingredients, let’s get down to making this cauliflower pizza crust.
How to Make This Cauliflower Pizza Crust Recipe:
Cauliflower Crust ingredients
- cauliflower
- egg
- sea salt
- oregano
- garlic powder
- pinch of pepper
- shredded mozzarella cheese or goat milk cheddar* (use the lower quantity if you’re going for fewer calories)
*We love goat milk cheddar cheese as my dairy-free kids can tolerate it and it tastes very similar to Mozzarella cheese.
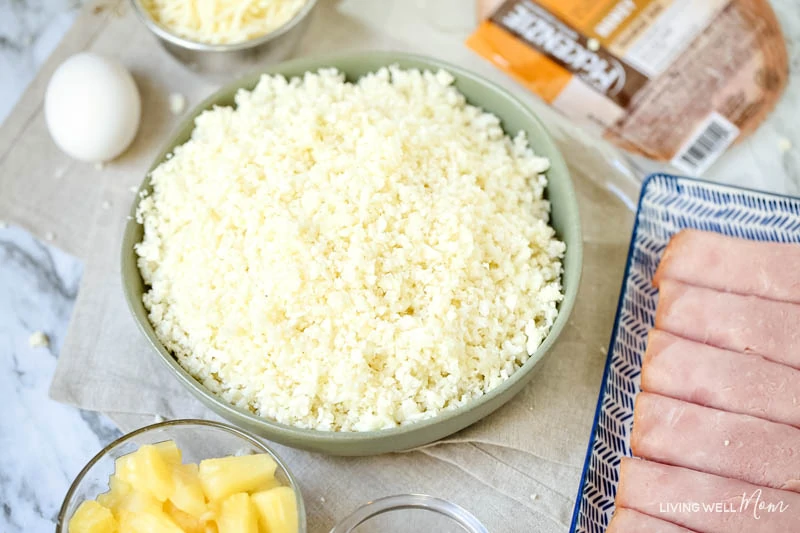
Toppings
Make sure to grab the toppings of your choice, too. If you want to make Hawaiian pizza like I did, here’s what I used:
- shredded mozzarella cheese
- honey ham (or any ham) slices, torn into small pieces
- ½ of 29 oz can pineapple tidbits, drained OR about 1 cup of fresh tidbit-cut pineapple
Supplies:
- Cheesecloth (I’ll explain why you need this below. It is optional but definitely good to have.)
- Parchment paper
- Pizza pan or cookie sheet
Step by Step Directions
Cut the cauliflower into small pieces and discard the outer leaves.
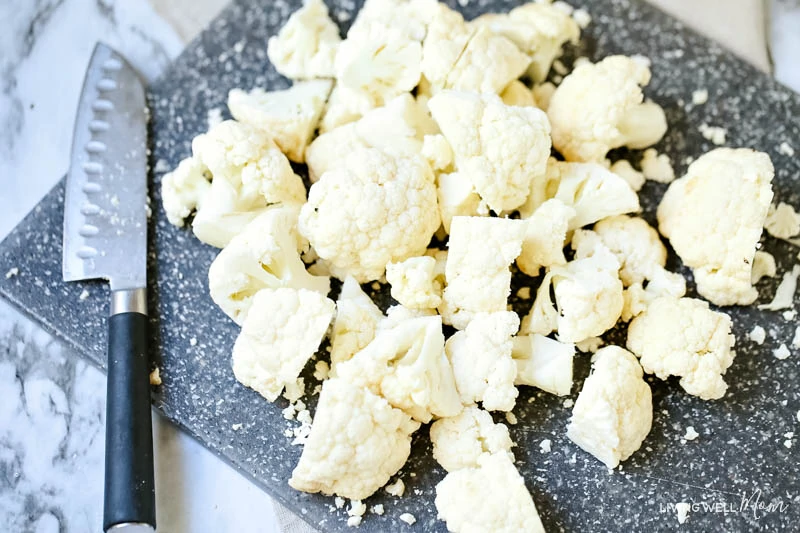
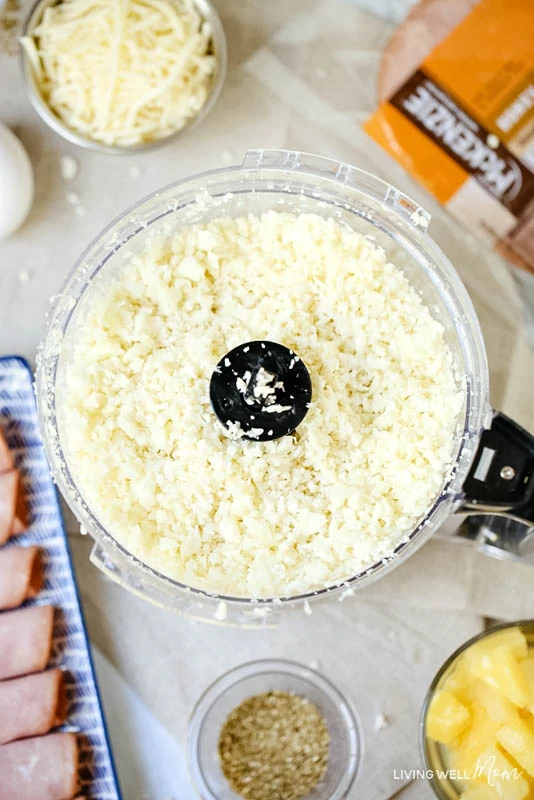
1. Rice the Cauliflower
Run half of the cauliflower (or ⅓ of the cauliflower if you have a large one) in a food processor until the cauliflower is chopped into small bits of “rice.” Don’t over-process.
If you have one single chunk of cauliflower, just remove it and process it with the next batch of cauliflower. Set aside the ‘riced’ cauliflower and process the remainder.
2. Cook the Cauliflower
Next, you’ll want to cook your riced cauliflower; there are two ways to do so.

My favorite is steaming it over the stove because it’s faster. Steam the cauliflower rice for 7-9 minutes.
OR you can bake in the oven at 375 degrees on a cookie sheet for 10-15 minutes.
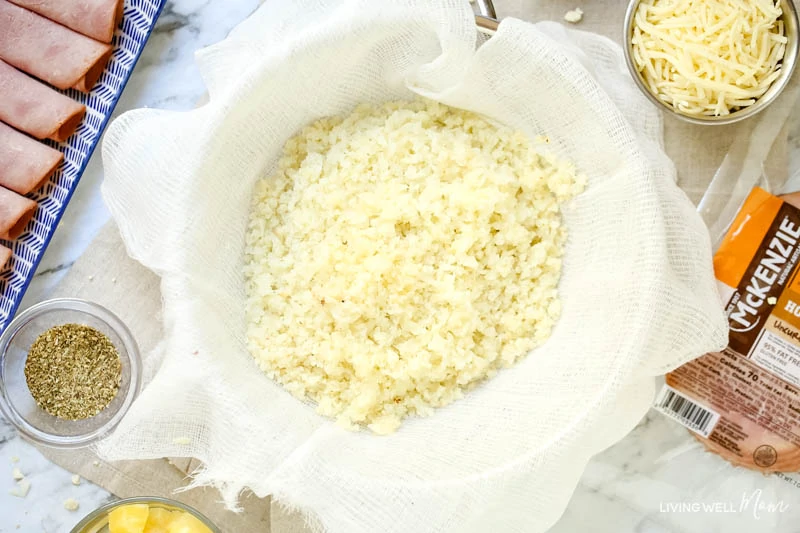
3. Press Out the Liquid
Regardless of how you cook the cauliflower rice, you’ll want to let it cool for 5-10 minutes, then press the liquid out using cheesecloth.
The cheesecloth allows you to remove the excess liquid that will result in your cauliflower pizza crust being soggy. I haven’t noticed that this affects the taste either way. You don’t HAVE to use cheesecloth, but you will probably end up needing a fork to eat your pizza because it will tend to fall apart.
I recommend putting 2 layers of cheesecloth in a medium-sized bowl. Dump the cooked cauliflower in the cheesecloth, gather it together and squeeze out as much liquid as you can. If it’s too hot, handle with caution and/or wait a few minutes longer until it’s cool enough to handle.
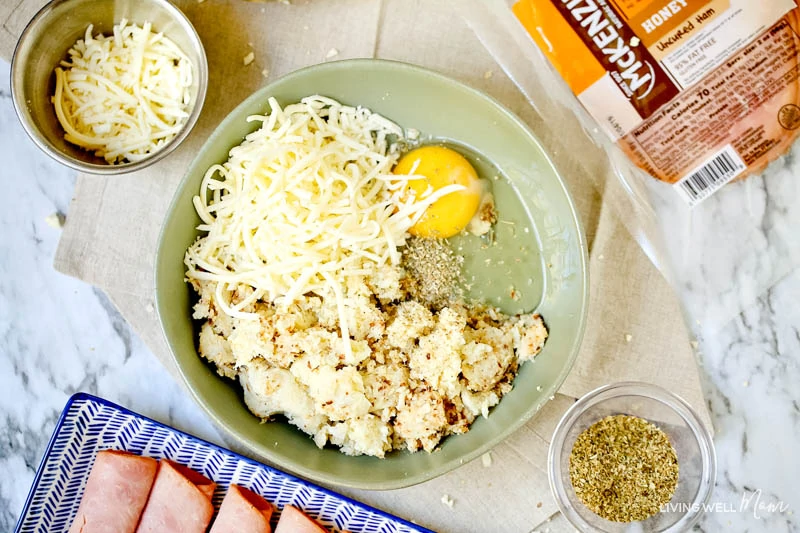
Once you’ve squeezed as much liquid as you can, dump the cauliflower into a medium bowl and stir in the egg, salt, oregano, garlic powder, pepper, and shredded cheese.
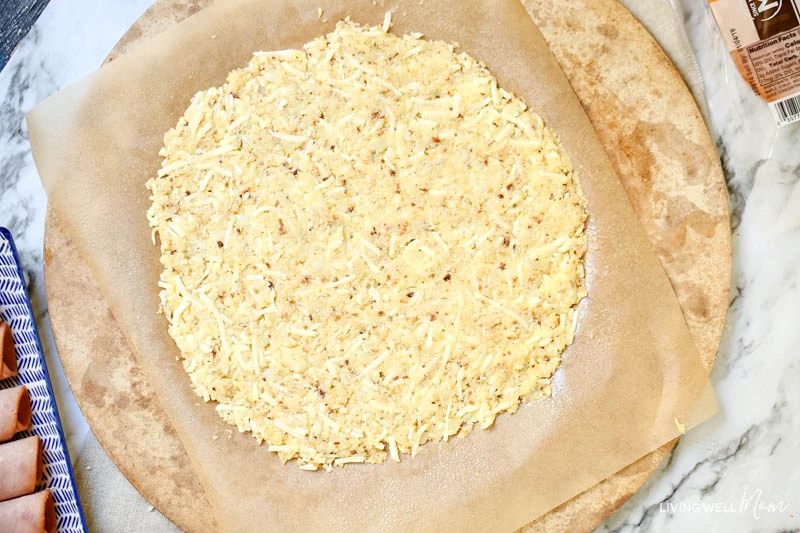
4. Shape Cauliflower Pizza and Bake
Line a pizza pan with parchment paper (leave a little hanging out as it makes for easier handling later) and press the cauliflower mixture evenly across the pan in a circle until it’s flattened.
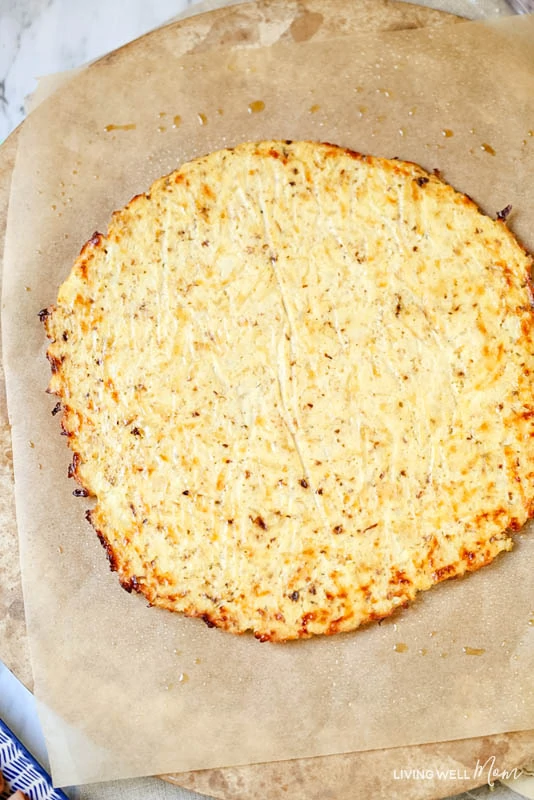
Bake at 425 for about 20 minutes.
Remove from the oven and using another pizza pan or cookie sheet lined with parchment paper and carefully using oven mitts, flip the crust into the other pan. (This is SO much easier and less messy than trying to flip it over with a spatula as I used to try.)
Discard the original piece of parchment paper. Adjust the new parchment paper if needed (if it became lopsided, etc.).
Bake for another 5-10 minutes or until the crust begins to show a few golden brown streaks. It may get a little brown or even burnt on the edges and that’s okay; it doesn’t affect the taste.
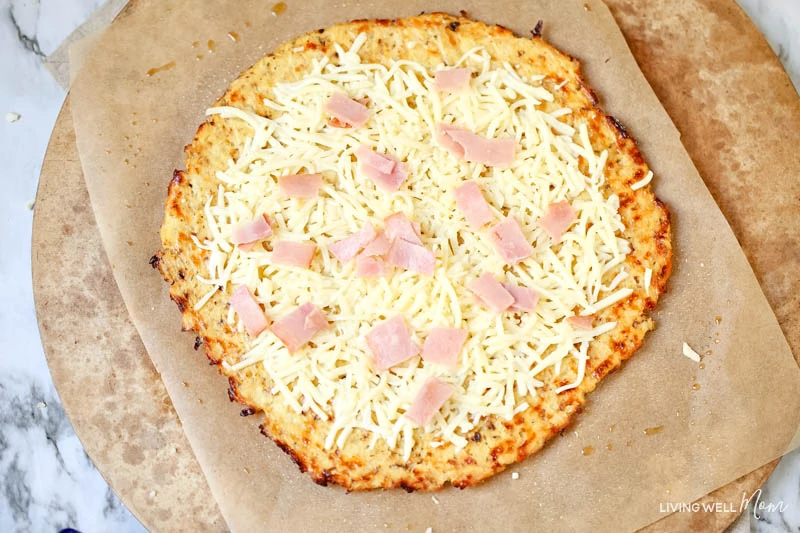
5. Layer on the Toppings
Add your toppings. Start with the cheese. You can use as much or as little cheese as you prefer. Use less if you’re going for a healthier pizza or more if you want lots of cheesy deliciousness. Top with pieces of ham and drained pineapple tidbits.
Bake for another 5-8 minutes or until the cheese is fully melted.

6. Slice and Enjoy!
There you have it. Now all that’s left is to slice it up and and enjoy your cauliflower pizza!
How to Store this Pizza
This cauliflower pizza is best enjoyed the day you make it. If you do have leftovers, store them in the refrigerator and enjoy within 3 days for the best results.
Pin the image below to save the recipe for later!

Cauliflower Pizza Crust Recipe

This Cauliflower Pizza Crust recipe is a delicious way to satisfy your pizza craving without the guilt and it’s perfect if you’re on a low-carb and/or grain-free diet.
- Prep Time: 15 minutes
- Cook Time: 30 minutes
- Total Time: 45 minutes
- Yield: 4 servings 1x
- Category: Dinner
Ingredients
Cauliflower Crust ingredients
1 medium-large head of cauliflower
1 large egg
1/4 tsp sea salt
1/2 tsp oregano
1/4 tsp garlic powder
Pinch pepper
1/2-3/4 cup shredded mozzarella cheese
Supplies:
Cheesecloth
Parchment paper
Pizza pan
Toppings
1-2 cups shredded mozzarella cheese
Ham deli meat slices, torn into small pieces
½ of 29oz can pineapple tidbits or chunks, drained
Instructions
Cut the cauliflower into small pieces and discard the outer leaves. Run half of the cauliflower (or ⅓ of the cauliflower if you have a large one) in a food processor until the cauliflower is chopped into small bits of “rice.” Don’t over process. If you have one single chunk of cauliflower, just remove it and process with the next batch of cauliflower. Set aside the ‘riced’ cauliflower and process the remainder.
There are two ways to cook your cauliflower rice; you can steam or bake it.
Steaming method: Steam the cauliflower rice for 7-9 minutes.
Baking method: Bake in the oven at 375 degrees on a parchment-paper cookie sheet for 10-15 minutes
Regardless of how you cook the cauliflower rice, you’ll want to let it cool for 5-10 minutes, then press the liquid out using cheesecloth.
I recommend putting 2 layers of cheesecloth in a medium-sized bowl. Dump the cooked cauliflower in the cheesecloth, gather it together and squeeze out as much liquid as you can. If it’s too hot, handle with caution and/or wait a few minutes longer until it’s cool enough to handle.
Once you’ve squeezed as much liquid as you can, dump the cauliflower into a medium bowl and stir in the egg, salt, oregano, garlic powder, pepper, and shredded cheese.
Line a pizza pan with parchment paper (you can leave a little hanging out as it makes for easier handling later) and press the cauliflower mixture evenly across the pan until it’s flattened.
Bake at 425 for 20 minutes. Remove from the oven and using another pizza pan or cookie sheet lined with parchment paper and carefully using oven mitts, flip the crust into the other pan. Adjust the parchment paper if needed (if it became lopsided, etc. Bake for another 5-10 minutes or until the crust begins to show a few golden brown streaks.
Add your toppings. Start with the cheese. You can use as much or as little cheese as you prefer. Top with pieces of ham and drained pineapple tidbits.
Bake for another 5 minutes or so until the cheese is fully melted. Slice and enjoy.
Pat says
Hi Erika! This pizza looks so delicious! I can’t wait to try it with my family. Thank you for the recipe!