Looking for an easy, fun, and affordable way to craft with your kids this Christmas? Look no further than these ultra easy salt dough ornaments!
‘Tis the season to get crafty and create memories—and one of my all time favorite ways to do it is with salt dough. It’s super easy to whip up and costs just pennies per ornament. Plus, it will keep your kids happy and busy which is always a plus this time of year.
In this post, I’ll show you exactly how to make a batch of salt dough, and give you plenty of ideas for how to use it, too.
So, gather your family around the kitchen table, roll up your sleeves, and prepare for an afternoon filled with fun and creativity!

Why You’ll Love Salt Dough
There are so many things to love about the holiday season, but near the top of my list are all the fun DIYs I get to do with my kids. In particular, making these salt dough ornaments has been a highlight year after year for my family. Here’s why you’ll love it too:
- A keepsake you’ll actually want to hold on to. Making salt dough ornaments is not only a fun way to spend quality time with your loved ones, but it also allows you to create keepsakes that will last for years.
- Incredibly easy to make. Got 60 seconds? Then you can make a batch of salt dough! You’ll be amazed at how easy it is.
- You likely already have all the supplies you need. Not only is it super easy to mix up, but you probably already have every single one of the ingredients in your pantry already.
- Makes for an adorable gift. Whether you gift a handprint salt dough ornament to a grandparent or use an ornament as a gift tag on presents, these are the perfect gifts to give this season.
- Not just for Christmas! My kids and I use salt dough all year long to make things such as flower magnets and olympic medals. The possibilities are truly endless here.
So, let’s sprinkle some flour, mix some dough, and let our imaginations run wild!
What is salt dough?
If you haven’t worked with salt dough before, I’m excited to introduce it to you! Salt dough is basically what it sounds like: a combination of flour, water, and—of course—salt.
Salt dough is different than playdough, it’s more similar to a non-toxic clay. You can mold it into various shapes (either by hand or with a cookie cutter). Then, all you need to do is allow them to either air dry or bake them dry.
Easy peasy!
I particularly like that this is a safe craft for even my younger children. Trust me, if any of your kids start to stick this dough in their mouths, the high salt concentration will make them immediately spit it out!
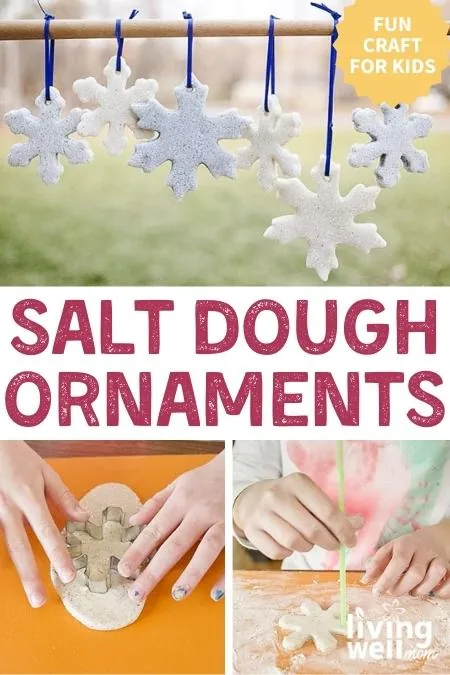
Salt dough ornaments with glitter
For this particular project, I wanted to use my salt dough recipe to create glittery snowflakes. So many salt dough recipes call for food coloring, but I was not interested in getting fingers (and who knows what else) stained with food coloring during this craft.
Instead of food coloring, I opted for glitter in our salt dough recipe. It was the perfect addition!
And yes, you’re probably thinking to yourself, is glitter REALLY less messy than food dye? Normally I’d say they can cause destruction pretty evenly. However, in this particular project, the glitter in the dough had all the pretty effect without glitter falling off everywhere in my house, unlike so many glitter crafts usually do.
You can be conservative and just give your salt dough snowflake ornaments a light dusting of shimmer, or use a very generous amount. I’m talking like half a glitter bottle! If you do so, it will give the dough the appearance of being dyed without the mess of food coloring.
But I’ll walk you through the entire process below!
Supplies
First up, gather your supplies. Here’s what you’ll need to have on hand:

How to make salt dough ornaments
Ready to make festive glitter salt dough snowflakes with your kids? Here’s how to do it.
1. Mix up your dough base
To make the salt dough recipe base, all you need to do is mix your salt and flour in a bowl.
While stirring, slowly pour in 1/2 cup of water. You want to mix in just enough to make the dough pliable but not sticky. You may not need to use the full 1/2 cup of water.
If your dough seems particularly dry, you can add a few extra drops.

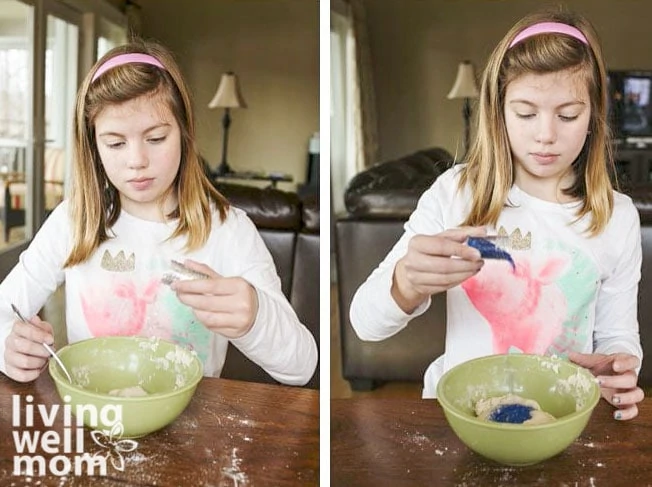
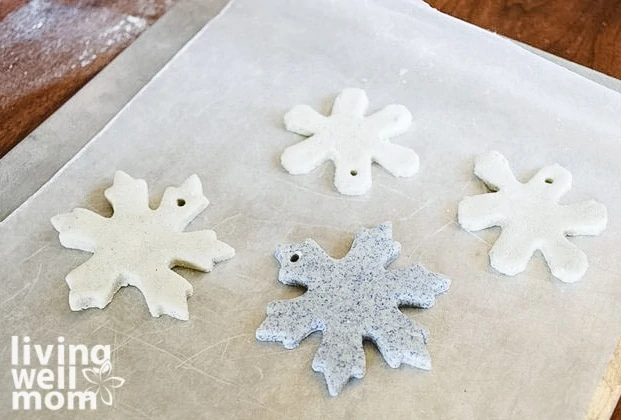
2. Add the glitter
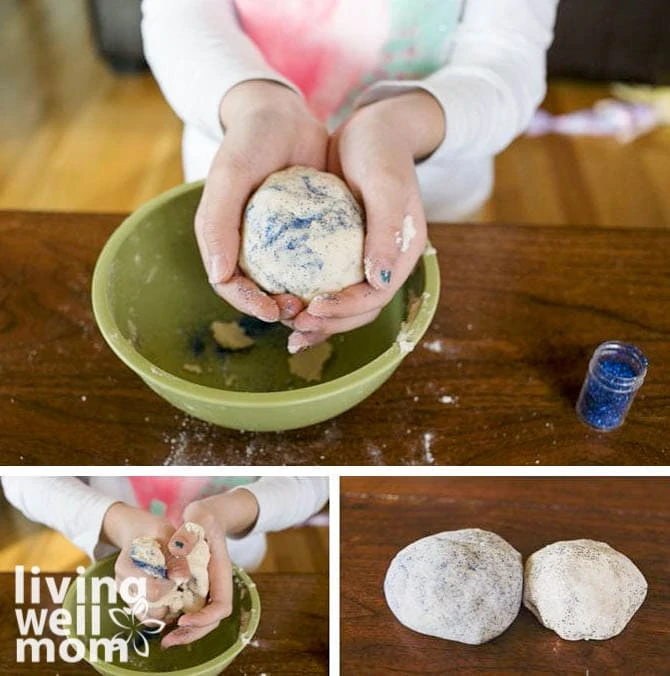
Split the dough in half. Mix blue glitter in one half and silver glitter into the other. Be very generous with the glitter. Add 3 to 5 tablespoons until you like the effect.

Knead the glitter into the dough with your hands. See what I mean about how the glitter stays mostly contained within the dough itself?
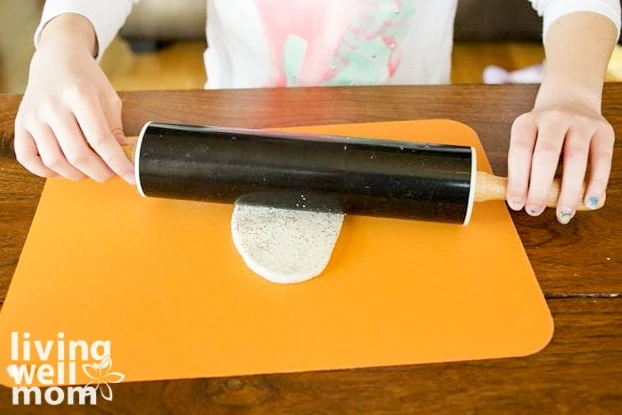
3. Create the snowflake ornaments
Now it’s time to take the dough and transform it into salt dough ornaments! First, roll the dough out to about 1/4 inch thickness. If your dough sticks, lightly flour your work area and rolling-pin.
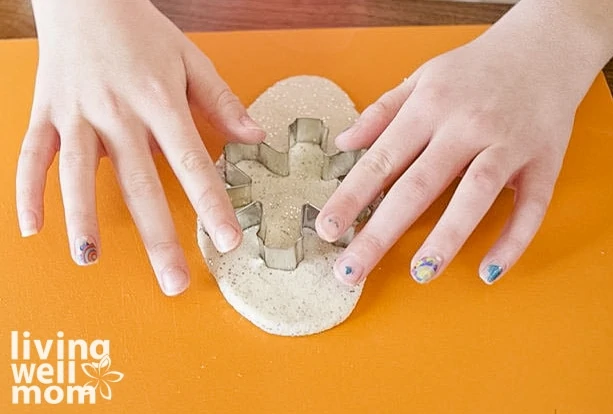
Cut out your desired shape using a cookie cuter. A few ideas include:
- Christmas tree shapes (mix the dough with green glitter!)
- Snowmen
- Gingerbread men
- Mittens
- Angels
This is also when you can press a handprint or a foot print into the dough and use a craft knife to cut out the shape.
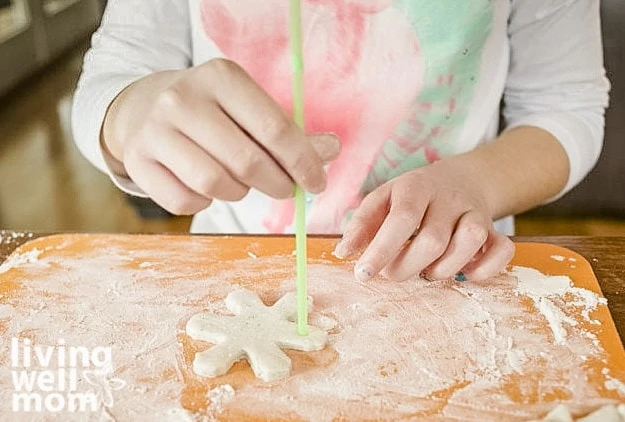
4. Add a hole for hanging
This step is very important – don’t forget to add a hole in each snowflake/shape so you can hang it with ribbon later! The easiest way to add this is to use a straw to poke a hole in each snowflake.
5. Dry the salt dough ornament
Place the snowflake cutouts on a cookie sheet covered in parchment paper (foil works too).
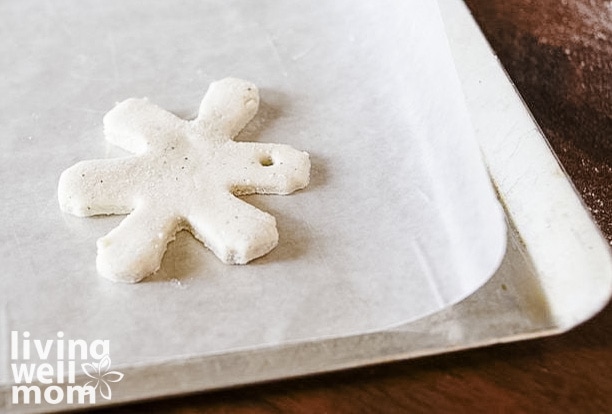
Now it’s time to dry the cutouts.
To dry out this salt dough recipe, bake your ornaments at 250 degrees for 45+ minutes. Time will vary depending on how thick your ornaments are. A general rule of thumb is that for every 1/4″ of dough, bake time is 45-60 min. If your salt dough ornaments are thinner, bake for less time.
Baking time depends on how thick or thin your cutouts are. Always bake for less and check throughout the process.
You want to remove them from the oven BEFORE they start to brown (unless you prefer that as a “finish.”) Then, allow them to sit out on the counter for at least overnight to finish cooling and drying.
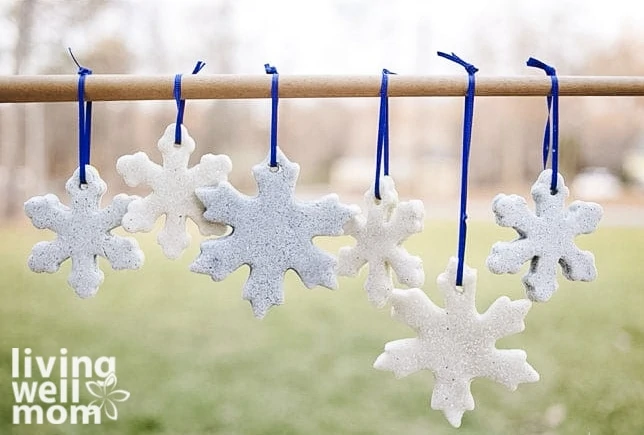
6. Display your salt dough glitter snowflakes
Thread a ribbon through the hole of your salt dough ornaments and hang them up.
These really adorable glitter salt dough snowflakes are sure to brighten your day.
Hang them from suction cups on your windows and mirrors, or create a cute mobile with the snowflakes hanging from different lengths of ribbon.
Of course, they look amazing hanging on your Christmas tree too!
FAQs about salt dough ornaments
How do you store salt dough ornaments?
To store salt dough ornaments, wrap them individually in tissue paper or bubble wrap and then stack them flat inside a box or container with a lid.
Avoid storing them in direct sunlight or extreme temperatures—they keep best in a cool, dry place.
How long do salt dough ornaments last?
Salt dough ornaments can last for many years if they are properly stored and cared for.
Remember: it is important to keep them in a cool, dry place when not in use, as dampness can cause them to become soft or moldy.
To extend their lifespan, you can also apply a coat of clear sealant to the finished ornament before decorating it.
How do you make sure the ornaments don’t crack while baking?
To prevent cracking, it is super important to properly knead the dough and roll it out evenly. This will ensure that there are no air pockets trapped inside, which is what causes cracks.
Additionally, make sure to use a baking sheet lined with parchment paper to prevent the ornaments from sticking and potentially breaking when removing them from the oven.
Is it better to air-dry or bake salt dough ornaments?
I have tried both methods and had much better success with baking salt dough ornaments, as it helps them dry more evenly and thoroughly.
However, air-drying can also be an option if you have the time and patience. It may take a few days for the ornaments to fully dry when air-drying, but they will still turn out just as beautiful.
More Christmas crafts
- Christmas Essential Oil Spray (2 Ways)
- Easy 3-Ingredient Peppermint Lip Balm
- DIY Salt Crystal Snowflakes
- Pom Pom Mittens Crafts for Kids
Just pin the image below to save the instructions for later!
DIY Salt Dough Ornaments {Glittery Snowflakes}

These Glitter Salt Dough Snowflakes are adorable and so much fun to create!
Ingredients
Instructions
- Mix one cup of salt and one cup of flour in a bowl.
- While stirring, slowly pour in 1/2 cup of water. You want to mix in just enough to make the dough pliable, but not sticky.
- Split the dough in half.
- Mix blue glitter in one half and silver glitter into the other.
- Knead the glitter into the dough with your hands.
- Roll the dough out to about 1/4 inch thickness.
- Cut out snowflake shapes.
- Add a hole in each snowflake/shape using the straw so you can hang it with ribbon later!
- Place the snowflake cutouts on a cookie sheet covered in parchment paper (foil works too).
- Dry the cutouts. Bake at 250 degrees for 45+ minutes. Time will vary depending on how thick your ornaments are. A general rule of thumb is that for every 1/4″ of dough, bake time is 45-60 min. If your salt dough ornaments are thinner, bake for less time. Always bake for less and check throughout the process. You want to remove them from the oven BEFORE they start to brown (unless you prefer that as a “finish.”) Allow them to sit out on the counter for at least overnight to finish cooling and drying.
-
Thread a ribbon through the hole and hang them up.
Notes
- You may not need to use the full 1/2 cup of water. If your dough seems particularly dry, you can add a few extra drops.
- Add 3 to 5 tablespoons until you like the effect.
- If your dough sticks, lightly flour your work area and rolling-pin.
tammileetips says
Those are adorable snowflakes!! I bet you could make almost any shape for any holiday with that recipe! I love homemade gifts like this!
Jody @ Mommy Moment says
Salt Dough projects are so much fun – I made sure to pin this one, my girls would love making them.
Ronni says
I saw these on my Pinterest feed earlier. They are so cute!
Emily says
Those turned out so cute! I love the dye variation in them, and how easy it is for kids to be involved!
Jesica Helgren says
Those are really cute. I wonder why they don’t brown in the oven – ideas?
CJS says
I do not usually leave comments, so I am sorry to leave this one. I was so excited to make these salt glitter ornaments. I followed the directions and baked them for an hour on parchment paper. They turned brown and are burnt on the bottom. It said to bake them for at least an hour… so I did not take them out of the oven earlier. I guess I should have. I have not shown them to the kids yet, as I do not even want to put them on my tree or give them as gifts. Any thoughts…. (our oven is not typically warmer than most for other recipes).
Erika says
Hi, that’s so disappointing! If it burns, it’s often due to varying thicknesses in the dough. Just like when you make cookies, if it’s rolled out thinnly it will bake more quickly. Thicker = longer bake time. I’m sorry that happened. I appreciate your comment because we will update the post to make sure people know that the bake time may vary.
*Note: I also adjusted the oven temperature in the recipe as an extra precaution against over baking. I hope this helps!
Melinda says
I made these last night with my 5- and 8-year-olds, and they turned out really well! They were fun and easy. I only cooked mine 35ish minutes to avoid any browning, and that was enough. These will be gifts to relatives this year. Thank you for the great project!
Erika says
I’m so glad!