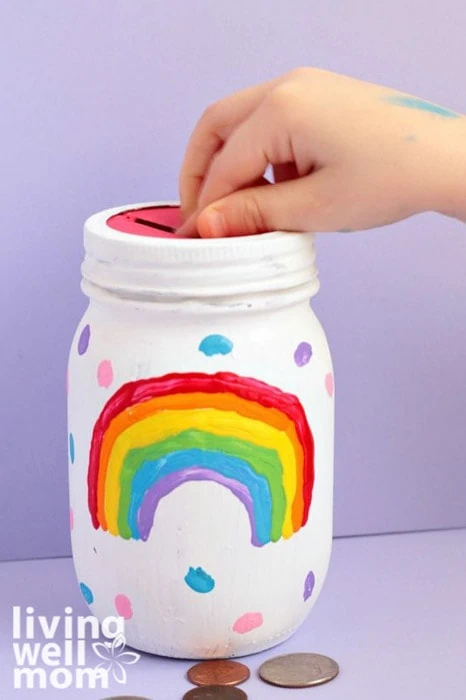
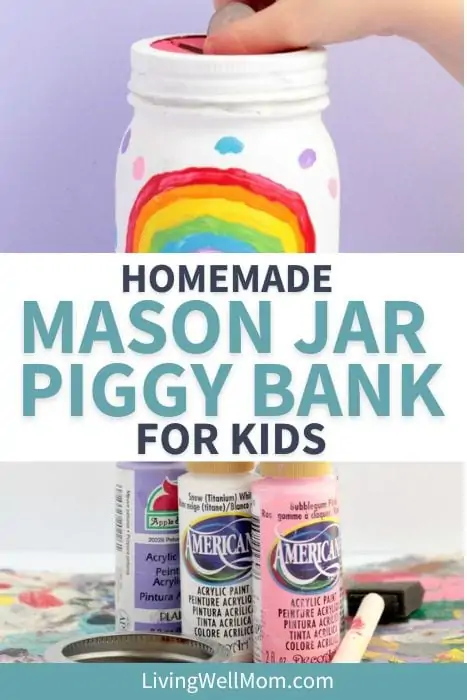
Enjoy some crafting fun and teach kids valuable lessons about saving money with piggy banks. Make this colorful rainbow mason jar piggy bank (+ more designs, too!) using a jar, acrylic paint, card stock, and this tutorial.

My girls love anything with rainbows. They can’t get enough of all the bright, cheerful colors, inspiring us to make this rainbow sensory bottle. I love finding ways to teach life skills so that the kids don’t even know they’re “learning.”
Today’s lesson: creating a fun way to encourage saving their weekly allowance.
So, we decided to combine these two loves and make a colorful twist on the fun Pokeball banks. My girls had a blast helping design and make this rainbow mason jar piggy bank!
Beyond the fact that my girls love the colors, we chose a rainbow for our jar bank because it is easy enough for kids to paint themselves, which means they could almost do this project alone. Win!
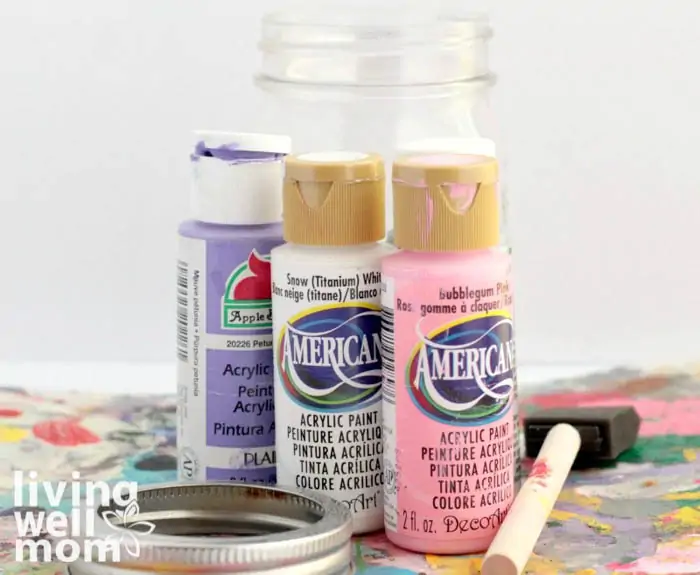
Supplies needed
- Acrylic paint
– in white and all the colors of the rainbow
- Paintbrushes
- Cardstock paper
- Laminator
and laminating pockets
– optional but recommended
- Scissors
- Mod podge
Regular mouth mason jars


How to make a rainbow mason jar piggy bank
Once you gather up your supplies, you can begin. Here’s how we made our rainbow bank.
Step 1
First, we took out the center metal lid from the jar. Then my kids painted the entire jar and the screw-on band white. We let each coat of paint dry before adding another.
Note: If you don’t let the paint dry completely, then it will start peeling as you add the new layer of paint.
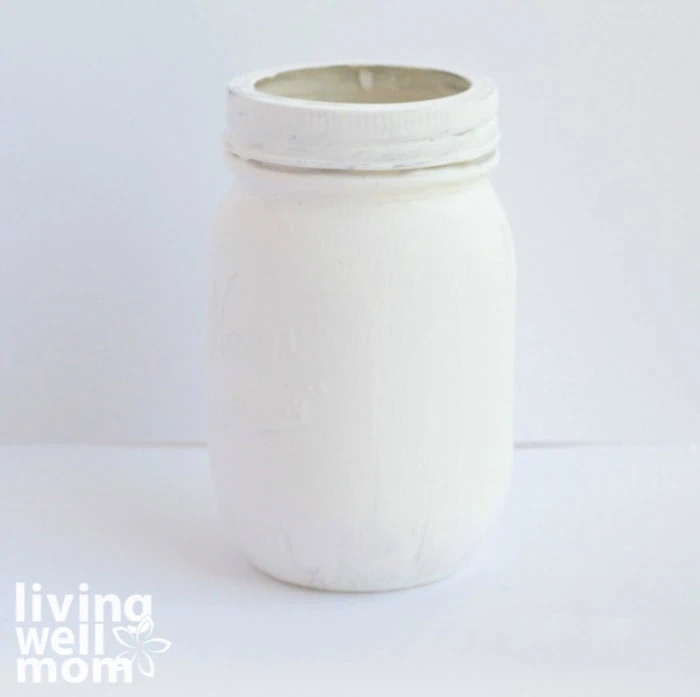

Step 2
When the white paint is fully dry (it takes about an hour), then let your kids paint on a rainbow (or design of your choice).
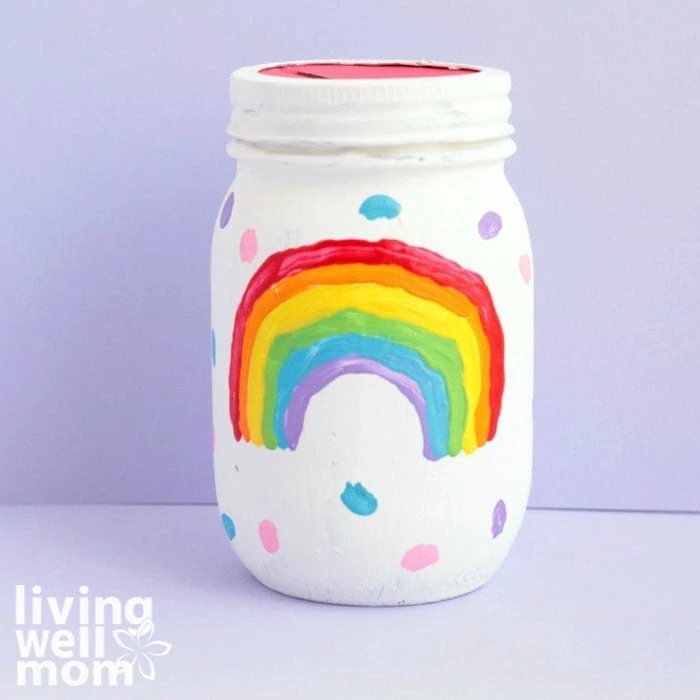
Step 3
After the rainbow dried, my girls added fun dots to brighten up the rest of the jar.
Step 4
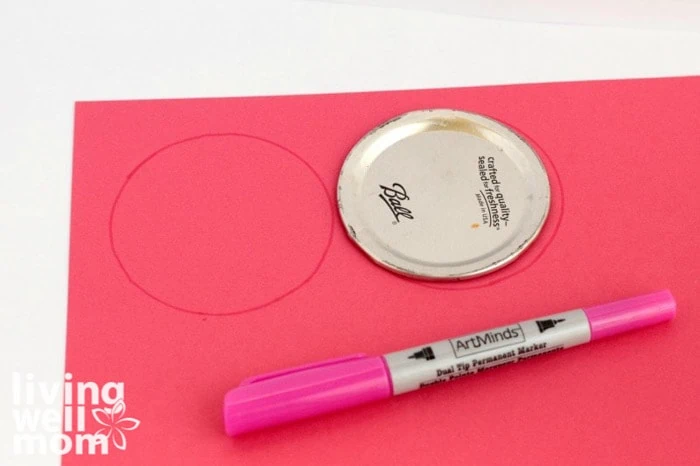
Now it’s time to make the jar bank coin slot for the top. We cut a circle of red paper (but your kids could use their favorite color) the same size as the lid of the mason jar. I cut out a slit in the middle.
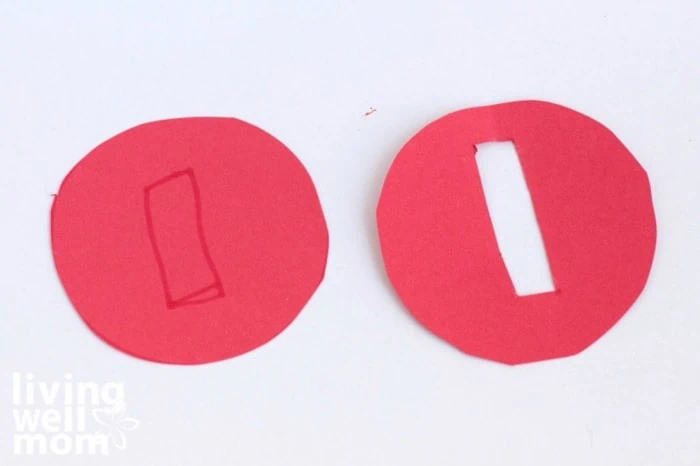
Pro Tip: If you laminate this paper circle, it will become much sturdier and won’t tear when the kids put in their coins. If you have active kids, as I do, I highly recommend laminating the card stock coin slot.

Step 5
We applied a coat of Mod Podge to protect the jar from damage and knicks.
Note: Let the Mod Podge dry for 24 hours before allowing your kids to use their new Rainbow Mason Jar Piggy Bank!
More mason jar piggy bank design ideas
On this site, we have this rainbow design and the Pokeball design that my boys love. But the design possibilities are endless! All you need is a little imagination to create incredible designs.
To give you a quick idea of what you could do with this mason jar bank project, check out:
Rainbow mason jar piggy bank FAQs
Here are a few questions that I notice readers asking on a regular basis. If you have a question I haven’t answered below, please leave it in the comments!
Will any size jar work?
Yes! We used the large quart size because that’s what I had on hand. Plus, I really want to encourage my kids to save money, so the bigger size works.
Can I use any other type of paint?
Acrylic paint is really the best for this design because it dries pretty quickly, provides good coverage, holds up to a little wear and tear, and is kid-friendly.
Spray paint is a good option, too, if you have some on hand. Just make sure to use a spray paint that works for glass.
Can I use something sturdier for the coin slot?
First, the card stock paper (especially when it’s laminated) is surprisingly durable. We made our jars a while ago, and the coin slot still looks brand new. Using cardboard would be too thick for the lid band to screw back on.
If you really want something stronger, you can actually purchase a piggy bank lid that has coin slots in them! Check out these coin slot bank lids.
If you purchase lids like that, then all you need to do is paint the lid because it’s one piece.
My daughter loves her new rainbow jar and has been excitedly collecting money to save. Now, every time she does her chores and receives her allowance, she puts it into her bank.
As a parent, it’s been the perfect gift to encourage kids to save money. I always find that a great hands-on opportunity can become powerful tools to work on learning new skills, and this mason jar piggy bank makes it fun and easy to learn how to save!
Do you kids need some chore motivation to get the coins rolling in? Try my chore chart for kids – it’s a simple, effective solution!
More fun activities for kids
Leave a Reply