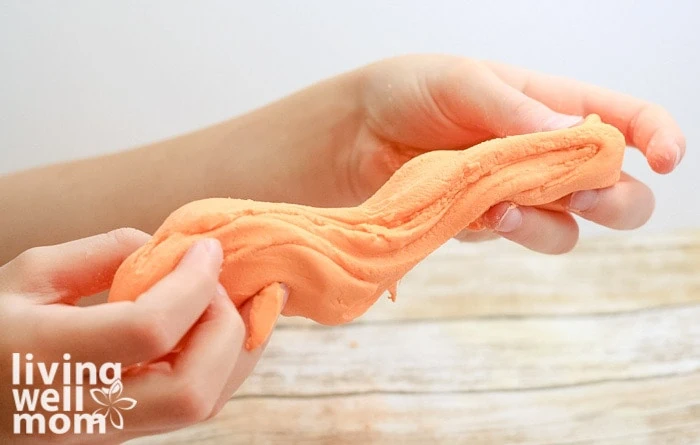
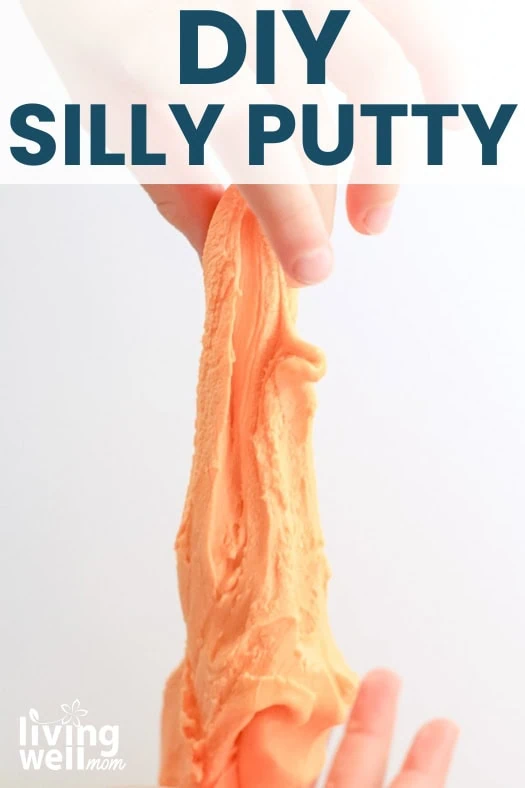
If your kids love anything stretchy, squishy, or gooey, they’re going to flip over this DIY silly putty. It’s soft, fun to mold, and so satisfying to play with — and the best part? You can make it at home in just a couple of minutes.
I’ll show you how to make putty using only two simple ingredients you probably already have. No glue, no borax, and no complicated steps. Just quick, easy, budget-friendly fun that doubles as sensory play.

If your kids are also obsessed with slime, putty slime, or anything they can poke and stretch, this recipe is going to be a hit.
I’ve stumbled across dozens of recipes, and we’ve been slowly making them all to try them out. This is the winner, hands down!
If you and your kids love putty and slime, be sure to also check out our glitter slime and fluffy slime recipes.
Why Make Your Own Silly Putty?
Homemade silly putty is one of those activities that checks all the boxes: cheap, quick, and endlessly entertaining. Plus, it’s a great hands-on sensory activity that helps little hands build fine motor strength without even realizing it.
Here’s why we love making it at home:
- It’s fast. You can whip up a batch in under a minute.
- It’s inexpensive. Two ingredients → hours of play.
- It’s naturally mess-friendly. It’s soft, contained, and easy to clean up.
- It’s customizable. Make it bright, pastel, glittery — whatever your kids love.
- It feels nostalgic. If you grew up stretching silly putty, this is such a fun throwback.
Is DIY silly putty like the one from the store?
Sort of. The store-bought kind has a different set of chemicals, many of which would be quite challenging to reproduce as you learn how to make your own putty.
I wanted to keep this DIY as simple as possible so you could quickly make it at home. Because of this, the texture is slightly different.
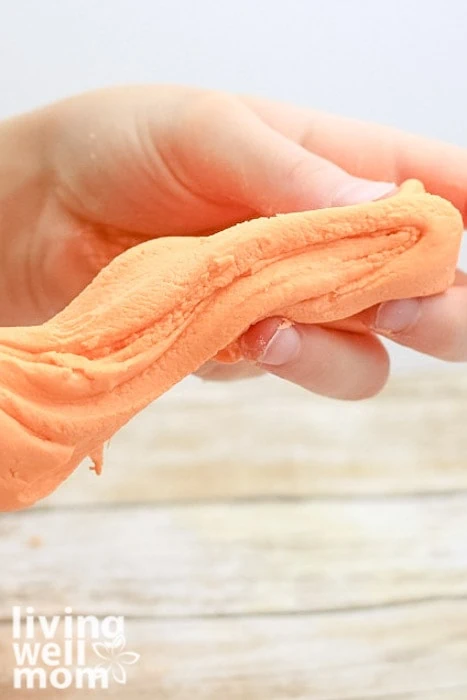
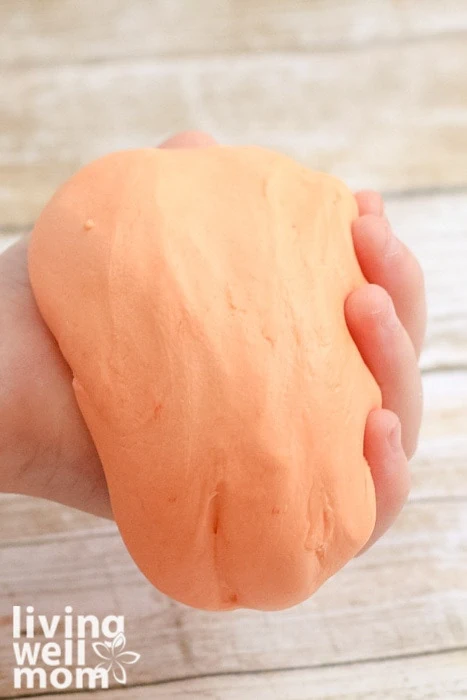
Due to the ingredients, the final texture of this silly putty will be similar to an oobleck rather than the traditional kind. The cornstarch keeps the putty from sticking to your fingers, but the texture will be a bit doughy rather than rubbery.
Ingredients
Here’s what you’ll need for this easy kid’s activity:
- 1 cup of cornstarch
- 1/2-1 cup clear gel-like soap
*
- Food coloring or gel colors
- A small bowl and spoon for mixing


*NOTE: Certain types of liquid soap will NOT work for this homemade silly putty recipe. Clear, gel-like soaps or soaps that have the consistency of hair gel or conditioner will work the best.
We used Method Gel Hand Soap for the silly putty in these photos, and I’ve also used Target brand strawberry shampoo with good results.
We also used gel food coloring and had no issues with dye sticking to our hands when the project was over.
Directions
Let’s get started – with only two ingredients, you know this is an easy kid’s craft.
Step 1
Dump your cornstarch and soap into your bowl and stir to mix it up.
Note: You may need to adjust the amount of soap used depending on the humidity of your room. It was dry in our house, so we used almost a full cup of soap. If you make it during the hot summer months, you may not need as much soap.
Step 2
If you want, add a couple of drops of food coloring.
Note: I recommend that you start out with a smaller amount and add a little more until you get the color you (or, more likely) your children want. Don’t add a ton of food color at first, or you may end up with stained hands.
You really only need a little bit of color to dye your DIY silly putty. The more coloring you add, the deeper your color will be and the greater the likelihood that it will stain hands.
Step 3
Mix the ingredients together with the spoon until it is too hard to mix, then use your fingers.
We found that we could mix using a spoon until our mixture turned into crumbles, and after that, we had to mix using our hands.
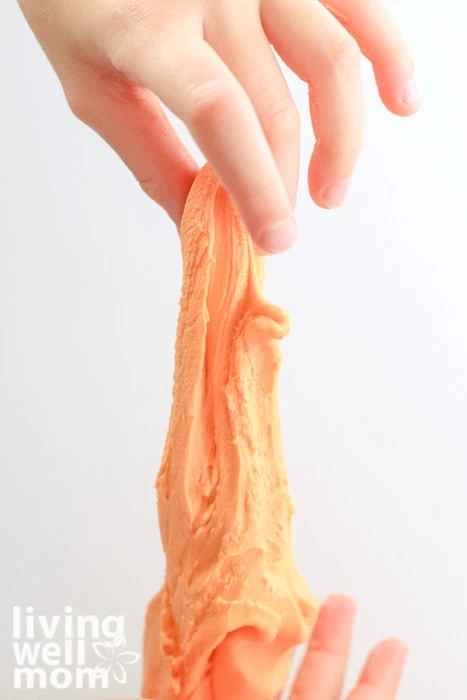
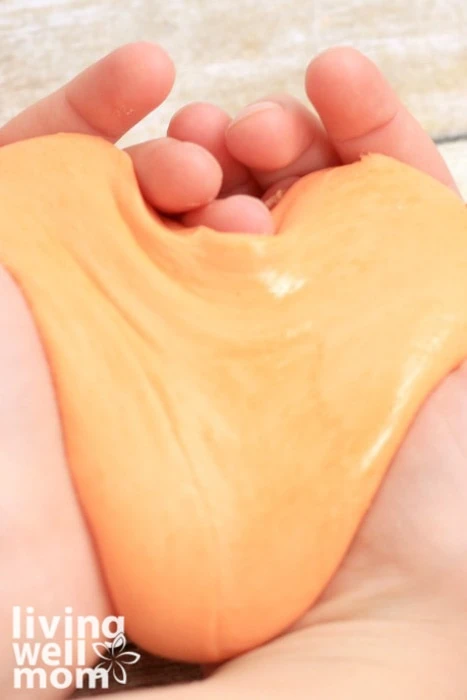
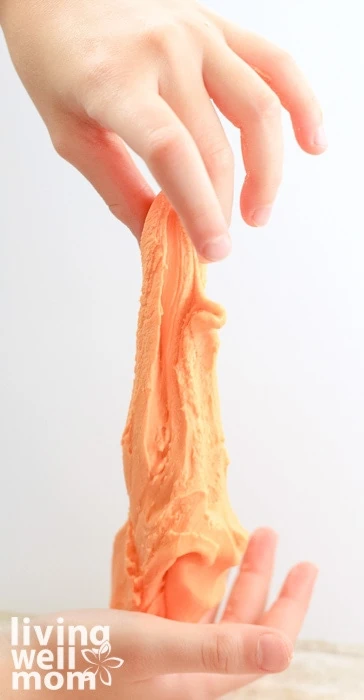
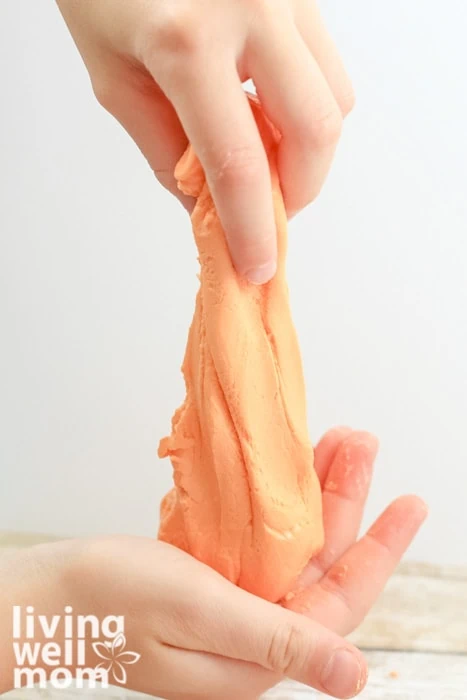
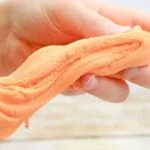
You’ll know your homemade putty is ready to go when it’s moldable and still a bit slimy, but it no longer sticks to your fingers!

Tips and Tricks
A few simple tweaks can make your homemade silly putty turn out perfectly every time. Here’s what I’ve learned after making this with my kids more times than I can count:
- Use clear, gel-like soap. The thicker the soap, the better your putty will hold together. Anything too thin or watery won’t form a stretchy, moldable texture.
- Adjust for humidity. Dry homes usually need more soap; humid days may need less. Add small amounts at a time until your putty slime feels smooth and stretchy.
- Start small with food coloring. A tiny drop goes a long way. Too much food dye can tint little hands—ask me how I know.
- Knead it well. Once the mixture gets crumbly, switch from a spoon to your hands. The warmth from your fingers helps it come together.
- Add a pump of soap if it dries out. This putty can lose moisture as kids play. A little extra soap brings it right back.
- Expect a doughy texture. This version is closer to an oobleck-style putty than classic store-bought silly putty—but still just as fun.
How to play with homemade silly putty
My girls were very excited about playing with it, and they fought over who got to play with it first. Eventually, I broke the silly putty into two pieces and let each of them have one!
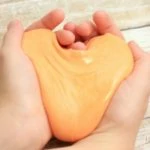
The girls were fascinated by how it kept its shape like playdough, but only for a little while. Within a few seconds, it would lose its shape and become a single blob.
Ours did start to dry out quickly. As it dried, it would become flaky. Adding another pump of soap to the putty moistened it up again and made it playable. You can keep adding soap until you are done playing for the day!
This DIY silly putty project is simple enough for older kids to make and quick enough to please little kids, too!
Troubleshooting your silly putty
If it’s too runny: Keep adding cornstarch one tablespoon at a time until your mixture stiffens.
If it’s too crumbly: Add a bit more soap until the putty can stretch again.
IMAGINATIVE FUN ↓
FAQs
Here are a few questions I often see readers ask about making their own DIY version.
What are the benefits of silly putty?
There are so many benefits to playing with this easy kid’s craft! First, it’s relatively mess-free, so you can let your kids spread it out, ball it up, stretch it out, and more without concern about ruining the carpet or the furniture.
It’s also portable and inexpensive, so you can take it anywhere (even on road trips)!
Further, the sensory input and motion of playing with putty can act as a stress reliever for kids who have anxiety. We call it stress putty in our house when we need to use it for stress relief.
It also makes a terrific kid’s craft that acts as a great rainy-day activity when needed!
How do you store DIY silly putty?
When you buy it, it comes in a container that you can use to store it, but when you make your own, you have to come up with a way to store it. The good news is that all you need is an airtight container or plastic bag to store your DIY silly putty. It doesn’t store long term super well, but can last a few days.
Are silly putty and therapy putty the same thing?
Essentially, yes. The main difference is the name and how you use it. If your kids use it mostly for entertainment and relaxation, it’s silly putty.
On the other hand, if they use it for various kinds of stress relief, strengthening, or anything else that’s similar, then it could reasonably be called therapy putty!
More Fun DIYs for Kids
- How To Make Homemade Bubbles
- How To Make 2 Ingredient Finger Paint
- Homemade Gak Recipe In Less Than 5 Minutes
- Simple Ingredient Puffy Paint
DIY Silly Putty
Ingredients
1 cup of cornstarch
1/2-1 cup clear liquid soap or conditioner – (Method hand soap works well
Food coloring or gel colors
A small bowl and spoon for mixing
Instructions
Add the cornstarch and 1/2 cup liquid soap (use the lesser amount to start with) into a medium-sized bowl and mix.
Add a couple drops of food coloring and mix. Add a little more color if desired (you shouldn’t need a lot.)
Mix the ingredients together with the spoon until it is too hard to mix, then use your fingers.
When your silly putty is moldable and a bit slimy, but no longer sticks to your fingers, it’s ready!
Notes
- Clear, gel-like soaps or soaps that have the consistency of hair gel or conditioner will work the best. We have used Method Gel Hand Soap and Target brand strawberry shampoo with good results.
- This putty will dry out as your children play with it. Add another pump or more of soap to it to bring it to the desired consistency.
- This silly putty doesn’t store well, but we’ve had some luck storing it for a couple of days in a sealed ziploc bag. Your results may vary, particularly depending upon the air humidity.

diane says
we made something similar with conditioner and it came out smelling heavenly. I bet your kids had fun with this!
Isabel says
So instead of using the dish soap you used conditioner?
Tylar says
Yes you could it would work just as well
Anne Osolinski says
how much conditioner would you use….I have a playgroup that I would like to try the recipe on and there are about
18 children……
Tylar says
You would use 1/2 a cup each batch
James says
Hi my name is James and this recipe is a huge mess . I had my daughter do this because she has adhd and so I thought is was a good idea and it wasn’t the recipe failed
Amanda says
Mine did too.. did you ever figure out what went wrong, or it’s just a bad recipe? My kids really want to make putty but they did not like this… in the picture their hands are clean but that was not my experience.
Crystal says
That sounds like fun! I appreciate the lack of Borax. I’ve never got any of that on hand, and prefer activities that don’t require special purchases.
Neil says
I am the same simple and easy that’s
How I think of thing and no money
Ready when i want it actually i mean the little ones
Izzy says
Borax is hard to work with
Madi says
Me to
Sarah says
Omg, this looks so fun! i want to try it with my kids, i bet they will love it.
Amber Edwards says
I have a special needs daughter who will love this! It is perfect for her sensory play! I love how easy it is to make!
Jennifer says
I used to play with silly putty all the time when I was a kid. I can’t think of any kid who wouldn’t love to help make this and then play with it.
codruta says
mine is very sticky to the fingers, I dont know why, i tried to put more cornstarch, then more dish soap
Brenda P says
Hi Codruta, The humidity of your room can make a HUGE difference in how sticky it is. I would suggest keeping adding corn starch a little at a time until it is the right consistency. You’ll know it’s right when it can form into a ball and feels just a bit dry to the touch.
Georgia Davies says
add about 2 tsp of cornstarch and 1tsp of dish soap it works then
Monica says
Can some one make my kids one I just can’t seem to do it right I tried like 6 times and. Omg nothing my kids were exited and then they started crying
Erika says
Hi Monica, I’m sorry you’re having issues with this activity. If you could tell us what’s happening, we might be able to better assist you. 🙂
mads says
my daughter tried this and it turned out like play-dough, i guess it kinda worked
Christa says
This recipe did not work for me at all. I used Dawn dish soap and cornstarch. When more dry, it left powdery clumps or just residue on my fingers. Adding more soap made it sticky. I gave up.
Brenda P says
Hi Christa,
We used a clear-blue hand soap for our experiment. Dawn soap might be too runny for this activity. At first, the putty will be quite sticky. At that point, we added a bit more cornstarch until it was just pliable enough to not stick to the fingers, but not so much that it dried out. Hope this helps!
izzy says
Can a earth dishsoap work we only have organic
Chloe Lamb says
hello I am not mother nor a frequent user of this site but i have discovered it in search of a recipe for silly putty. This recipe was outstanding and I was very pleased wit the outcome of my putty. although things did go as planned (such as a jeans mishap) everything is well now. God is good
Martha says
Can this be kept for use another day?
Erika says
Yes, you can store it in a ziploc baggie. 🙂
Reve shmaysani says
Can we do this with flour instead of cornstarch plz reply fast
Erika says
No, you need cornstarch. Flour is different and won’t have the same results.
Megan says
I used dawn dish soap and it did not turn out well at all. Has anyone tried with regular hand soap like dial and gotten good results?
Megan says
If you are using the blue dawn dish soap, let it settle a bit dusted in cornstarch if it is sticky. I did that thinking it wasn’t working, had to tend to my baby, and came back 5 minutes later. It had slowly let gravity form it a little more. I mixed it with my hands maybe 5 times and it started to form the putty just right.
Erika says
Thanks for sharing this great tip, Megan!
Deborah Armstrong says
Thanks for sharing this recipe for silly puddy. My youngest grandson is starting to ask about doing projects like this and I can’t wait until he comes for a visit so I can make this with him! Thanks again!!!
Madi says
Worked great I added sparkles to it and it looks great.A little sticky but a really good recipe
Lena says
Can I do it also with normaly food starch?
Super DIY!
Elle says
Anybody tried it with potato or tapioca starch? My daughter is allergic to corn
Sam says
Can you use cornflour instead of cornstarch or are they the same thing?
Erika says
Cornflour is very different and wouldn’t work – the texture is very different. If you have tapioca flour or arrowroot flour, one of those may work. I haven’t tried it however they both have similar textures to cornstarch. (Though cornstarch is cheaper to buy)
Tammy Dulaney says
This was an awesome experiment for the day! I had to add a little extra soap. I used Baby soap and the kids love it! Then we pinched off a tiny piece and washed our hands with it!!!? How long will this keep?
Kaylee says
OMG this is amazing
Chxris says
I haven’t tried it yet but judging by the comments it seems to be rlly fun and easy unlike the youtube video scams hopefully, crossing my fingers and hoping it works!
Erika says
Thank you!
Natalie says
I did the recipe as 2 parts hand soap and 1 part flour instead and it worked out well, just took a minute of messing with it and adding a tiny bit more flour. Probably not as slimy as with cornstarch, but still nice to fidget with.
Erika says
I’m glad it worked for you. I am planning to test some different versions to offer more options and will have to try that. Thanks, Natalie!
Melody says
This silly putty is so much fun! We followed the directions exactly and it turned out great for my kids. Thank you so much for the awesome tutorial!
Susan Dubose says
What a very good job for children! Thank you for the post!
Danielle says
This is a great idea! My toddler recently got play-do from her nana but after a short time it dried out and I have been looking for something similar to make from home! This way I know what’s in it and I can make small batches and not worry about it drying out!
Roxy D'melo says
My daughter loves making this together with me, thanks for the recipe!
Maria Kayke says
Its ok, the slime was a bit crumbly and not very stretchy, it was more like a dough