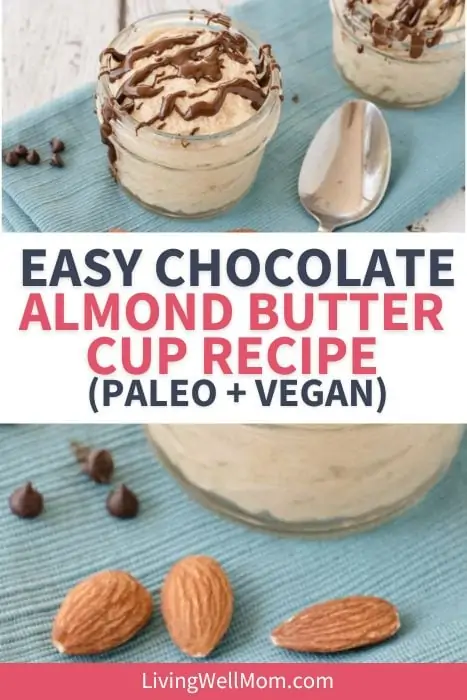
If you’ve been searching for the perfect almond butter cup recipe, you’ve officially found it!
These homemade almond butter cups deliver everything you want in a dessert: rich chocolate, a creamy almond butter filling, and just the right amount of sweetness. They’re also made with simple ingredients (no refined sugar or dairy needed!). While they taste indulgent, this recipe is surprisingly easy to make.
If you love the classic chocolate + nut butter combo, you’re going to love this version….as will your whole family!

Why You’ll Love This Almond Butter Cup Recipe
There are a lot of dessert recipes out there — but this almond butter cup recipe checks all the right boxes.
Here’s why it’s a favorite in our house:
- Made with simple, wholesome ingredients – No long ingredient lists or hard-to-pronounce additives. Just real, pantry staples you probably already have on hand.
- No refined sugar or dairy – Sweetened naturally with maple syrup and made with coconut milk instead of cream, this recipe skips the processed extras without sacrificing flavor.
- Rich chocolate + creamy almond butter – The filling is smooth and fluffy, and the dark chocolate topping adds the perfect contrast. It’s indulgent without feeling heavy.
- Comes together in minutes – No complicated steps or special equipment required. If you can stir and drizzle, you can make this.
- No baking required – This is a completely no-bake dessert, which makes it perfect for warm days or when you need something quick.
- Naturally gluten-free – Great for serving a crowd when you want a dessert that works for a variety of dietary needs.
In short, they taste like a treat you’d buy at a specialty dessert shop, but they’re easy enough to whip up on a weeknight. Win-win!
What Makes This Almond Butter Cup Recipe Different?
These aren’t firm, molded candy cups like the kind you’d unwrap from a package.
Instead, this almond butter cup recipe creates a soft, creamy dessert layered with chocolate on top — almost like a light almond butter mousse tucked into a jar.
The texture is:
- Fluffy and smooth
- Rich but not heavy
- Spoonable rather than firm
- Lightly sweet instead of overly sugary
Think of them as a homemade, no-bake twist on classic almond butter cups — just softer, fresher, and made with simple ingredients.
If you prefer a firmer, more candy-like texture, you can freeze them longer or use silicone molds to create layers of chocolate on the bottom and sides before adding the filling.
Either way, you still get that irresistible chocolate + almond butter combination — just in a slightly different (and honestly, more decadent) form.
Almond butter cups: An allergy-friendly treat
Especially because it’s paleo-friendly (dairy-free, gluten-free, and refined sugar-free, too), you can enjoy this dessert almost guilt-free.
This dessert isn’t low-calorie, but it has a lot fewer calories than typical peanut butter cup desserts, so that’s a win in my book!
Every once in a while, things fall together, and it just works. That’s what happened when I came up with this dessert. I don’t remember exactly what I was trying to make, but whatever it was failed.
So instead, I whipped up these tasty almond butter cups, and I couldn’t be more thrilled with how they turned out.
Ingredients
Here’s what you’ll need for this recipe. For the full recipe details, please see the printable recipe card at the bottom of this post.
- coconut milk, cream from the top only
- almond butter
- maple syrup
- vanilla extract
- chocolate chips, dairy-free & soy-free
How to make almond butter cups
With a base of coconut milk cream and almond butter, this light dessert takes just a few minutes to make. In fact, it’s so easy, that my 13-year-old often makes this for a Friday night treat.
My whole family loves this recipe, and I have no doubt yours will too.
Step 1
Skim the cream off the top of canned coconut milk (I highly recommend this brand because not all brands have thick cream). It should be thick and creamy, about 1/3-1/2 cup worth.

Step 2
Whip the coconut milk cream on low until it’s smooth and fluffy. Don’t overmix.
Step 3
Add the almond butter (1 tablespoon at a time) and continue mixing slowly. Slowly drizzle in the maple syrup and vanilla extract.
Step 4
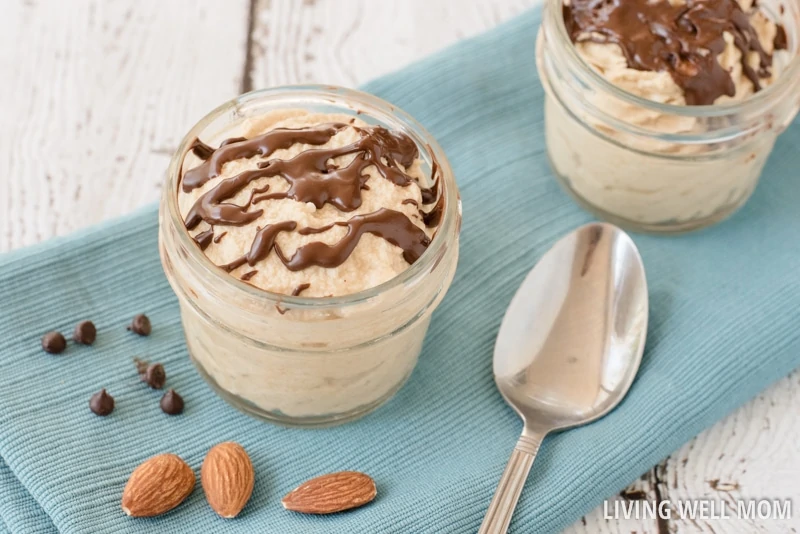
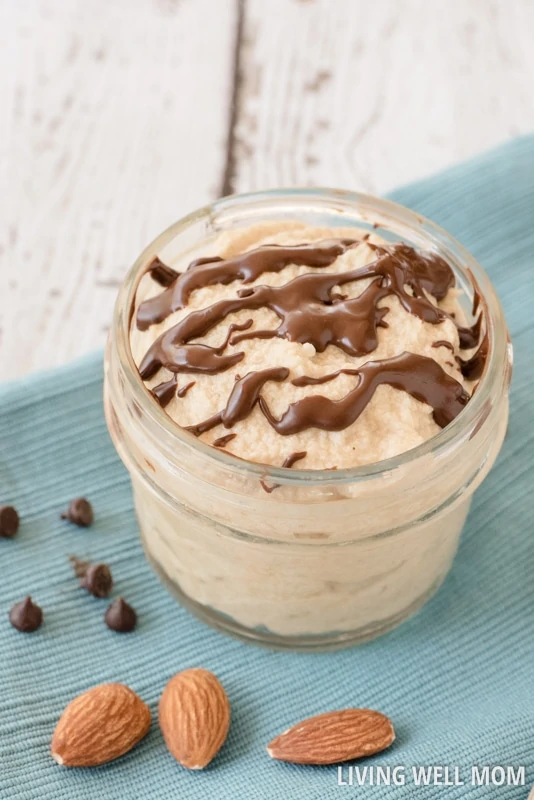
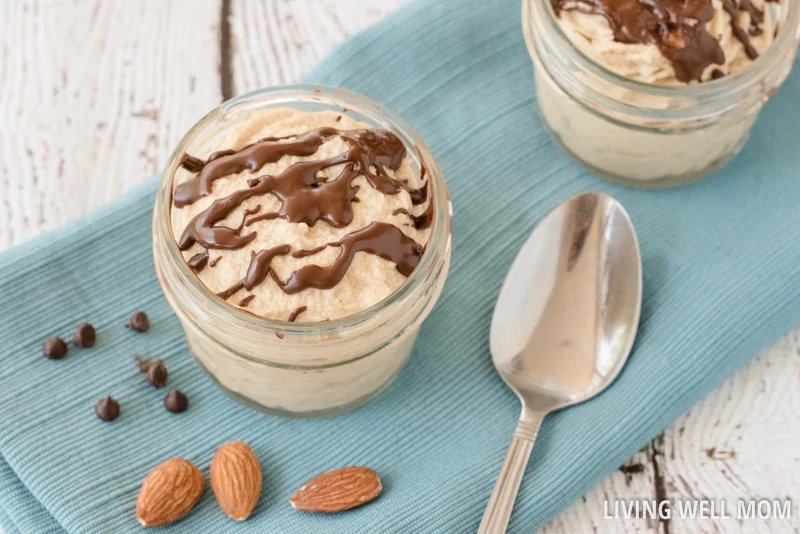
Spoon into little bowls or cups.
Step 5
Melt the dark chocolate chips in the microwave-safe bowl and drizzle the melted chocolate over the top of your almond butter cup dessert.
Sprinkle a dash of sea salt on top (optional, but highly recommended!), and dig into your almond butter cup dessert. Enjoy!
Variations
One of the best things about this almond butter cup recipe is how easy it is to customize. Try one of these simple twists:
- Make It with Peanut Butter – Substitute natural peanut butter for almond butter in a 1:1 ratio for a more classic peanut butter cup flavor while keeping the same creamy texture.
- Try a Different Nut Butter – Cashew butter creates an ultra-smooth, mild filling. Sunflower seed butter can work as a nut-free option, though the flavor will change slightly.
- Make It Keto-Friendly – Swap the maple syrup for a powdered or liquid low-carb sweetener and use sugar-free chocolate chips to reduce the carb count.
- Add Crunch – Stir in finely chopped almonds, cacao nibs, or mini dairy-free chocolate chips for a little texture contrast under the smooth chocolate topping.
- Add a Protein Boost – Mix in a tablespoon of collagen peptides or unflavored protein powder. If the mixture thickens too much, add a small splash of coconut milk.
- Create a More Traditional “Cup” Shape – Pour a thin layer of melted chocolate into silicone molds and chill until firm. Add the filling, then top with more chocolate and refrigerate until set.
Tips for the Best Almond Butter Cups
Because this almond butter cup recipe uses simple ingredients, a few small details make a big difference. Keep these tips in mind for the best texture and flavor.
1. Chill the Coconut Milk First
For thick, scoopable cream, refrigerate your canned coconut milk overnight. When chilled, the cream rises to the top and firms up, making it easy to separate from the liquid.
Remember…only use the thick cream layer for this recipe!
2. Choose the Right Almond Butter
Natural almond butter (just almonds and maybe salt) works best.
If your almond butter is very thick or dry, stir it well before measuring. If it’s overly oily, mix thoroughly so the texture is smooth and balanced.
3. Add Maple Syrup Slowly
Drizzling the maple syrup in gradually while mixing helps prevent separation.
Adding it too quickly can cause the mixture to loosen or break slightly.
4. Don’t Overmix
Whip the coconut cream until smooth and fluffy — but stop once everything is incorporated. Overmixing can cause the mixture to thin out.
5. Chill for a Firmer Texture
These are naturally soft and creamy. If you prefer a more structured, candy-like texture, refrigerate for at least 1–2 hours before serving.
For an even firmer result, freeze briefly before eating.
6. Use Good-Quality Chocolate
Since the chocolate layer is a big flavor component, choose a chocolate you truly enjoy. A darker chocolate balances the sweetness of the filling beautifully.

Homemade almond butter cups FAQs
Here are some questions that I frequently see readers ask about making this allergy-friendly dessert. If you don’t see your question answered below, please leave it in the comments!
Can I use peanut butter instead of almond butter?
Yes! Although I use almond butter instead of peanut butter, you can absolutely use peanut butter if you prefer. In fact, from time to time, I will make this dessert with natural (no sugar added) peanut butter.
Alternatively, you can also use cashew butter or any of your other favorite nut butters and probably nut-free seed butters too (although I haven’t tried using seed butter myself yet).
Would other sweeteners work instead of maple syrup?
If you need to substitute something else in place of the maple syrup for these almond butter cups, I recommend using agave. You can substitute it 1:1. Honey could work too if you prefer to use that.
Why does the coconut milk sometimes separate?
If the coconut milk separates a little while you’re making almond butter cups, don’t worry. Leave it as is because it will still taste DELICIOUS!
I’ve noticed this a couple of times, and it usually occurs for a couple of reasons:
- If the temperature is hot out, it’s more likely to happen.
- Adding maple syrup too quickly can cause separation.
How do I store leftovers of almond butter cups?
If you make these almond butter cups in small mason jars, you could just put the lid on top and store the leftovers in the fridge for up to 5 days. However, if you don’t serve them in small mason jars, use any other airtight containers that you can put in the fridge.
If you would like to make them ahead of time and freeze them, you can put them in an air-tight freezer-safe container and store them in the freezer for up to 3 months.
More allergy-friendly desserts
If you love this dessert recipe, I think you’ll love these other ideas too!
- Quick and Easy No-Bake Chocolate Peanut Butter Cookies
- Easy and Energizing Chocolate Protein Balls Recipe
- Easy Chocolate Peppermint Fat Bombs {Keto-Friendly}
- Guilt-Free Chocolate Mousse With Avocados
- Homemade Dairy Free Hot Chocolate Mix
Almond Butter Cup Dessert
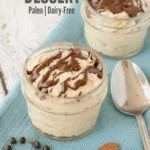
If you love peanut butter cups, you’re going to love this healthier Almond Butter Cup Dessert that takes just 5 minutes to whip up!
- Prep Time: 5 mins
- Total Time: 5 mins
- Yield: 2–4 servings 1x
Ingredients
- 1 can coconut milk, cream from the top only*
- 1/4 cup almond butter
- 1–3 Tbsp maple syrup (I use 1.5 Tbsp)
- 1/4 tsp vanilla extract
- 1/3 cup chocolate chips, dairy-free soy-free
Instructions
- Spoon the coconut milk cream from the top, leaving the liquid coconut milk. It should be thick and creamy, about 1/3-1/2 cup worth.
- Whip on low until smooth and fluffy. Don’t overmix.
- Add the almond butter, 1 tablespoon at a time while slowing mixing. Slowly drizzle in the maple syrup and vanilla extract.
- Spoon into small jars or bowls.
- Melt the chocolate chips and drizzle over the top of your almond butter cup dessert.
Notes
*In warmer weather, it’s best to refrigerate the canned coconut milk for at least several hours first.
Amber Edwards says
I just love paleo desserts! They have such a great flavor and yet I can feel good eating them! No Seriously, I literally feel good after eating them because of the natural ingredients…no upset tummy after eating a lot of chemicals in other processed foods! 🙂
These almond butter cups look amazing! I recently made paleo whipped cream with coconut milk and that was such a hit in our family. So I KNOW this one will be too!
Ann says
This sounds fantastic! I love the addition of the maple syrup. Tasty combination.
Ellen says
Oh my that looks good! It’s so hard to find Paleo desserts. Cannot wait to try it.
Scott says
Only 5 minutes! Ok, that seems way too easy. Going to have to give it a shot!
diane says
this looks delicious! I have been meaning to try whipped coconut cream. Looks tasty with almond butter whipped in!
Lindset says
If you skim the coconut cream from the top, what do you do with the rest of it? Is there a coconut cream product?
Marcy says
I use it for smoothies.
Nicole says
Can you use heavy cream if you don’t have coconut milk ?
Erika says
Yes, you can use heavy cream however you will need to whip it before adding it to the other ingredients and then gently fold it in. Enjoy!
Nina says
I made this today. Used cinnamon almond butter, came out GREAT!
Tomorrow Im going to add strawberries, and eventually I want to try it frozen!
Thanks for the recipe!
Angie McP says
Can you make this ahead of time and keep in the refrigerator?
Erika says
I have stored this overnight in the refrigerator but never longer. It might keep but I wouldn’t do it for more than 2-3 days.
Kirra says
I just made this and it is absolutely DELICIOUS. It is officially my favorite healthy recipe! Thank you so much for the recipe!
Margaret says
Do you use the skimmed cream or the liquid part?
Erika says
The cream part
Carolyn says
I don’t do any kind of sugar. What would you recommend in place of the maple syrup?
Erika says
You could try a monkfruit or stevia sweetener – you’d have to adjust quantities depending on what you choose to use. At least this recipe is easy so you can add a little, taste and see if you like it. Good luck!
Tara says
This was good and easy. Took me longer since I had put my coconut milk in the fridge to get the max “cream” at the tip- then it was too hard to make smooth. A little patience and it came together. Also I think the hot melted Choc made it a little runny so I put it in the fridge for a bit and it was perfect! I used Trader Joe’s coconut milk