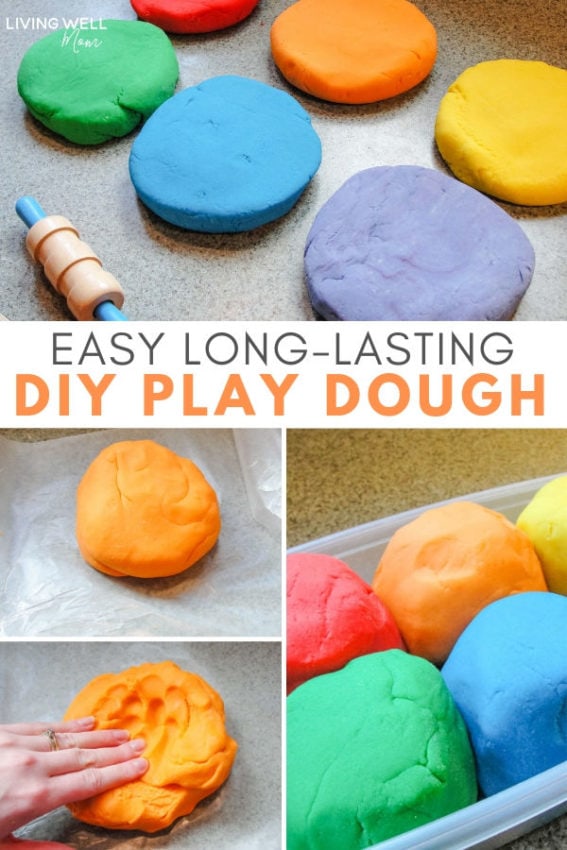
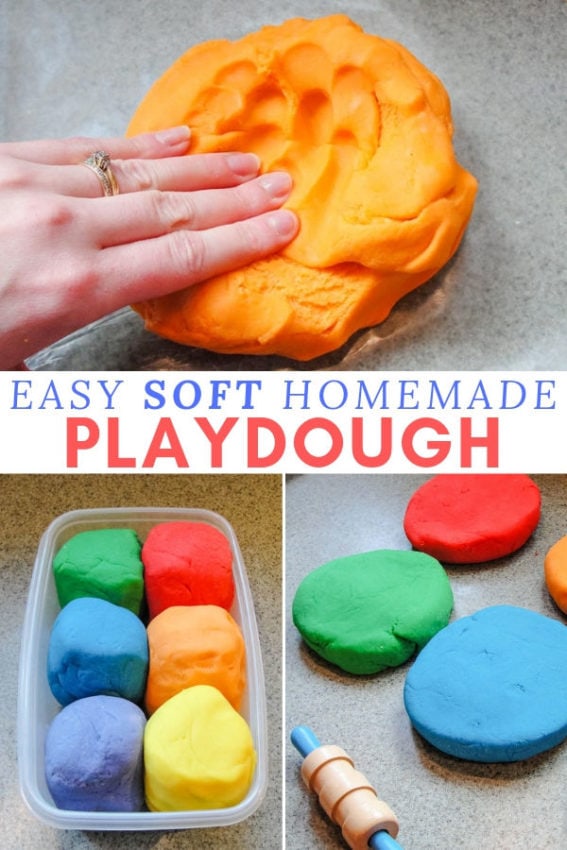
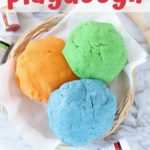
Looking for a fun and easy playdough recipe to make at home? This homemade playdough recipe is simple, affordable, and perfect for an activity with the kids. With just a few pantry staples, you can create soft, colorful dough that’s safe and lasts for weeks.
I’ve tried dozens of playdough recipes over the years with my four kids and I always come back to this one. This homemade playdough recipe is soft, lasts a LONG time, doesn’t stain little hands, and uses common ingredients you probably already have.
Plus it’s super quick and easy to make (you can make a batch in about 5 minutes) and much cheaper than buying ready made playdough.
And it’s just plain fun to have the kids help you make their very own playdough recipe!

This post has a lot of information so use this list to skip ahead for easy navigation:
- Why make your own play doh?
- How to make playdough
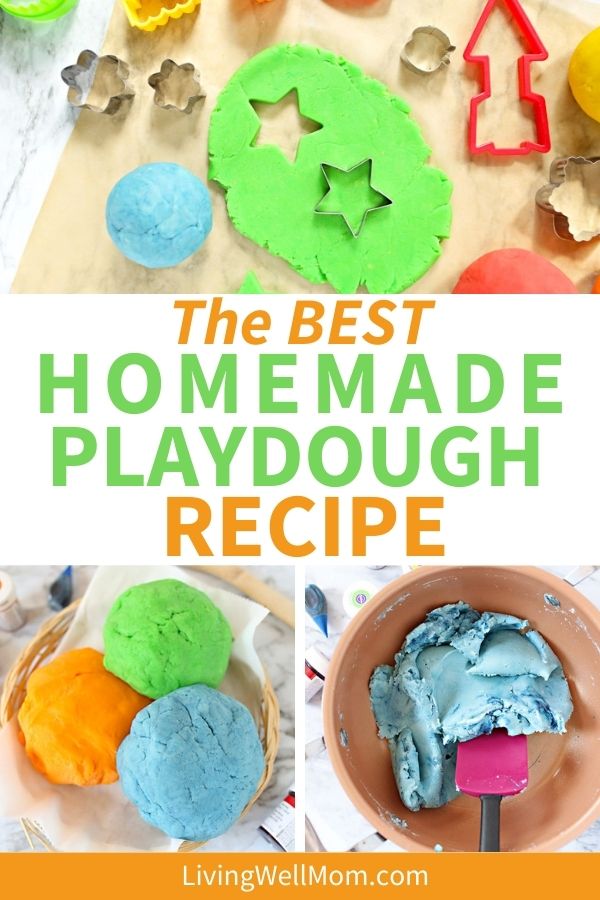
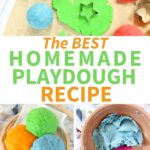
- What is the best playdough recipe?
- Can I make playdough without cream of tartar?
- What does cream of tartar do for playdough?
- How much playdough does this recipe make?
- How to store playdough
- How to make playdough soft again
- How do you fix sticky playdough?
- How do you get playdough out of carpet?
- How do you get playdough out of clothing?
- Does this recipe use boiling water?
- How do you make playdough more fun?
- Printable playdough recipe
I love doing fun things with my kids, but I don’t do DIY stuff as often as I’d like because of time and the mess. Honestly, I have enough messes to clean up as it is without purposefully adding to it!
Can any of you relate? We’d all love to be those fantastic crafty moms but the simple truth is most of us are just too tired and busy.
If that’s you – or even if you are an amazing crafty mom (my hat’s off to you!) – then this DIY playdough recipe is for you.
Homemade Playdough Video Tutorial
Why You Need to Make DIY play dough
- Long-lasting. This homemade playdough lasts for months when stored properly. In fact, we have a batch from well over a year ago that’s still going strong!
- Better texture. In my experience, this play dough recipe doesn’t crumble and make as big of a mess as the store bought “Play-Doh”.
- Inexpensive. Store bought playdough can get expensive especially if you have multiple kids as I do. This recipe costs about $5 give or take and you get a TON of playdough!
- Easy to store. Those containers are small and if your kids leave the lids off those tricky to snap on lids, it dries out. This homemade play dough is super easy to store. Just drop it in a zipped bag and it will last for months!
- Fun to make. If you have independent littles who are eager to “help” with all the things…this is a great way for them to jump in and make something!
- Non toxic. If you prefer knowing exactly what ingredients your children are playing with, this play dough is for you. The ingredients are simple, common household ingredients you probably already have around your house. Also, because this recipe is preserved with salt, it will taste very salty, meaning your children will probably have no desire to eat it.
By the way, if you are gluten-free, try my gluten-free playdough recipe. It’s awesome!

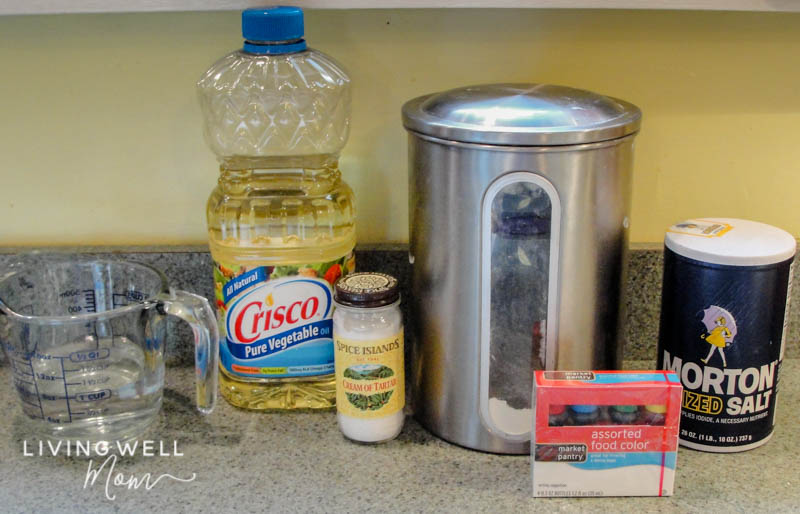
Playdough Ingredients
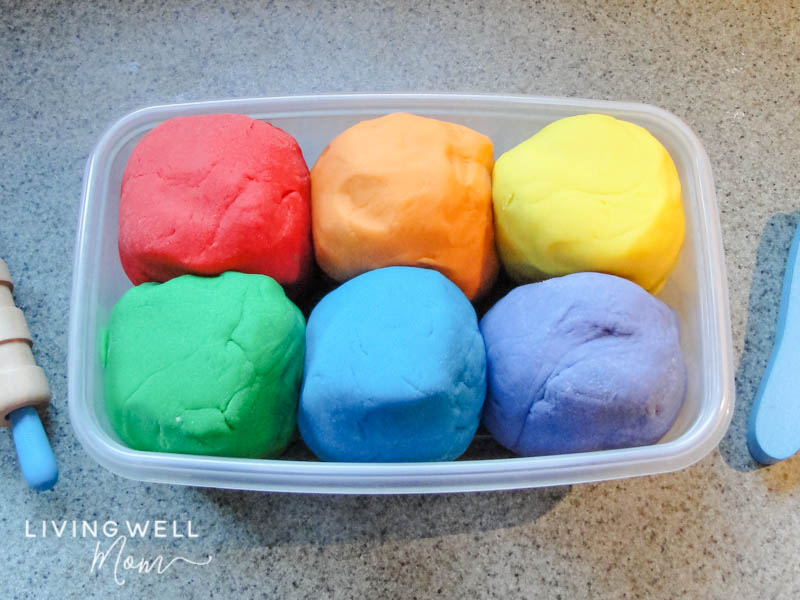
One batch of this homemade play dough makes a large amount, about equal to 2-3 storebought containers.
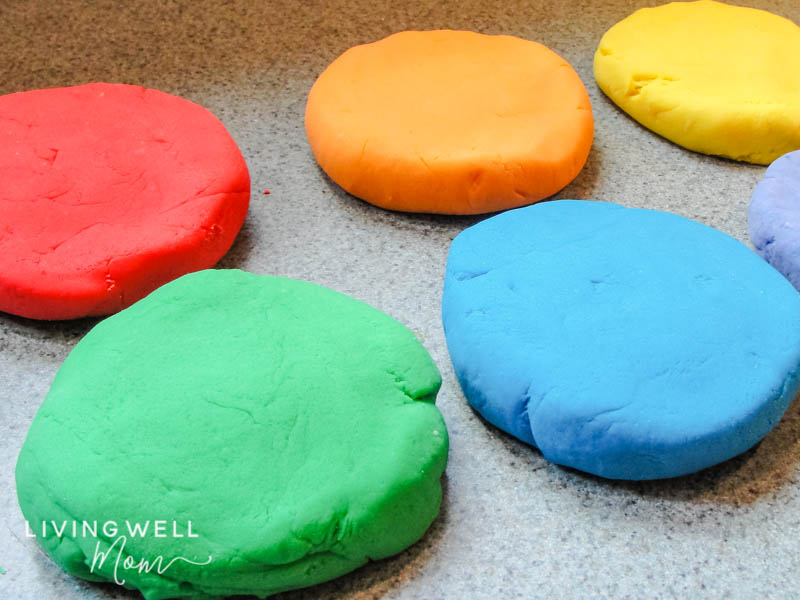
Tip: you might want to halve this playdough recipe if you want to use different colors. I made 6 batches of the full recipe because my four kids wanted multiple colors, plus it’s nice to have more dough to go around.
- all-purpose flour – the basic stuff is totally fine.
- water
- cream of tartar – I highly recommend buying a large container of cream of tartar, such as this one; it’s much cheaper than the tiny ones from the grocery store!
- cheap table salt
- vegetable or canola oil
- gel food coloring – I highly recommend using gel food coloring; not only does it last a LONG time (a little goes a long way), but you’ll need gel food coloring if you want the vibrant colors you see in this post.
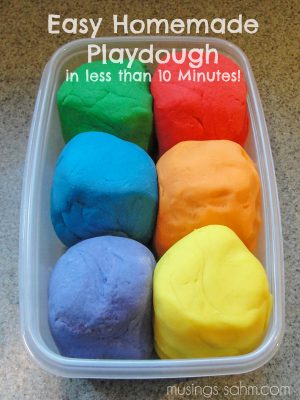
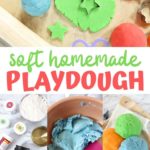
How to Make Playdough
This homemade playdough recipe is so quick and easy to make, you can make a full batch in less than 10 minutes and your kids will love playing with it for hours!
I often make 4-6 batches in just 30 minutes because once your pan is heated up, you can whip up batch after batch very quickly.
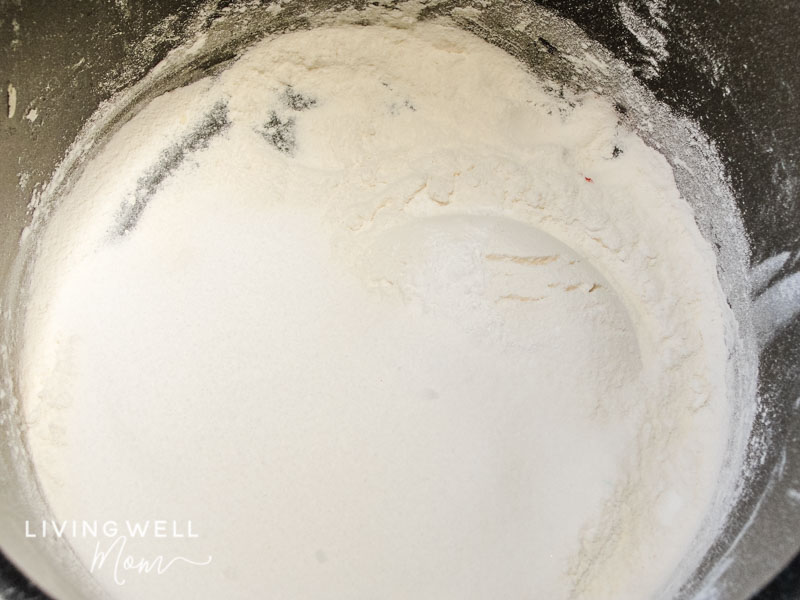
1. Add flour, cream of tartar, and salt to a saucepan
Add 1 cup of flour, 2 teaspoons cream of tartar, and 1/3 CUP of salt* to a 2-quart saucepan.
*Yes, that is 1/3 cup of salt. If you use 1/3 teaspoon or tablespoon, you’ll end up with very sticky play dough. The salt works to keep your homemade playdough from sticking and also helps preserve it, so you definitely want the full amount.
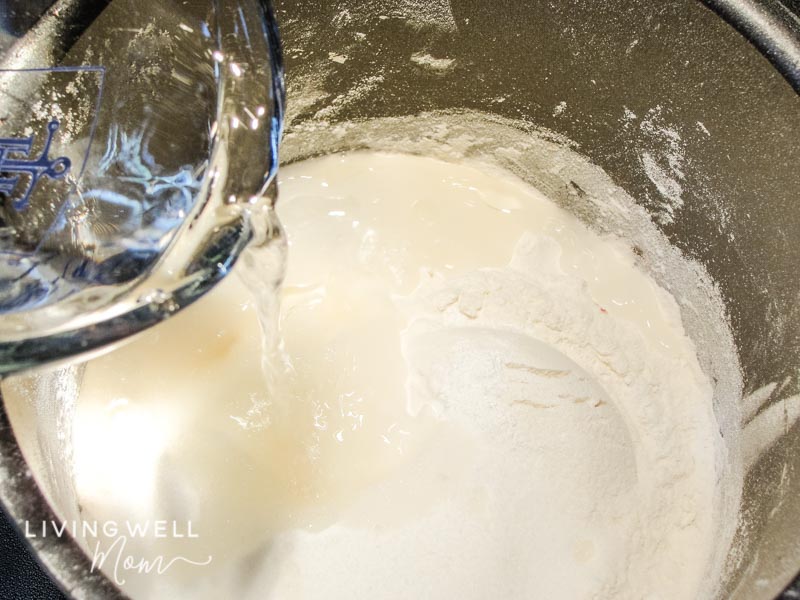
2. Add water, vegetable oil, and food coloring.
Add a few drops of food color to 1 cup of water, then stir into the flour mixture along with 1 Tablespoon vegetable oil.
Tip: I’ve adjusted the original recipe to include adding the food coloring in this step as it’s even easier to evenly blend the color into your playdough compared to waiting later. Thanks to the readers who suggested this! (This update is why the photo instructions aren’t colored yet.)
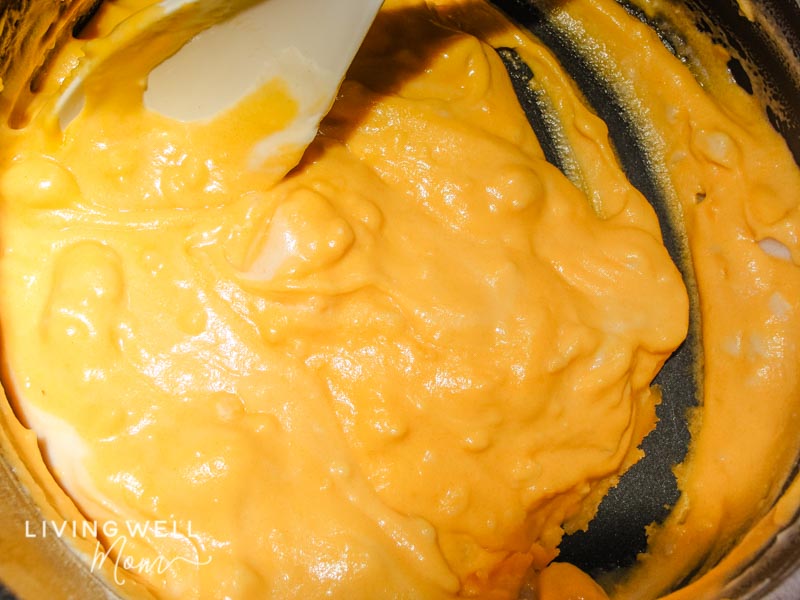
3. Cook and stir until your playdough starts to solidify.
Heat your burner to medium/low and stir.
It will be a little lumpy. That’s okay.
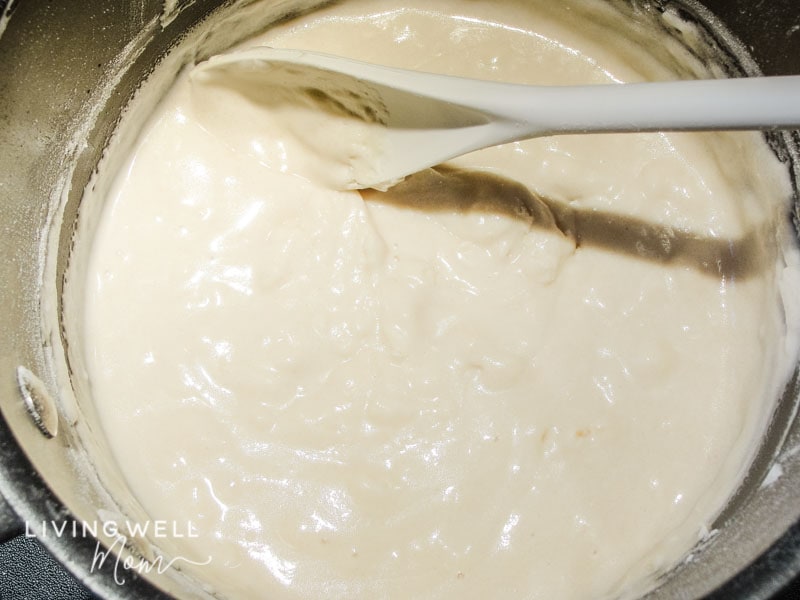
Keep stirring until it starts getting a little solid. If there are still a few lumps, that’s ok – you can work them out later.
If your stove is already hot or you have a gas stove, this will only take 20-30 seconds, but it may take 2-3 minutes if your electric stove is still heating up.
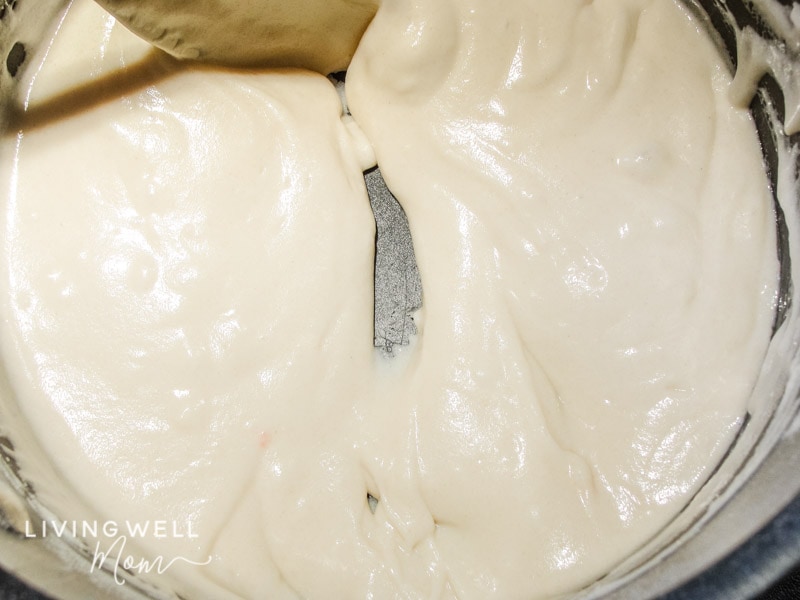
4. Keep stirring.
Keep stirring your play dough mixture.
As you can see, I USED to add the food coloring at this point – and you can too – however it IS easier to add it along with the water.
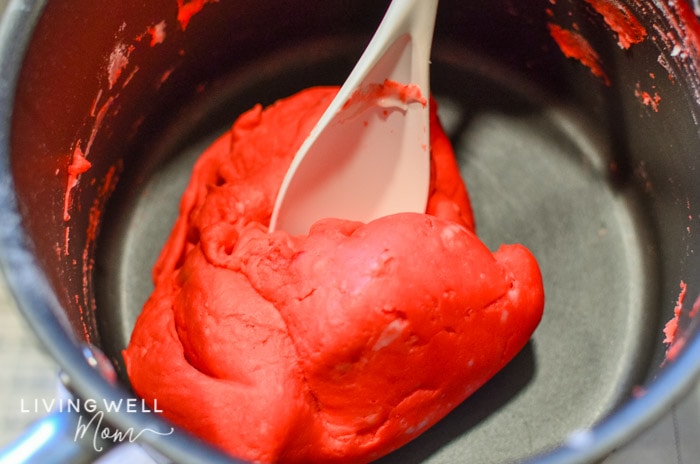
Now the dough will start becoming thicker and a little lumpy. Just keep stirring.
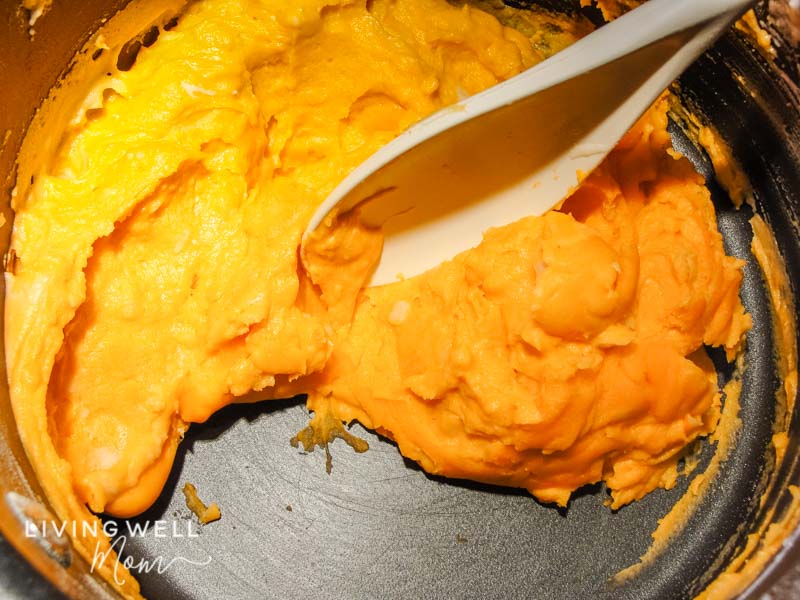
Once the dough starts gathering together around the spoon you know it’s done. This may be 20 seconds or 2 minutes; it depends on how hot your stove is.
My first batch of easy homemade play dough took a bit longer, but once we got going, it literally only took a few seconds and a total of 2 minutes from start to finish for each batch.
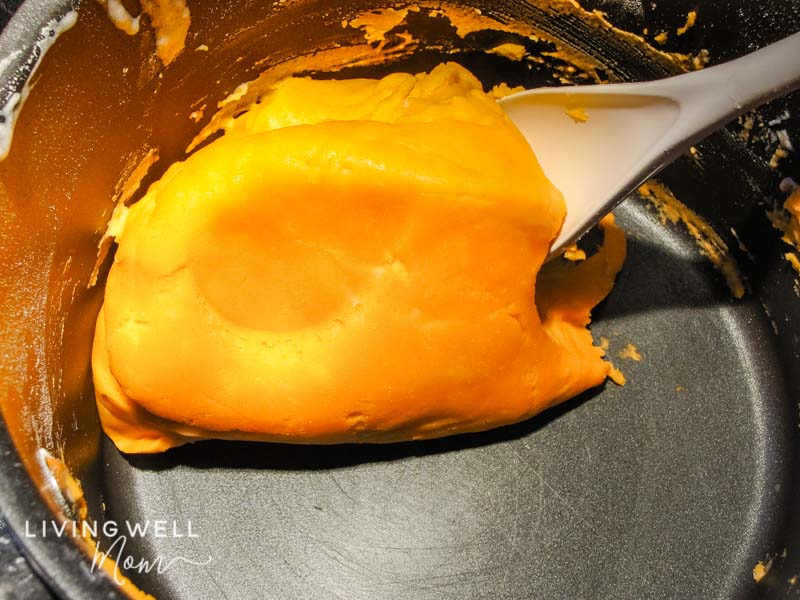
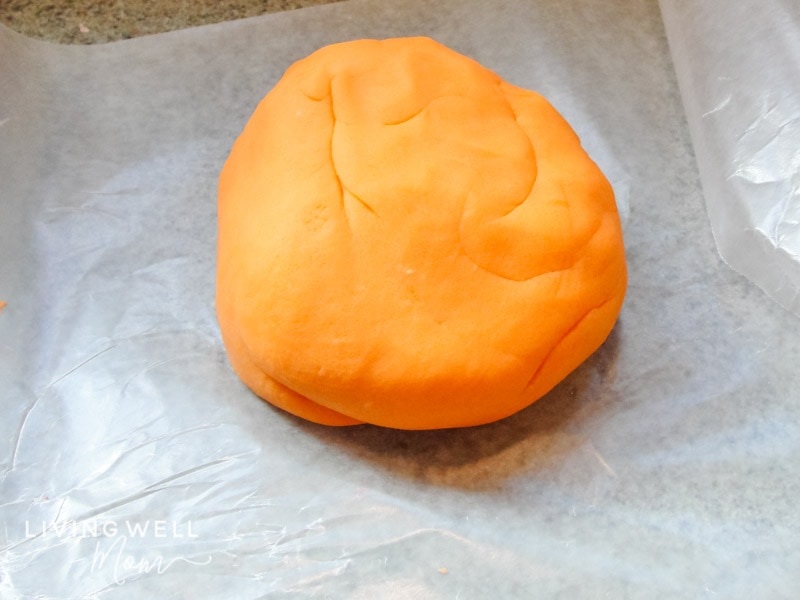
5. Remove from the saucepan and cool.
Remove your homemade playdough from the saucepan and put it on some waxed paper or a plate to cool.
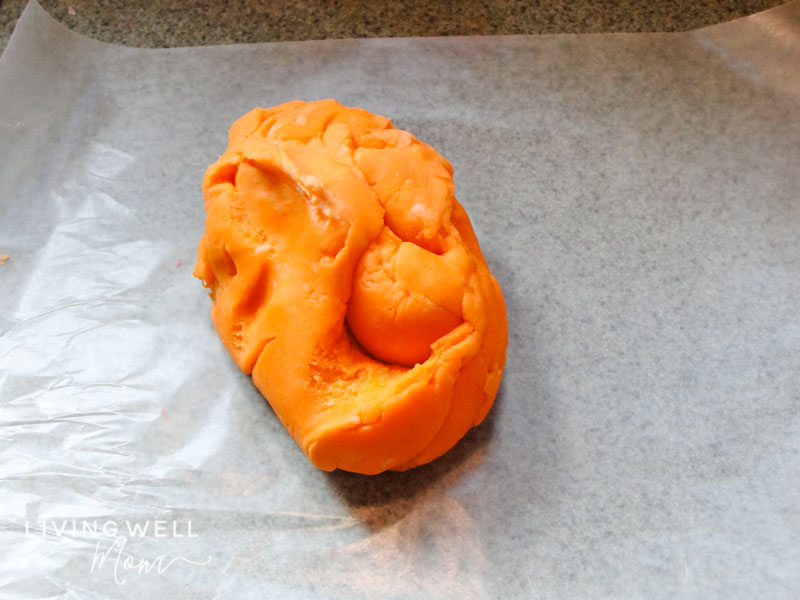
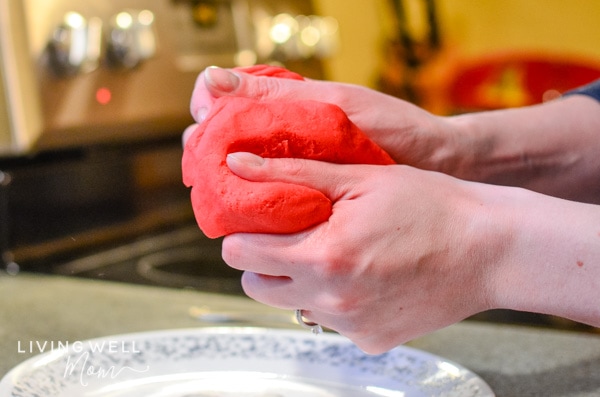
6. Squish and knead your doh to remove lumps
Once it’s cooled, I like to knead the play dough for a minute or two to get out any lumps and to get it to a better consistency. Then again it could just be my excuse to squish it myself before handing it over to the kids…it is kind of fun.
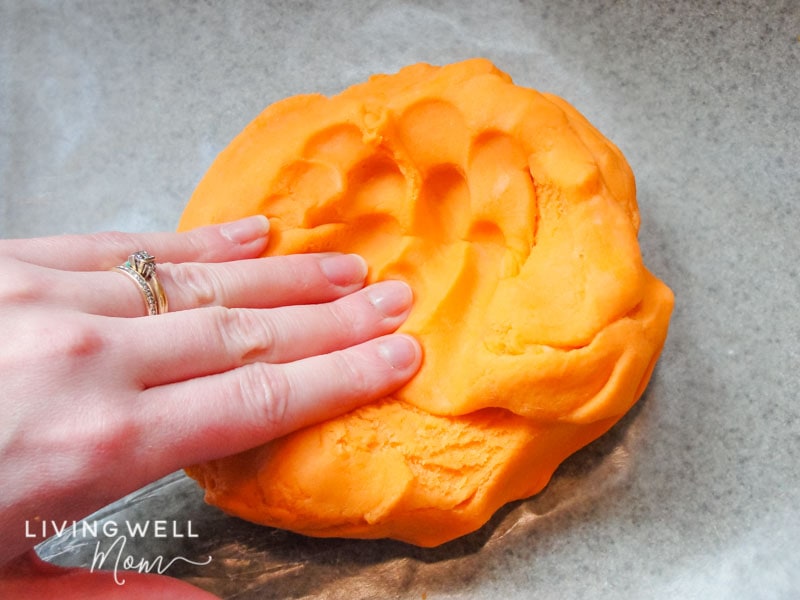
That’s it! You’ve made homemade playdough!
Don’t you want to just squish this soft playdough?!
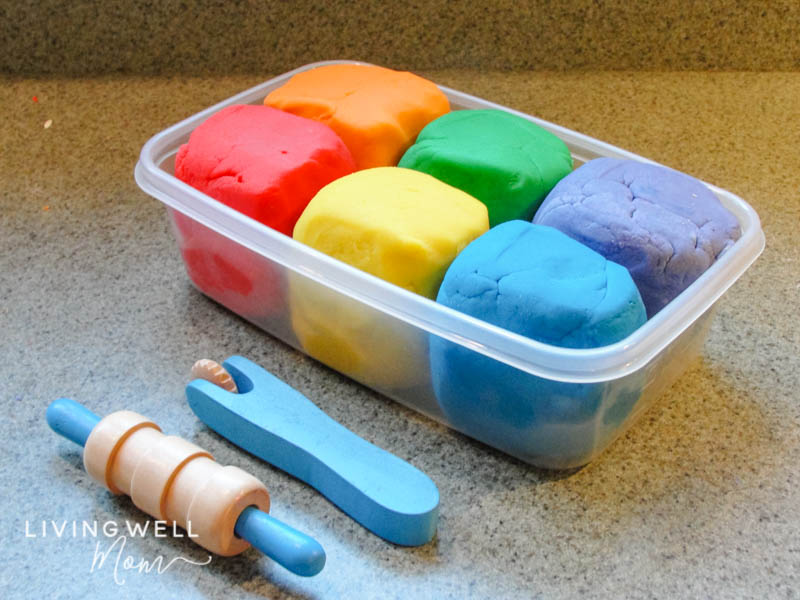
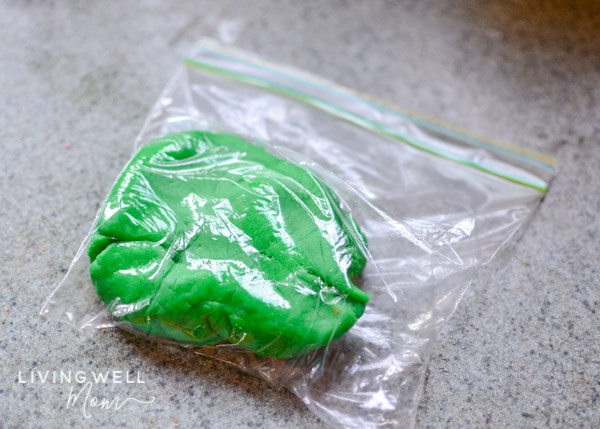
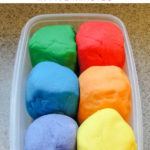
How to store play dough
In order for your playdough to last for a long time, I recommend storing it in a sealed ziploc bag. We use sandwich or quart bags.
Make sure your play dough is completely cool before you put it away. If it’s not, your playdough will become musty and even mold.
Common Playdough FAQs
What is the best playdough recipe?
It seems almost every blog has their own play dough recipe these days and it’s no surprise – homemade playdough is generally easy to make and so much fun! It’s a perfect DIY activity for kids.
How do you decide which play dough recipe is the BEST?
It comes down to consistently getting good results. Sure you can try variations. like no-cook, but does it last as long? Is it as soft? Is it low-mess as my soft homemade playdough recipe here?
Some may be, but in my experience of trying MANY different versions of DIY playdough, this one here in this post has consistently been the best. Other moms agree – I’ve received hundreds of emails from moms praising this recipe since I posted (and regularly update with tips and new info) this recipe a long time ago.
Can I make homemade playdough without cream of tartar?
A common question is: “do I have to use cream of tartar for making homemade playdough?”
The short answer is yes, you can make playdough without cream of tartar. However, it won’t be as good in my opinion. Cream of tartar is recommended for a reason.
This brings me to the next question…
What does cream of tartar do for playdough?
Cream of tartar does a couple of things to help your playdough.
- Cream of tartar helps make the playdough more elastic and stretchy. Best of all, it helps minimize crumbles and mess!
- Cream of tartar also helps act as a preservative, allowing your homemade play dough to last a LONG time without going bad
But I don’t have cream of tartar…
I thought this originally too, but trust me when I say that the cream of tartar is worth it.
Tip: it’s NOT worth it to buy those little bottles of cream of tartar from the baking section, like this:
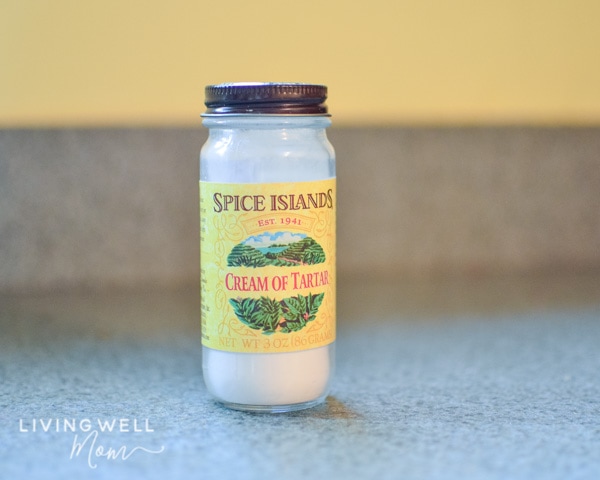
Instead, I recommend one of these larger, better value containers from Amazon. It will last a long time and allow your kids TONS of the best playdough batches!
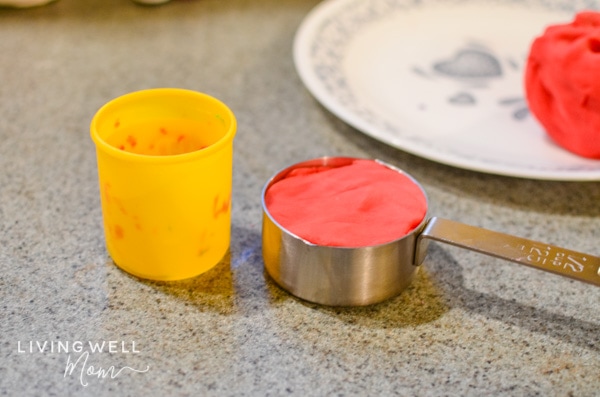
How much playdough does this recipe make?
One batch makes just under 2 cups. A standard size container of store-bought Play Doh holds approximately 1/2 cup.
One batch = about 4 containers of store playdough.
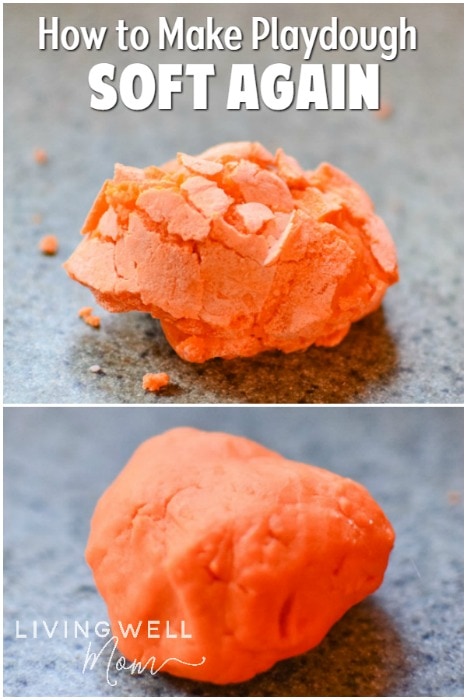
How to Make Playdough Soft Again
If your play dough is left out and becomes dry, you can often revive it with this simple little trick for fixing dry playdough.
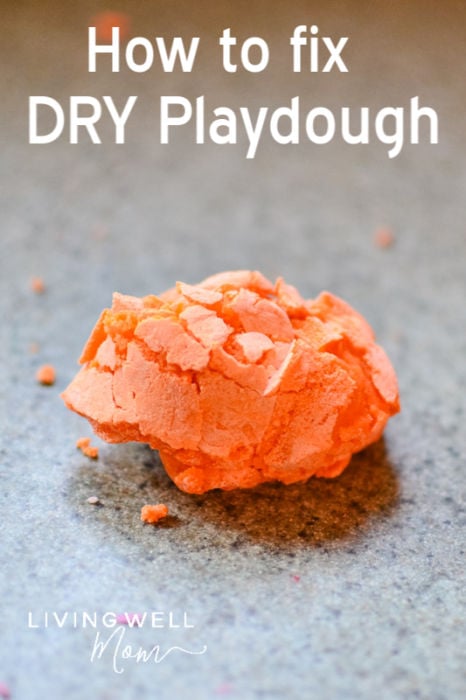
Work a little vegetable or canola oil into the playdough. The best way is to pour about a teaspoon of oil onto your hands, then work it in. Add a little more gradually as needed until the playdough is soft again.
Your playdough may not be quite as smooth and pliable as before, but this softening trick really does help.
Occasionally a chunk of playdough can’t be revived if it was left out for a really long time (good thing this recipe is SO quick and easy to make!)
How do you fix sticky playdough?
Using less flour or salt will result in sticky playdough. If you used the correct quantities in this recipe and your play dough is still sticky, it probably needs to cook a little longer.
Add it back to your pan and reheat for another 1-3 minutes until it is no longer sticky.
How do you get playdough out of carpet?
Messes happen inevitably with children. If your kids do get playdough in the carpet, luckily it’s not too difficult to remove it.
Here’s remove play dough from carpet:
- Allow the playdough to dry completely first. Do not try to clean it before it’s dry! This is very important!
- Pick out any bits you can by hand.
- Use a firm brush, like this one, to brush the carpet gently but firmly. This will help remove any stuck-in bits
- Vacuum
- If there is a stain left behind, use a carpet-safe stain remover, like Oxiclean (follow instructions and test in a small spot first)
How do you remove playdough from clothes?
In my experience, playdough does not get stuck on clothes too often (homemade slime is the worst culprit for that!) but if your child does manage to get it on clothing, try this:
- allow it to dry completely first.
- Use a firm brush, like this one or a clean toothbrush, to gently but firmly work the playdough out of the fabric
- Soak the clothing in COLD water with a small amount of dish soap for 20-30 minutes
- Put a little more dish soap on the area, then wash as you would normally
- The stain should be removed!
Can I substitute other oils in this recipe?
While I typically use vegetable oil (it’s cheaper and what I usually have on hand), my readers have claimed over and over that other oil varieties work just as well as vegetable oil. Some of those include canola oil, coconut oil, olive oil, even baby oil! If you’ve tried it, let me know!
Does this play dough recipe use boiling water?
Nope.
There may be some varieties that do, but this recipe does not involve boiling water. I’ve had comments from people saying that boiling water makes it faster, etc. That may be true, but this variety works well without it.
It’s also safer when you have small children around. Of course, your pan will still get hot so you’ll still need to be careful.
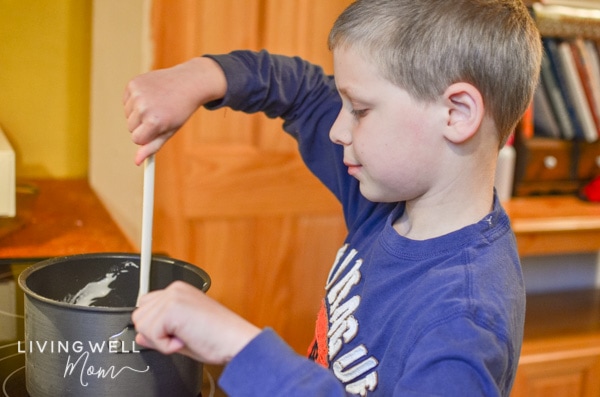
My 9 and 6 year olds often help make a batch of homemade playdough. They’ve gotten quite good at stirring. In fact, even when the playdough is at it’s hottest, you can still touch it. I usually dump a batch onto a plate and knead it to get the color worked in straight off the burner. It’s very warm (my kids don’t want to touch it at that point) but it doesn’t burn us.

What type of pan should I use?
I’ve made this recipe using nonstick and regular stainless steel pans. It is MUCH faster, easier, and cleaner to use a nonstick pan. The playdough will stick to regular pans, making it more difficult to stir together and also require you to stop and clean it out between every batch.
I got rid of my nonstick pans a couple years ago. I wish I had kept just one solely for making playdough. Now I’m keeping an eye out in thrift stores for a cheap one just for this purpose.
Tips if you do NOT have a nonstick pan: add a little oil to the bottom of the pan. You may also need to work an additional 1/2 tablespoon oil into the playdough once it’s fully cooked because the non-nonstick pans tend to dry it out more.
Will the food coloring stain my child’s hands?
As long as you mix it up well before you give it to them, there is no staining. That’s even if you use Gel Paste Food Color![]() which results in bright, vivid colors.
which results in bright, vivid colors.
I highly recommend Americolor by the way – it’s well worth the money because you will use it for so many things – from many batches of playdough to cupcakes and more. It’s my favorite food color ever.
Tip: this food gel brand is cheaper and appears to work well too. I have not tested it personally (my Americolor has lasted for years!) but it’s worth checking out.
Here you can see, I just finished kneading a fresh warm batch of bright red playdough and there is no color on my hands at all:
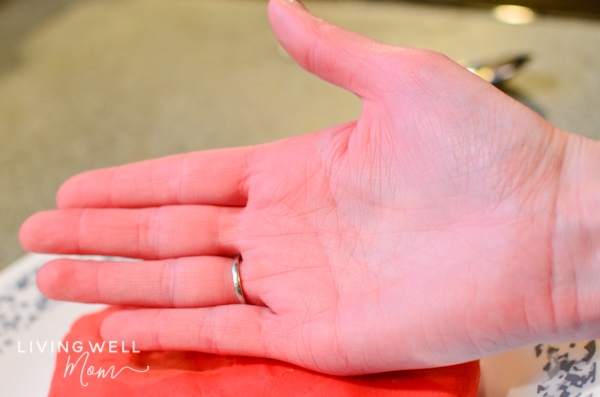
The one caveat? I have not tried black food coloring, so no promises there! And of course, you have to use a reasonable amount of food coloring – if you try using an entire bottle of Americolor food gel? You’d have to let me know how that one turns out.
Playdough Activities to Try
Kids love play dough and will often spend hours with it. But sometimes they can get bored and you might be looking for some fun play dough add-ons for more fun and direction.
For a fun play dough variation, try this scented playdough with essential oils. It’s great for relaxing sensory play for kids with autism or ADHD. It’s also great as a calming activity for any kids.
Try a holiday twist with one of these fun options:
Printable playdough mats can help kids learn while they’re playing:
- Cupcake themed play dough mats
- apple tree playdough mats
- free playdough shape mats
SIGN UP HERE – your FREE mats will download immediately after confirmation:
Pin the image below to save the recipe for later.
Easy Homemade Playdough

Less-crumbly, less-junk, and more fun, this homemade playdough recipe can be made in less than 10 minutes!
- Prep Time: 5 minutes
- Cook Time: 5 minutes
- Total Time: 10 minutes
- Yield: 3 containers 1x
- Category: kids activity
- Method: kids activity
- Cuisine: kids activity
Ingredients
- 1 cup all-purpose flour
- 1 cup water
- 2 teaspoons cream of tartar
- 1/3 cup salt
- 1 tablespoon vegetable oil
- food coloring
Instructions
- Mix together all the ingredients in a 2-quart saucepan.
- Cook over low/medium heat, stirring.
- Continue stirring until the mixture is thickened and begins to gather around the spoon.
- Remove the dough onto wax paper or a plate to cool.
Notes
Cool completely before storing in a ziplock bag or sealed container.
Copyright © Living Well Mom. All content and images are copyright protected. Please do not use my images without prior permission. If you would like to republish this recipe, please re-write the recipe in your own words or you may link back to this post for the recipe.


aurie says
Love this – especially the bright colors. At the rate we are going through PlayDough this might be a great option for us 🙂
Tyas says
Thank you for the recipe 🙂
I tried the recipe couple times. At first i use the exact quantities and the result was very sticky. Then second, i tried to reduce the cream of tartar to 1 teaspoon and oil to 1/2 tablespoon, at first the result was okay but after i stored it in a tight plastic container for a few days it became very sticky.
I already cook it in the pan even longer..but it just sticks all over the spatula and the pan until it burns.
What should i do? Should i add more salt or something?
Fyi, i live in tropical country with very high humidity. Maybe that is the reason?
And how long does your playdough last before it gets rotten? Because this is from flour so it will get rotten somehow right.
Can we keep it in the fridge so it will last longer?
I will be very glad and thankful if you can answer my questions. Thank you soooo muchhh 🙂
Erika says
Hi Tyas, if the playdough is too sticky and you’ve cooked it longer, you probably need more salt in the recipe. It is possible that the high humidity is contributing to this. I have never stored playdough in the fridge. Once it’s cooled, we simply store it in a ziploc bag and it lasts for months.
Ruth says
I had the same issue. Took at least 20 minutes or more of stirring to get it to be the right consistency, but still feels damp after cooling down. 🙁 I followed the recipe exactly. All I can think of is the humidity must be higher here than where you are.
Katy says
Mine was a bit sticky, so when I turned it out of the pot I lightly dusted it with flour and kneaded it as best I could without burning my hands. It turned out perfectly.
mandy says
I tried so many tipes of play dough recipes this is ausome!!!!!!!!!!!!!!
aliza adam says
good answer
Laura B says
Love this for the yellow we did, however we used Wilton Black, and my hands are hot pink now wondering if there’s a way to prevent this from turning the kids hands colorful too, I may try to refrigerate unless someone else knows any tricks?
Erika says
You might try wearing disposable gloves when mixing in the black color. Once it’s mixed in and cooled, it shouldn’t bleed onto fingers.
Lily says
Pro tip
My mom used to make homemade play dough all the time for me and she said that it is easier to mix the food coloring and water together and then add the way
Tiffany Cruz says
I’m so making this. I’ve had cream of tartar in my cabinet forever and have never used it. I don’t even know why it’s there. I think it’s from my husbands house before we got married. When we combined our items after moving in together I magically had it.
I love the bright bold colors. What food coloring did you use. I like that each color is in the same hue family. Very cohesive.
Jessica Jaworski says
Can we make play dough without heating it
Erika says
This recipe does require heat. It’s quick and easy! 🙂
momto8blog says
this is such a fun idea!! we made this and the kids would create all sorts of things!! it lasts a long time if stored in an air tight container too. great recipe for fun!
Deb says
Thank you for the recipe. Very easy to make, I made 3 different colours yesterday with my little ones (they are 4 and 17 months) and they loved helping preparing and playing with it. The only thing that I would do differently would be making only one colour at a time because after 10 minutes of them playing it all became one thing 😂
Erika says
I’m so glad your family loved this! My kids used to love blending playdough colors together into one icky looking greenish-purpleish blob too!
Angela Wells says
I love this idea. I teach pre k and am always looking for new recipes. Can you tell me if the food coloring stains the kids’ hands. Had that happen once before! I sent 16 kids home with BLUE hands!! They looked like smurfs!
Ashley says
I JUST MADE SOME (4/28/12) AND I USED GEL FOOD COLORING AND IT HASN’T STAINED ANYTHING…. =)
Andrea says
I have tried so many playdough recipes before and this is hands down the best I have ever came across! Thank you so much!! Very quick and easy to do and virtually mess free!! Can’t beat that!!
kymi a says
your recipe looks awesome the color is so vibrant, I’ve made this before with the kids but it didn’t look like this. Great job and I can’t wait to do it right this time lol…thank you for sharing.
Christina M says
I made some yesterday and used Wilton Red gel to color it….my red isn’t nearly this bright though 🙁 Any secret to getting it so vibrant? Or is it just the difference in food coloring brands?
Erika says
I think it’s the different food coloring brands. I can get bright colors with Wilton but I have to use a LOT more. I get much more vivid colors with AmeriColor with less too.
Rita Spratlen says
This is wonderful!! Great way to make your own! I wish I knew this when my kids were little. I will have to do this for my grandson soon. Great instructions and find!!!
Rebecca says
I am so excited to make this for my four kids! I have always hated the way the store bought kind smells so this looks like it will be a great alternative. I do have one question, is the food coloring nut free? I have one (maybe 2) little one with a nut allergy and the Wilton food coloring is made in a facility that processes peanuts and tree nuts but I can’t find an ingredient list online for the americolor ones.
Kay says
Great recipe. I never let my kids play with playdough because it made such a mess, but grandkids are a different story. I made one batch in hot pink and my 4-yr-old and 2-yr-old granddaughters have been playing with it for an hour.
Dottie says
You can also,use kool-aide instead of food coloring…
It makes it smell good..
Cate says
You can usually find cream of tartar in the bulk food section of many stores. If you are anywhere near a WinCo grocery, they have wonderful prices in their bulk foods.
Marcy says
use coconut oil and it will smell so yummy!
connie says
i have made this for years. great recipe. in the old days, it was used as a wallpaper cleaner!
lynn says
My mom used to make this for us and I remembered the ingredients but not the proportions. Thanks to your recipe my 2.5 year old is in toxin free playdough heaven. I read that the brand name dough is made in China and completely unregulated. With kids putting that stuff in their mouths I can’t imagine how are they get away with it but I’m not buying any for my child.
mary says
i made this for my kids who are now 27, 26, and 23. 🙂 i had and still have arthritis in my hands and i can still remember making this and plunging my knuckles down in it. the warm, clinging ball of fun and goodness was also therapeutic… 🙂
Rachel says
If you use boiling water you can skip the cooking entirely. Adding the color on that step is what makes the color so vibrant. We made this 2 times a year, 6 batches at a time for 3 classes at our preschool. Skipping the cooking part makes it move really fast
Becky Abel says
Use 2 pks of unsweetened KoolAid instead of the food coloring and double the cream of tartar. The KoolAid powder makes an intense color and a wonderful smell. That’s how we made it when my kids were small.
Holly says
This recipe is amazing! I’m 22 college student (so obviously, a ton of cleaning is NOT my idea of fun) so this was perfect to make with my 7 year old sister! I loved it just as much as she did! LOL Thanks 🙂
Torie h says
You can make play dough from Kool aid packages and that recipe is without cream of tartar. If you google Koolaid play dough recipe you will find it. And it smells amazing!
Erika says
You can definitely add scents – I’ve done that before! You usually only need just a drop or two anyways so it wouldn’t bother the consistency.
Erika says
I’ve used peppermint extract. I think extracts are probably the best way to go, but you could try essential oils too. It’s easy to experiment with this recipe.
CForbes says
I loved making this with my son. I used canola oil as I didn’t have veg oil and it turned out perfect 🙂
Izzy says
How did you get yours so bright? I used almost half a container of blue food coloring and its still such a pale robins egg blue.
Sarah L says
I like the bright colors and that it’s non-toxic. Thanks for the info.
Danielle says
I believe the cream of tartar helps keep the dough from getting moldy and stinky.
Jennifer B. says
Love this for the yellow we did, however we used Wilton Black, and my hands are hot pink now…..hmmm wondering if there’s a way to prevent this from turning the kids hands pink too, I may try to refrigeration unless someone else knows any tricks.
Erika says
Yikes, hot pink hands! I don’t know if I’d be brave enough to try black myself. For the other colors, I only got a little on my hands while mixing it, but it washed off pretty easily.
Aundreya says
I’ve been making this for years and have always preferred using boiling water. Goes much faster and doesn’t leave a pot to wash. (make sure it’s boiling-not just hot….if it’s not hot enough you’ll just have a sticky mess) I’ve added scents like peppermint and vanilla, also have added cinnamon. The cinnamon makes it smell great and gives it a cool texture-plus it makes it a pretty natural color if you don’t have anything to color it with.
I’ve used food coloring and even paint to color my playdough. If whatever you are using does happen to make the playdough a little sticky, just add some flour and it will be perfect!
The S.O.S. Mom says
Always wanted to make homemade play dough! My son is still too little to play with it, but in due time… I will keep this recipe close by so when the time comes, I’ll be ready! 😉 Thanks again Erika for another awesome post! Your website is just fantastic!
judy gardner says
i used to have this recipe and lost it – thanks so much for posting! it is very easy to make, and with all of the pretty food colorings out there now it looks really pretty!
Lindsay says
I just made a batch with my daughter and so far so good! I saw lots of people commented about cream of tartar- it is an acid, so that is probably why lemon juice could possibly be used as a substitute. Just the chemist in me thinking here… Anyway, thank for the recipe!!!
Kelby says
Best. Play. Dough. Recipe. EVER!
Chrissy says
Just made three batches, super easy. Perfect rainy-day activity for my little girls. Thank you for posting!
Erika says
Getting ready to make this recipe and realized I didnt have any cream of tartar. Did a little research and found a substitute:
white wine vinegar or lemon juice in 3 times the ratio to the cream of tartar requirement.
Brenna G says
Thank you so much for posting. Just made a huge batch for my son and his friends. Love this recipe!
Katie says
You can actually uses vinegar instead of cream of tartar. same amount just mix it with some extra flour first to take away the wetness. I wish I would have known about this secret in my preschool teaching days…. spent plenty of money on cream of tartar back then…. vinegar Works awesome and way cheaper. Also in a pinch i used some evoo i had instead of veggie oil… still worked fine. !
Lynn M. says
I just made this for my 9,7&5 yo siblings, they are in love! Great Saturday project! 🙂
I used canola oil and it worked well! I used vinegar in the place of the tartar. Also I didn’t have food coloring so I took out 1 tablespoon of water and added one tablespoon of lime juice when I was supposed to add the food coloring. It kind of smells like a salt and vinegar chip as the 9yo pointed out.
Mud Hut Mama says
Thank you so much for this! I have tried so many recipes and nothing has worked for me. First day it’s ok and then turns to a sticky mess. I made this on Wednesday – it was quick and easy and is still going strong. I can’t buy play doh where we live and it is a favorite with my girls. So happy I came across this post.
Karla Kish DeLoma says
I love this recipe! I put my food coloring in with all the other ingredients and that seemed to work well for me….even if the playdough gets left out for hours or overnight, it’s still moist! So much better than buying it and my toddler prefers “Mommy’s playdough” over the store bought kind. Plus, it’s easier for her to work with and goes through the Playdoh Plump easier….Thank you so much for this recipe; I made 7 batches of 7 different colors and gave half of each batch to a friend!
Nancy says
This is great! I have three little ones, and I never buy playdough b/c it is so expensive and it gets thrown away once the colors get all mixed up. So glad its edible, EASY, and a great way to use up the cream of tartar that just sits in my cupboard! Thanks!
Eileen says
I have made a variation of this a lot in the past, but not for a few years. I think your colors are WAY more vibrant than mine ever were. I do love the consistency. The only thing is, how do we get that Playdoh smell in ours…LOL. Something about the smell of Playdoh that takes me back to when the kids were really tiny. Maybe that’s why I like it so much.:)
A great project to let kids help with. And have older sibs do for their little sibs. Also a great project for babysitters to do with their kids (parent approved of course)…my 12 year old would love to make this!
Kara says
Thanks for the recipe, I work at a daycare and the kids love this stuff! I actually didnt have enough cream of tarter for my second batch and to be honest in my opinion it came out just fine 🙂
Kacey says
Thank you for the recipe! I used canola oil without even checking it first, and my play dough turned out great. I also used soap dyes instead of food coloring (simply because that’s what I had), and that worked, too.
Sharon Taylor says
The Cream of tartar holds the color in. More fun than food color, try adding a package of unsweetened Kool Aide instead, adds color and scent.
Pam says
I check the price today at the grocery store. Alum and Cream of Tartar cost exactly the same. However, you will get quite a few batches of this playdough from one little jar making it very cost effective considering that “real” Play Dough can cost $3.00 for 4 small containers. This is, by far, the best recipe I’ve ever tried (and I’ve tried MANY)!
Ashley says
When I first saw how much a tiny container of cream of tartar was I felt the same way. Since then I have found it @ Target. Their brand is around $2 for a container twice the size of most stores. Not sure if you live near a Target or not. Hope this helps!
Emily says
I bought some Cream of Tarter at a health foods store, they sell spices by the oz and it was 15 cents an oz (much cheaper than anywhere else I looked). You can always call the store before you go too.
Camille says
This just happened to me, too. I actually put the dough back in the pot and cooked it longer. It’s cooling now and re-cooking it seemed to help. For the next batch I’m going to turn the heat up because I cooked this for at least 20 minutes and I’m afraid it’s still sticky.
marissa says
do you know how long it takes for it to dry out? i need a lot of playdough for a school project but i need it to harden. also do you know if i cracks when it drys or if it holds its shape?
Erika says
I’m not sure Marissa. It seems to last awhile. My kids have left this out overnight and it’s barely hardened at all.
Erika says
No, I would not use it for fondant. There’s no sugar and it’s wayyy too salty. I don’t think it would roll out as smooth or stay in place as you would need it too. Technically, it is edible, but it wouldn’t taste good.
Jenna says
This playdough looks amazing, I really like the color of it. I will definately give this a go with my children! 🙂
chrissie says
I just wanted to say thanks for posting this! I found it via pintrest. I had success with adding some cheap gel food coloring even after I finished the dough. I made a yellow and my son and I decided to see if we could make green. So I just tore off a handful and squeezed on some green gel food coloring. I did add it while it was still pretty warm so don’t let your kids do that part but my 10 and 7 year olds are in the other room having a blast with the new playdough!! Thanks again for sharing!
Erika says
Demi, some others have commented that they’ve used vinegar successfully. I have not, so I can’t attest to how well it works. But you could read through some of their ideas and try that.
Thanks for stopping by!
JoAnna says
I used vinegar this morning and it turned out great! The only thing was, it was just a little sticky at first, but as it cooled it was the perfect texture. My kids(6 and 2) played for about 1 hr and a half with it with all the play dough accessories we have.
Erika says
Roo, I would try working some more salt into it and see if that helps. If you make another batch, I would try 1/2 cup instead of 1/3 cup of salt. I’ve never had that happen before, but that would be my best advice. Good luck! And thanks so much for stopping by and commenting!
Cindy says
how many drops / how much food coloring do you use in each batch to get the rich colors in the picture?
Amanda says
I thought the same thing, but I just made up 3 batches and I would guess I maybe used about 1/3 of the jar. That’s not too bad if you consider you will probably be able to make up a good 10 batches at 30 cents per batch. One batch is equal to about 3 potsof playdough. And it lasts a very long time – much better than the real stuff. Plus, can’t beat the customization options 🙂 I just put glitter and just used coconut oil in mine it smells divine! And the consistency seems much smoother than the batches I put veg oil into.
Samantha says
I don’t have any vegetable oil and was thinking about using coconut oil too. Bridge, my guess is just substitute it for the same amount of vegetable oil.
My kids used to go to montessori school and our first assignment was to make a batch of this playdough with our child and bring it back to school to be used in the classroom. It was fun because it stocked the classroom with playdough but it also got us in the kitchen with our kids and it showed us that we could do this at home too. The teacher used to freeze most of the playdough we brought so she could just bring out a fresh batch when their center needed refreshing. So I thought I’d let everyone know that it evidently freezes well.
Ana says
Centuries ago, the recipe was just flour, same quantity of water and oil, lot of salt and food coloring. Monosodium glutamate was the preserving element. Yes, we ate it when we shaped cookies, pasta, ice cream palettes, so on. Any day, after learning how to mix colors to get new ones, a classmate mixed the play dough to get new a color play dough. It did not work of all. She ended up with marble play dough!
Thanks a lot for posting this easy to do recipe. The children would appreciate it a lot, specially during the winter days when there is not much outdoor activities.
Janelle says
I made this today!! AWESOME AWESOME AWESOME!!! I made it as directed and then added a corresponding koolaid and the same color glitter for smell and sparkle!!!! Even my older kids loved it!! THANK YOU!
Sue says
Hi there,
My daughter and I just made two batches of this and it came out pretty good. 🙂 Like you said, I didn’t realize that it was going to cook up so quickly, so the color of our first batch didn’t get thoroughly mixed in, but we were ready the second time. We have one “issue” and that is when we began playing with it, it got kind of sticky and stuck to my daughter’s hands. I thought I had read somewhere in here that you said the salt helped keep it from getting sticky, but when I went back to re-read that, I couldn’t find it. Any suggestions on the stickiness? More salt or what…? Thanks!
Erika says
I would add more salt – try 1/8-1/4 cup. You could also try cooking it a little longer the next time. As you make more, you’ll get a feel for what works the best. Hope that helps! 🙂
Alisonjane says
Hi Erika,
My mum used to make playdough for us as kids this same way however there was one difference. She always made the dough without any colour first. She would take it off the stove when it was ‘cooked’ and let it cool a little. Then she separated it into smaller batches, poked her finger in and dropped the food colouring in then. It was then our job to knead the dough so the colour spreads evenly. It was really fun but also made us a part of the cooking process too. Just thought I’d add this.
🙂 Alisonjane
Erika says
Thanks Alisonjane! I love that! I didn’t do that with my kiddos because the food coloring I use is really vibrant and I didn’t want it to get all over them. But if you have older kids that won’t touch everything, that’s a great idea.
Thanks for sharing!
Jessica says
Found this recipe on Pinterest and made it with the kids just now. We found that if we added the dry ingredients and the oil first then the food colouring and then the water that we got much better colours. We made pink, blue, purple, green and yellow. I’d have made more but kids just wanted to start playing! This will be my ‘go to’ recipe for playdates and passed it onto my little boy’s playschool teacher too!
Lyndsay says
I just used baby oil instead of vegetable and it worked great and smells good!\
cathy stech says
I use the ..same recipe, BUT kill 2 birds with one stone… try using a “kool aid” packet for coloring and the added bonus of a great fruity smell to the playdough also!
Katie says
I love this! I just made some last night and I 4 batches was enough to fill 20 baby food jars which I am using in my daughters 1st birthday treat tubs.
Jenn says
I just made this and mine came out a bit sticky… What do you think I might have done wrong?
Erika says
Jenn, my suggestion would be to cook it a little longer. That happened to me once when I hurried the process a little too much.
Maria says
@ Erika, this is brilliant.
Thanks a lot.
I am experiencing problem to let my toddler playing with playdough as she keeps put everything to her mouth. Guess this will be a surprise for my husband when he saw our girl playing with dough and eat them! LOL!
Sammie says
This recipe was fantastic! I found it on Pinterest. I’ve never made play dough before, and this was SO easy! I made 6 batches in less than 30 minutes with no mistakes. Thanks for the great tutorial. I saved about $15 by making my own versus buying the same equivalent. The cream of tartar (small container) was exactly enough to do 6 batches. I am giving out individual containers as favors for my daughters birthday party. Thanks for sharing! =)
Kate says
Hi there 🙂 Just wanted to let you know that I have just made 3 batches using olive oil because we don’t have veg oil in the house. It came out brilliantly. Thanks for the great recipe 🙂
Flora says
Thank you for this recipe for Playdough! This is so much less toxic than the stuff that can be bought from the store.
kate loeb says
Fantastic!!!! It was better color however to add 10-20 drops of food coloring to the water before you stir it in. Way easier to mix that way.
Olivia says
Just a thought for storage, if you have a baby food eating age child and use the square plastic containers you could wash and reuse those to keep the dough instead of ziplock bags and they would stack easier in a play bin or on a shelf.
Keleigh says
Thank you for posting this! I found it on pinterest and made 6 batches today! It didn’t stick to the pan or ruin it like some comments suggested… I’m excited to see the kids at the preschool play with it and if the teachers can tell that it’s not actual Play-doh.
Maggie says
Just wanted to say thanks for this recipe and lovely pictures to go with it. I’ve tried a few variations on this recipe but yours is my favorite. Some of the other ones were too dang salty and left my hands all dry and grody after playing with it. This recipe has the BEST consistency. Love it.
Katlin says
I didn’t use cream of tarter & i didn’t cook it. Mine came out perfect. I accidentally put a lot of olive oil but I made up for it with flour.
pam d says
I’ve read in some homemade play dough recipes that you need to store it in the fridge or it will go bad. Does this need to be refrigerated, or can it be kept at room temp?
Erika says
I’ve never stored it in the fridge and have never had an issue. 🙂
Laurie says
Thank you so much! This recipe worked great!!
Dawn says
Wow! This looks so simple and easy! Thanks for sharing!
Vicky says
Going to make homemade playdough for the first time and this looks to be the best out there. I’m wondering, can you use kosher salt in this recipe?
Phoenix says
I made my first batch last night. I used canola oil because I didn’t have any vegetable oil. It seems to work just fine. I’ll have to try it with veg oil when I have some and compare them.
I have a feeling I’ll be making this a lot, so I think I need to keep track of the combinations of the food colours, otherwise I’ll never be able to make the same shade twice!
Nicole says
We’ve been using this same recipe (except in our recipe we sub Kool-Aid for the food coloring) in our Sunday school classes for 10 years or more. Then I started using it at home when our oldest was ready for play-dough. I have found that storing it in store bought frosting containers keeps it freshest the longest. About half of the recipe fits in one normal size frosting container. Just take off the wrapper and write on the outside with a colored sharpie what color is on the inside.
Laurel says
My husband found this and sent it to me! Today is our oldest boys 4th Bday, and since its rainy out, I decided on a cool project, so now we made some playdough and my two boys are in all their glory playing with it! Thank you for this, SOOOO simple to make, and very easily fixed if mess up the coloring, you know only speaking from my first batch;) Have a good weekend!
Susan Hiebert says
I was wondering, does this recipe feels greasy after a while? I made a different one that also used vegetable oil and it didn’t feel to bad but after a month or so of being played with and stored in a ziploc bag it felt super greasy and the kids didn’t want to play with it anymore.
Erika says
I have never noticed it feeling greasy. This recipe, with the amount of salt used, helps prevent that from happening.
Erika says
Honestly, I have no idea. But it’s so easy to make, you could try a batch just to see. I’d love it if you let me know how it turns out too! 🙂
alexis says
this is soo cool my mom wouldn’t make it………………..
Jamie says
Does the playdough stain at all?
Erika says
Not in my experience. I’m sure someone would find a way to make it stain if they used an excessive amount of food coloring, but if you use a normal amount, nope, no issues at all. 🙂
Shari Lynne says
Great Recipe Erika..just to let you and your readers know..Canola Oil works great!
Blessings!
Laura says
Just made this and it worked great! Thanks!!!
Valerie Charles says
I’ve been using this method of making playdough for several years and I love it too! I didn’t know about the food coloring you use though. That looks great! I’ll have to try it. You can use any kind of oil, including baby oil. That makes the play dough smell good!
Valerie says
I go to a grocery store that has a pretty extensive bulk foods section. When you buy spices and such in bulk, you can usually get them for alot cheaper. Just save an empty container of cream of tartar and refill it with the stuff from buying in bulk.
Holly says
I loved that this was so fast and easy and there was virtually no clean up. The dough came clean away from the pot I used. I mixed my colors in after the dough came together. I divided one batch into four balls and made each a different color. I can’t Imagine buying play dough again because the consistency of this is perfect. I used the Americolor gels too and they blended easily with this method and are nice and bright. I have made it twice in the last week because my kids want more colors. They like to make pictures on cookie sheets using the dough to make every element of their art.
Amber says
thanks for the recipe. I can’t wait to try this out!
I didn’t read all of the comments, but for those worried about the price of cream of tarter another great use for it polishing silver. You mix it with lemon juice and then just use a cloth. It’s something that I learned in elementary school. It makes it worth it to purchase a large content of it if you can find it.
Grandma says
When I had my own pre-school, and later when I worked in day-care centres, we always made our own play-dough and this is the recipe we used. Because it isn’t commercially made and contains no artificial preservatives, we always threw it out after one month and made new stuff. Bacteria from little hands grows quickly…
Amber says
I just made this and it was so easy my 3 year old helped me! He and his little brother love it! Thanks.for sharing I just might put these in cute little containers for my neices and nephews for Christmas!
crissy says
Great recipe. Just made some with my daughters. I tried to make some previously with another recipe and it didn’t turn out well. Thanks for posting this!
Masha says
Since everything is eatable I was thinking about putting it on cakes. It sounds easier to make than fondant. Would it be the same if I would put sugar instead of salt? Or salt is there with a reason? Thank you! 🙂
Erika says
I wouldn’t recommend it. There are recipes for fondant while this recipe is for playdough. I don’t think the consistency would be right if you substituted sugar for the salt, etc. I would just stick with a fondant recipe. I’ve made marshmallow fondant and it’s pretty easy and yummy too.
Annette says
I agree this is a great recipe. I have used it for years. My twist is, instead of food coloring is one pkg of unsweetened KoolAid! Not only does it color, not maybe as bright, but it makes the playdough smell great.
Ann says
Regarding cream of tartar. Snickerdoodle cookies require cream of tartar. It’s what gives it a unique taste that regular sugar cookies do not have.
I used to stress over the cost of gift wrap tape that my grandson would over use. Yet, I had to admit it is actually a cheap and educational ‘toy.’
Same with cream of tartar. Get some at whatever price and use it for crafts or fun tasty food.
Rachel says
Thank you for the recipe, it worked great!
shiri says
If I wanted to make this for my kids for Christmas, would it hold up til then or should I wait until it gets closer to that time?
Erika says
Ours has lasted well over months, but if you wanted to be sure if was perfectly nice, I would wait until closer to Christmas. It really depends on how you store it. I am actually making a batch of “Christmas” playdough now and will be posting that later this week. 🙂
Holly says
May I add that in our church/preschool we make a lot of homemade playdough, and one tip we discovered was to add unsweetened kool-aid mix to the ingredients. Adds some color & great smell! When it wears off you know it is time for a new batch.
Love your site!
Nicole says
I really love this recipe! I did it on my small front burner on 3 and it worked out in less than five minutes it seemed. I did the food coloring after I took it out of the pan. I was able to do that right out of the pan, as it was not that hot. I did a little less than 1/3 cup salt. Next time I will try 1/4 a cup to see what that does. I made blue, grey purple, red, yellow, and green from one batch! So easy and awesomely fun to do!
Thank you for putting this recipe up online! Thank you for sharing your faith, too!
Love in God,
Nicole
Erin says
I just made four batches of this recipe and they turned out great! The first batch cooked way faster than I was expecting. I’m assuming that you used an electric stovetop, vs. my gas range, so that’s probably what made the difference. So for the remaining three batches, I added the food coloring to the water, and then mixed everything together before even turning on the fire. I think I still overcooked it, because it is a bit drier than I was expecting, but I think kneading a little bit of water into it will probably soften it up nicely.
Britney says
Have tried sooo many recipes and this is by far my favorite! I subbed alum for the cream of tartar and used coconut oil and it came out perfectly! Love the coconut oil instead because it smells nice and it makes hands feel very nice, not sticky or greasy 🙂 Thanks for sharing, this is my go to play dough recipe from
Now on!
Polina says
Thanks so much for the recipe! I made this using coconut oil and India Tree natural / nontoxic food coloring. I have to admit that the colors came out a bit silly due to the food-based dye (yellow, red, and blue = yellow, bright pink, and pink!) but my 2.5 year old loved it anyway, and I don’t worry if he accidentally eats some :).
Meredith says
Needed a recipe for my son’s preschool and this looks so easy! Your blog is beautiful, BTW. Thanks for the help with the playdough!
Tim Goyer says
Stuti,
You should be able to find it readily enough at places like INA Market and Modern Bazaar. Otherwise, cream of tartar is produced from wine making. If you have trouble finding it where you are, you may be able to find a supplier by inquiring from a local vineyard. It’s also known as Potassium Bitartrate, if that helps your search.
Jennie says
Thank you for sharing not only a great recipe but fantastic pictures!! It turned out well and I want to explore the food coloring you mentioned as your doughs were really bright!
Thanks again!
Jennie
Ellee says
I made this for my son. Very easy! I can’t wait to see what he says when I give it to him. He’s two and is just starting to get interested in play dough.
I remember when my mom made homemade play dough for me and my sisters. I’m glad to pass this along to him.
Thanks!
Nicole says
I love this recipe. But I use less salt. I use a quarter cup and it works just fine. I also stopped using the dyes, as these are toxic. I use natural foods to make colored water to use in the play dough. I used 1/4 cup of blueberries, heated them in a little water (1.5 cups or so) until they popped. The water was as dark as I wanted. So I strained it and used it in the recipe.
I made an awesome white person flesh color by using yellow onion skins. I cooked them in some water, strained and used it in the play dough.
I just noticed the color of the water while cooking my dried black beans. So I took a cup of it out and am going to make a batch of that color later on.
You could use a myriad of foods to make different colors. Like strawberries, or cranberries. Or even juices, like orange, grape, etc. It does not effect the play dough. It does not mold or go bad. At least ours haven’t.
Michele Ladd says
Erika,
Thanks for your step by step recipe. It was just what we needed. We had to make up a few batches for Science and they turned out great! Keep up the good work.
Blessings to you,
Michele
Olivia says
fantastic recipe! I substituted 1 teaspoon baking powder for the 2 teaspoons of cream of tarter and it still turned out fabulous like your picture 😉 totally felt like supermom making my first batch of homemade play dough for my little one!
christina says
I just wanted to say thank you! For putting the playdough recipe & super easy to follow directions on your site! Ill be making this with my 7yr old in a few mins! Can’t wait & thanks so much again! Can’t wait to findd other fun stuff to do with him soon!
anne says
great playdough! tried with 1/4 c salt and it worked great i just worked in a little extra flour when kneeding.
thanks for sharing
Agnes Smith says
I used to make this for my daughters many years ago and had lost the recipe. I have been looking for it for a while now and I think this one is it! Thanks so much for posting it. I have four grandchildren now and would love to have it on hand for them.
Agnes
Hanneke says
I tried this recipe without the cream of tartar (cause it’s hard to find in Holland) and it turned out just fine. I love these things where you can easily trie to do something new in only a few minutes. I used food coloring from Dr. Oetker, the most common baking brand in the stores, but I had to use the whole bottle to get the dough pink (not even red). So I think next time I’ll use a better product instead. That being said, the recipe is perfect! Can’t wait to make some more for my friends’ kids!
Momma Jorje says
This is so fun to make! I made pink & light blue batches for my kids, trying to make red and blue. Now I’ve made green, blue, red, and yellow! 16oz peanut butter jars are the perfect size t hold an entire batch! I made the blue and yellow tonight, so I can’t wait for my daughter to see them in the morning!
Sara says
Great recipe! My daughter loves it. For storage, I saved the plastic containers from her baby food and keep it in those.
MzHolliWudKitti says
Hello Erika! I know im about a year late but i just wanted to ask…kan we just add the koolaid packets instead of the food coloring to THIS recipe???? i love how yours LOOK like PlayDoh! My daughter is excited to make it! We are gonna try YOUR recipe first then the KoolAid later. WE have made the basic one (NON cooked) lots of times but this looks like it will be much better! thanks so much for the info! AND TO ALL WHO COMMENTED!! I LEARNED A FEW THINGS TODAY!
TOODLES FROM CALI!
Emily H says
We made this dough yesterday, and a ton of it. It is very pretty and vivid with the gel colors. One thing that irked me is that it is pretty drying and does leave that crusty film on our hands. In the beginning, I took some of my batches off as soon as they began to cling into a ball and they didn’t have as much of a problem with the film on the hands and were much more malleable . The rest of the batches I kept on the heat until they were a pretty firm ball and I guess they dried out a bit too much because they leave a bad film. Not sure if anyone else had this problem but I guess these need to stay pretty moist and I may be tempted to try adding a little more water or oil to them to see if that fixes the film problem.
Cynthia says
I just made this today and it came out great! I fudged on the colors a bit, but that’s fine. Tip: def use a non-stick pot 🙂 Thanks for the recipe
Kathy says
For those who don’t like the cost of crèam of tarter… I’ve had the same small container for 3 yrs. I use it one time a year to make Christmas sugar cookies.
I used to make this playdoh when my daughter was little. It stayed soft a lot longer than the store bought kind.
Invest in the cream of tarter. It’s worth it.
Kate says
This is really the best play dough recipe I’ve ever tried. It’s the perfect texture and truly lasts ages. I’ve made it for my preschool students several times and it’s their favorite toy in the classroom! Thank you!
Erika says
Aww thanks, Kate! So glad they love it!
Karen says
Great Playdoh recipe! I see you suggested essential oils if someone wanted to scent the dough. I would suggest that anyone wanting to scent with essential oils some research first. Robert Tisserand is a good place for info. Some essential oils are not safe for children and the ones that are safe much be used in proper dilution rate.
Erika says
Yes, you are right. Robert Tisserand has great advice – I am reading his giant Essential Oil Safety textbook now!
Lacey Raber says
Can you make the play-dough, let it cool and THEN add the food coloring? I imagine it would be a bit more kneading but I would love to make a batch and divvy it into several colors. Thank you for your help!
Erika says
Yes, you can add the food coloring later, but I’d suggest getting some single-use gloves so you can knead in the color well. If you do it without gloves, your hands are likely to get stained. (Great question!) Have fun!
Winnie Tan says
hi, thanks for the recipe, I’ve tried it and the dough is a lot nicer than store bought, it doesn’t dry out as fast too. My only problem is that I can feel some of the salt in the dough when it’s all done. Do you have any advice on that? I use fine salt. TQ!
Sariah Beus says
What if it’s sticky? Any advise there? I don’t know what I did wrong. Help please!
Erika says
If it’s sticky, you need to cook it longer.
Michele//VAMICreations.com says
Thank you for this recipe! This is my go to for whenever we travel around the world! We take our own cream of tartar (I have no idea how to say it or even attempt to find it in other countries) and find the other ingredients when we get settled in. 🙂 Our son (and us) love this and your recipe has truly traveled the world with us! THANK YOU!!!
Twen says
This recipe worked great! Thank you
Sarah Taube says
Tried to 1/2 the recipe so I could make more colors but playdoh all stuck in the pot so I’d have to wash the pot in between batches. Was not easy to wash and not easy with my 2.5 yo trying to help. I like the idea of mixing the color in with the water but I will forever more be just making one color or micing the color in after the fact. Maybe you use a non-stick pot? I don’t own those….
Erika says
Hmm I have used both nonstick and regular pans. Nonstick is the easiest, but I’ve made this in a stainless steel pot too. Maybe the temperature is too high? I would try reducing the temperature. Hopefully that helps. Sorry it didn’t work out for you! I can understand how frustrating it must be trying to make this with a toddler and having it stick!
Keri says
Perfect recipe, thank you so much for sharing! My 13 year old special needs son is actually enjoying finally being able to play with Play-Doh. The store-bought play dough is always too hard and he gets frustrated.
Brittany says
I LOVE this recipe, have made it a few times now and its the best ever!
Erika says
Yay! I love hearing this!
Gini says
We made this today and it turned out great! My son wants to make shapes and let them harden like clay. Have you tried this? Any tips?
Erika says
Hi Gini, I’m glad your son loved this playdough! You would want a salt dough recipe for letting it harden – you can try this one here and make whatever shapes or theme he wants – https://livingwellmom.com/glitter-salt-dough-snowflakes/
Kandepohe Marraige Bureau says
thanks a lot for sharing. this was much needed. very easy recipe.
Erika says
You’re welcome, I’m glad it worked well for you. 🙂
Charity says
I first found this recipe at least 7 years ago and made it as a gift for my niece – so easy and budget friendly. Then I’ve made it off and on over the years but haven’t made it in at least a year maybe two and I forgot how EASY it was. Literally all ingredients you would have in the cabinet (well maybe not cream of tartar but I did this time 😂) Just whipped up a double batch for my 2 & 4 year old and now they are playing quietly so I can get stuff done. So THANK YOU!
Erika says
I love hearing this! Thanks, Charity. 🙂
Nina says
Awesome recipe! Just made it and it was so easy and turned out great. Tried another recipe from somewhere else first and had to toss that one. Thank you!
Erika says
I’m so glad you loved it! Thanks for the kind words, Nina. 🙂
Mary says
Initially it turned out great!! But I have made two separate batches following the exact instructions and both stink to high heaven after a day in a zip bag both at room temp and in the refrigerator. I really want to make this work! It seems like no one else in the comments has had this problem. Does anyone have suggestions???
Erika says
Hi Mary, this is the first time I’ve heard of this. You might try letting it sit out longer before putting in a bag. That’s the only suggestion I can think of. Good luck!
Katie says
Do you add the food coloring in before its on the stove; or after?
Danielle says
This is so cool! Have you tried coloring the play dough with a fruit pigment before instead of food coloring? I’m wondering if beet juice or turmeric could dye the dough in a substantial way without it just rubbing off onto everything… curious what you think!
Erika says
I have not tried it, but that’s a great idea. This playdough recipe is easy enough to make that you could experiment without wasting a ton of supplies or time.
Annisakih says
This is exactly what I need for my son. You are very kind to add every little detail information.
I’ll subscribe to get more ideas!
Erika says
Thanks for the kind words! I’m so glad you and your son enjoyed this playdough. 🙂
Narko Blog says
homemade but in terms of appearance as with those sold in food stores,
I really like this creativity, very inspiring
CJ says
What’s the longest time that playdough has lasted for?
Cara says
Hello, can sea salt be used instead?
Erika says
I would stick with regular salt. Sea salt is much larger grained and won’t mix as well, which would probably leave you with a rough, grainy playdough.
Cle says
Made it tonight and it’s great! Excited to have the kids play with it. Wondering…do you feel like this is “low mess”, enough that you’d let kids have it on a road trip?? 😅 With a tray, feel like it would be a hit.
Erika says
I’m so glad you and the kids loved the playdough! I don’t think I’d be a fan of playdough in the car personally, but if your kids are old enough to keep it on a tray, it would be a great activity.
Michelle says
Hi, why does my playdough feels oily? How to make it hot oily? Is it because I keep it while it’s warm?
Erika says
Thank you, Tessa!
Maria says
Worked perfectly from the first try!
I’m the person which never gets the recipe rights from the the first attempt! And yet, here it is, perfect play dough with slight lavender aroma which I added for extra sensitive experience 🙂 It’s a bit softer than the original play doh but works just as well. I’m sure it’s going to be a huge budget saver for us 🙂 Thank for the recipe!
Erika says
I’m so glad to hear it, Maria!
Daniella says
I made this today for my toddler, but forgot salt 🤦♀️🤦♀️🤦♀️ I almost threw it away, but when it cooled off, I was able to throw in a little bit of flour and the salt, and it turned out fine. My toddler is loving it as I type. Probably not as great as the original recipe, but I’m glad I didn’t just throw it away.
Erika says
Oh boy! I’m glad you could still save it. Just be aware that it will probably go bad quickly. (The salt preserves it.)
Deshi says
great Recipie, consistency is very close to real playdough. It even works in the microwave, I found it seems to work best if you heat it initially just until the top layer starts to darken, then take it out and stir it up, and repeat in 10 second increments after the initial heat until you get the same consistency you described in the pot. Came out just as well, but easier than heating up a stove and seems to hold itself together (not leaving much in the bowl) after cooking in the microwave dish so that theres no cleanup to speak of compared to the pot in my experience.
Emma says
Worked great. I now have biceps of steel from all the stirring 🥵😂😂😂 & a happy daughter 👍
Jacqueline says
Worked perfectly! Thank you!
Beth says
I just made this and it came together quickly and is great. Now I just need my LO to get up so we can play with it 🙂 I didn’t have any cream of tartar so I removed 4 tsp of water and replaced it with 4 tsp of vinegar instead of the cream of tartar.
Angelina says
So easy! The kids enjoyed helping me make it also. Love that it doesn’t have the odor that Play-Doh has. Mega win for us! And this stuff seems way more hardy than the other stuff too! LOVE!
J Smith says
Hi! I have used this recipe for my classroom for many years, and I love it. BUT I recently found an improved less messy way to make the same playdough…. instead of cooking it on the stove to activate the cream of tarter and thicken the dough… I now add (food colored) BOILING water to the mixed flour, salt, oil, and cream of tarter ingredients! This allows you to make it in a bowl and not use the stove, so one doesn’t have to clean the pan you cooked the playdough in–it was a bit of a chore, especially if one overcooked the dough!
My class loves kneading warm playdough!
Erika says
Great tip – thanks!
Gianna says
We made this today and it’s the best diy play doh ever!! It turned out perfectly, smooth and soft, but not sticky. Thanks!
Erika says
I’m so glad you enjoyed it!
Amber says
The BEST! I have made this a couple of times now and both have come out fantastic. Just a little tip if you prefer more natural dyes but still want a great colour. I boiled some leftover red cabbage in water for an hour or so and I strained it, then used it in this recipe and it gave me a bright magenta pink 🙂
Natasha says
Had alot of fun making this recipe. It’s like real play doh, definitely recommend making this guys!
Nonna Sandra :) says
My DIL asked for Play Doh for my 18m grandson for Christmas, so Nonna went searching for a recipe – yours looked easy and I had all the ingredients – within minutes I had my first batch completed. SO easy! It’s cooling on the counter right now, and I’ll admit that I played with it while I was “kneading” it – kids don’t get to have ALL of the fun! 😉 I need to get some more cream of tartar so I can cover the rest of the rainbow – what a fantastic Christmas gift this will be! I’m going to hit the $ store for some Christmas cookie cutters to go with it. Many thanks for such an easy recipe – it’s explained thoroughly and the big clear pictures are very helpful 🙂
Daisy says
I made this but didn’t have food coloring, so I used the zest of a mandarin orange and got a light yellowish color. Last year I used blueberries and got a pretty purple color. They held good in an airtight container.
Esther says
This is a perfect alternative to buying play dough in the stores. Extremely cheap and waaayy more play dough than the little containers. And I love that the ingredients are so easy. I had everything on hand. The cream of tarter I’ve had sitting in my cupboard for ages with not a whole lot of uses for it.
I made some play dough rules with my 4 and 2 year olds and rehearsed them while making the play dough together.
1. Always ask mom first
2. Don’t mix the colours
3. Play dough stays on the table.
4. Always put it back in the bag when you’re done!
They had a grand time helping me by dumping the ingredients in. I still did the stirring since they’re a little small to help with the heat. I let them pick their colours and they each got to dump in the ingredients in for their own batch of play dough. Helps to keep out fighting over who gets what colour 😄
I also added some lemon essential oil and my 4 year d declared that it smells like candy!
Ari says
Thanks for the recipe! My first recipe I had to dump and found this one. That one had too much salt I think (1/2 cup) and the whole thing was just goo. This consistency is perfects
Although I will say, for those of us with extremely hot gas stoves, even the lowest setting was not low enough. I could tell my dough was going to explode if I left it on any longer.
So I removed from heat the moment the water was brought to a boil and stirred in the ingredients while the saucepan was still hot. I kept a kettle of boiling water on the side and added accordingly, but I didn’t dare leave it on the fire!
meia says
I just wanted to say thank you so much for this recipe.
It saved me from shelling out bunch of $ for barely any of the brand name dough.
I followed one of the commenter’s tip on dusting the dough if it’s too tacky.
It came out perfect.
MissyG says
Best Playdough recipe Ever! 🙂
Easy, fast and so pliable and smooth. AND, in case there are other BakeWell Cream fans out there like me, please know you can use the Bakewell instead of citric acid (if you can’t find yours like me *eye roll*). I figured they both act the same chemistry wise, so I took a chance. It came out perfect.
As for some people making the statement that there’s came out sticky, that probably means that there’s a bit more water than what your batch wants. Another commenter already said this, but just like making a crust or other dough, simply adding a little bit of flour after removing the playdough from the saucepan, and kneading it in will fix it right up. I added just a touch to mine too and everything came out perfectly. I highly recommend this recipe. I know I have no reason to use any other one. It’s a keeper.
Belinda says
Great recipe! This dough is awesome! It dried out just a bit while cooling so I put a small amount of oil in my hands and worked it in.
Erica says
This turned out like Gack. Goopy and slimmy. My kids still played with it, but not at all like play dough. I did use olive oil, but I didn’t think that would make that big of a difference.
Erika says
I’ve heard olive oil doesn’t work as well – that’s why I said canola or vegetable oil in the directions.
Vanessa says
This recipe was great. Easy to follow and we ended up with a smooth, stretchy play dough mass as promised. The only negative which might be unavoidable is quite a bit of playdough did get stuck on the pot as not all of it attaches to what you pull out. I wonder if a non stick pot would work better for this next time. Thank you for the recipe, I’ll definitely be making it again with different colours.
Jean Schuler says
b est playdough ever
cuden says
Many thanks for your recipe from Canada.
Michelle says
Hi, I really like the way this dough turns out but I am wondering about one small thing. I get a grittiness to my hands after kneading it for a few minutes. Is there something I can tweak to minimize this? I would rather my/my kids’ hands feel oily versus salty/gritty after playing. Thank you!
Misty says
Super soft dough. It’s excellent!